Master 80% of Notion with this ONE Feature
| Notion
In an age of constant distractions, having a structured system for your inbox means getting things done faster while making fewer mistakes.
In this post I share 6 Gmail filters that help you decide which important emails get surfaced and which ones should be deprioritized and it will continuously work for you after a one-time setup.
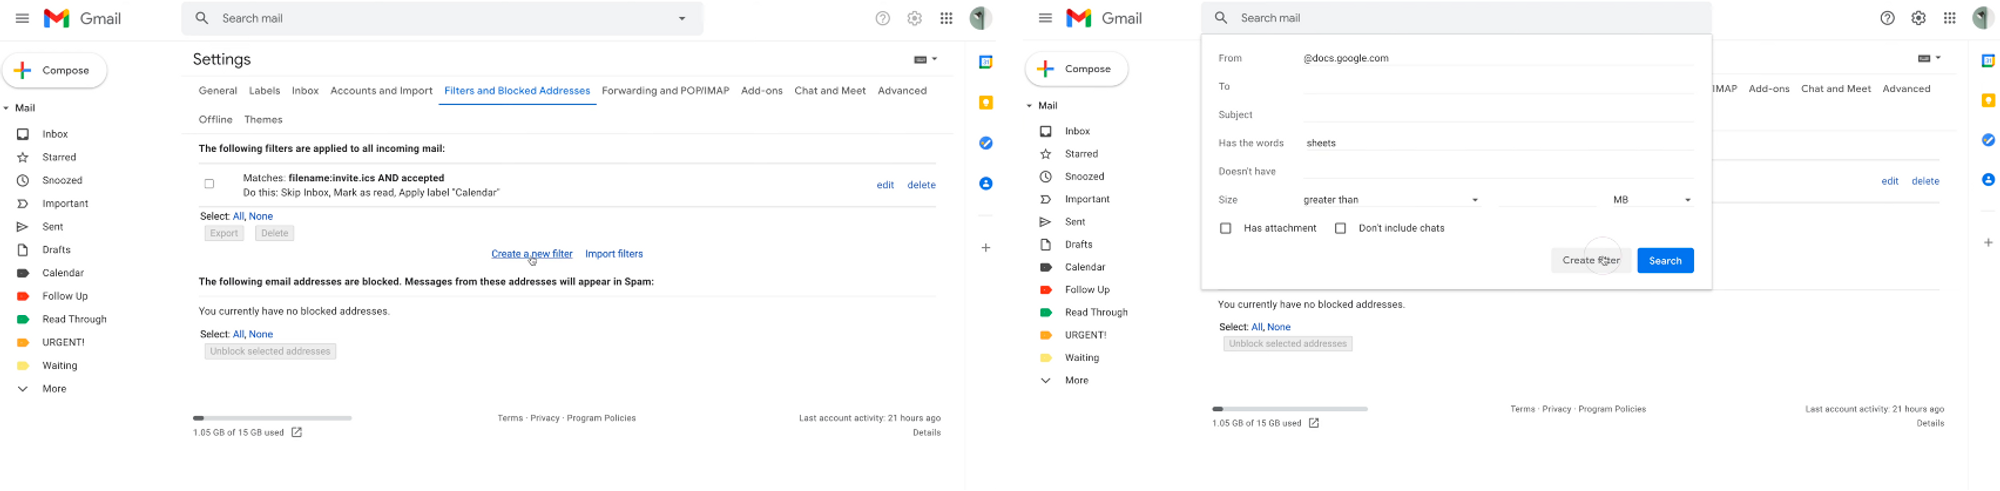
If you work with any of the Google workspace tools like Docs, Sheets, or Slides, you know that whenever someone comments on a file where you’re the owner, or comments at you within the file, you receive an email notification by default.
What I like to do is to apply separate labels to comments I receive from: Google Docs, Google Sheets and Google Slides.
So, let’s say I want to create a filter for comments from Google Sheets:
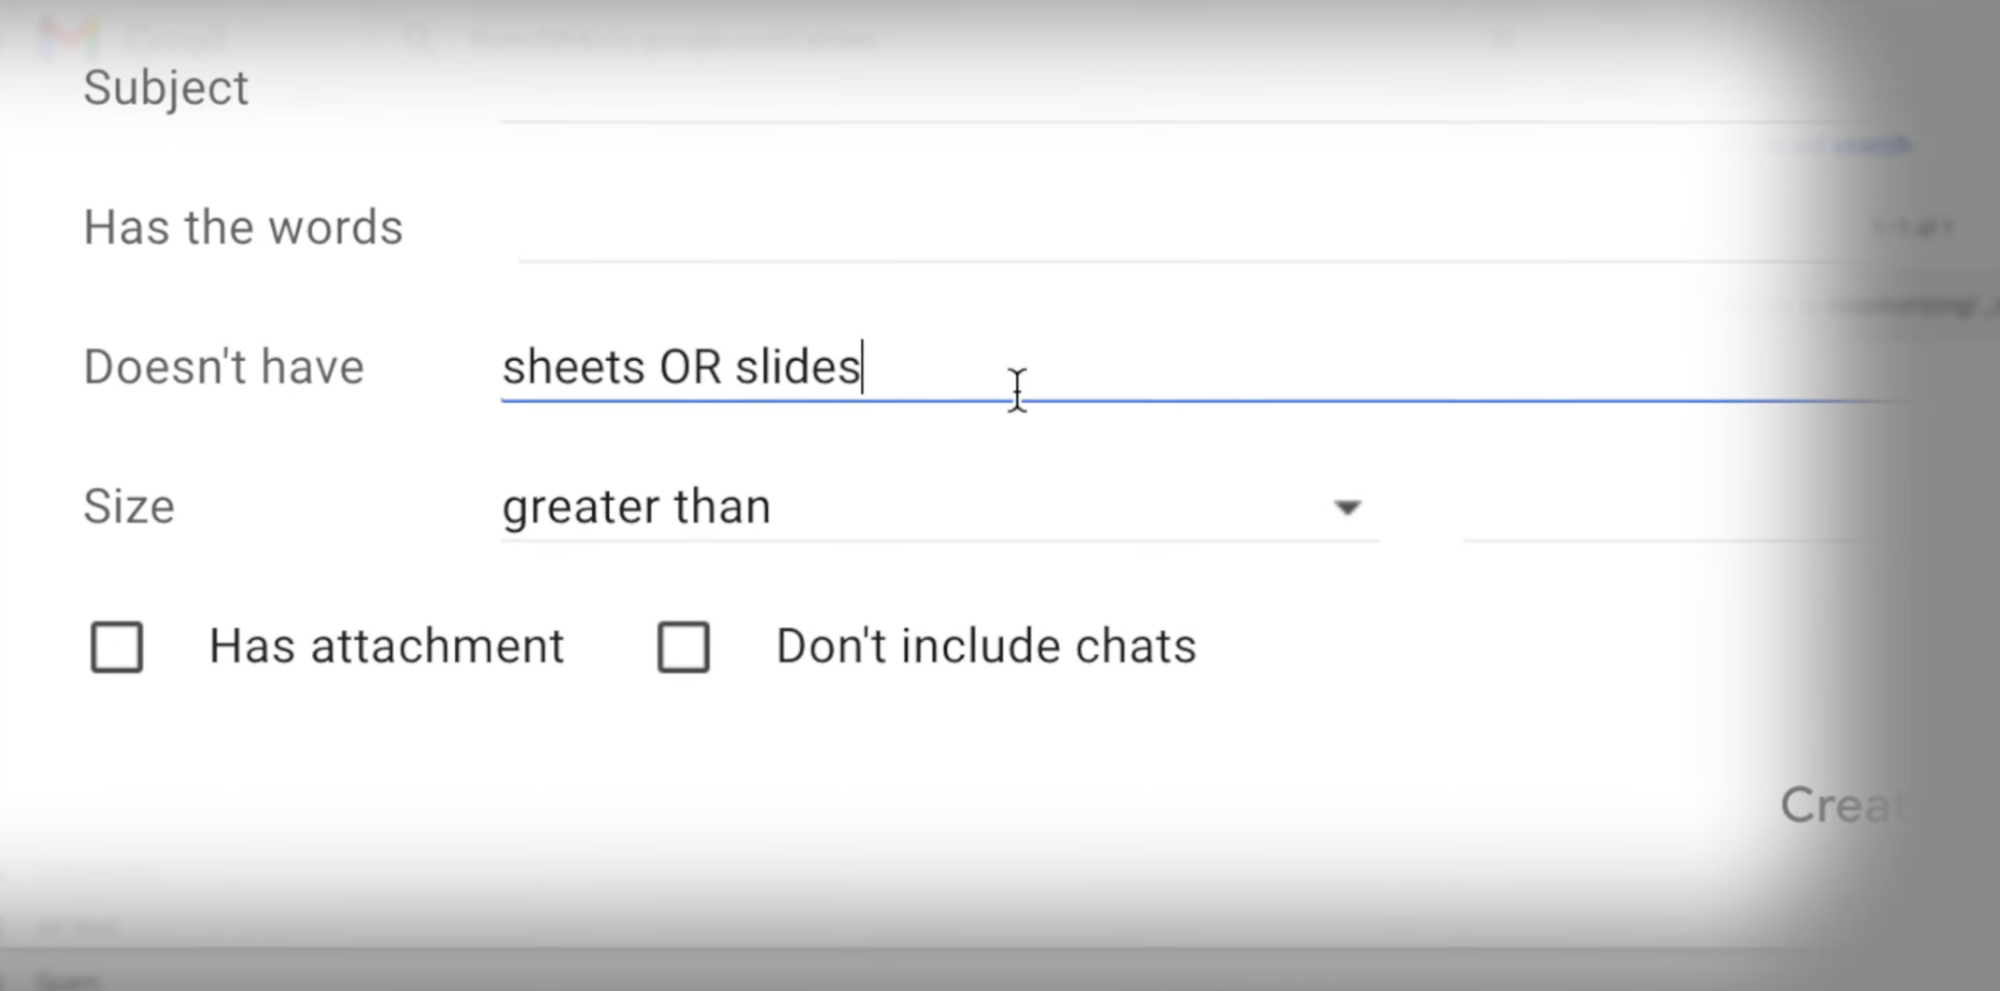
You can repeat this process for Google Slides, and just replace “Sheets” with slides in “has the words” field.
However, for Google Docs is a little different. If you want to filter out Google Docs only, you have to write doesn’t have “sheets OR slides” and then continue with creating the filter.
In Gmail settings you have the option to set up a vacation responder when you’re out of office. The “issue” with this is you can only have 1 message for everyone who emails you.
And while you might want to have a cute or humorous reply to your colleagues, you probably want to have a more professional and dignified response ready when external clients email you.
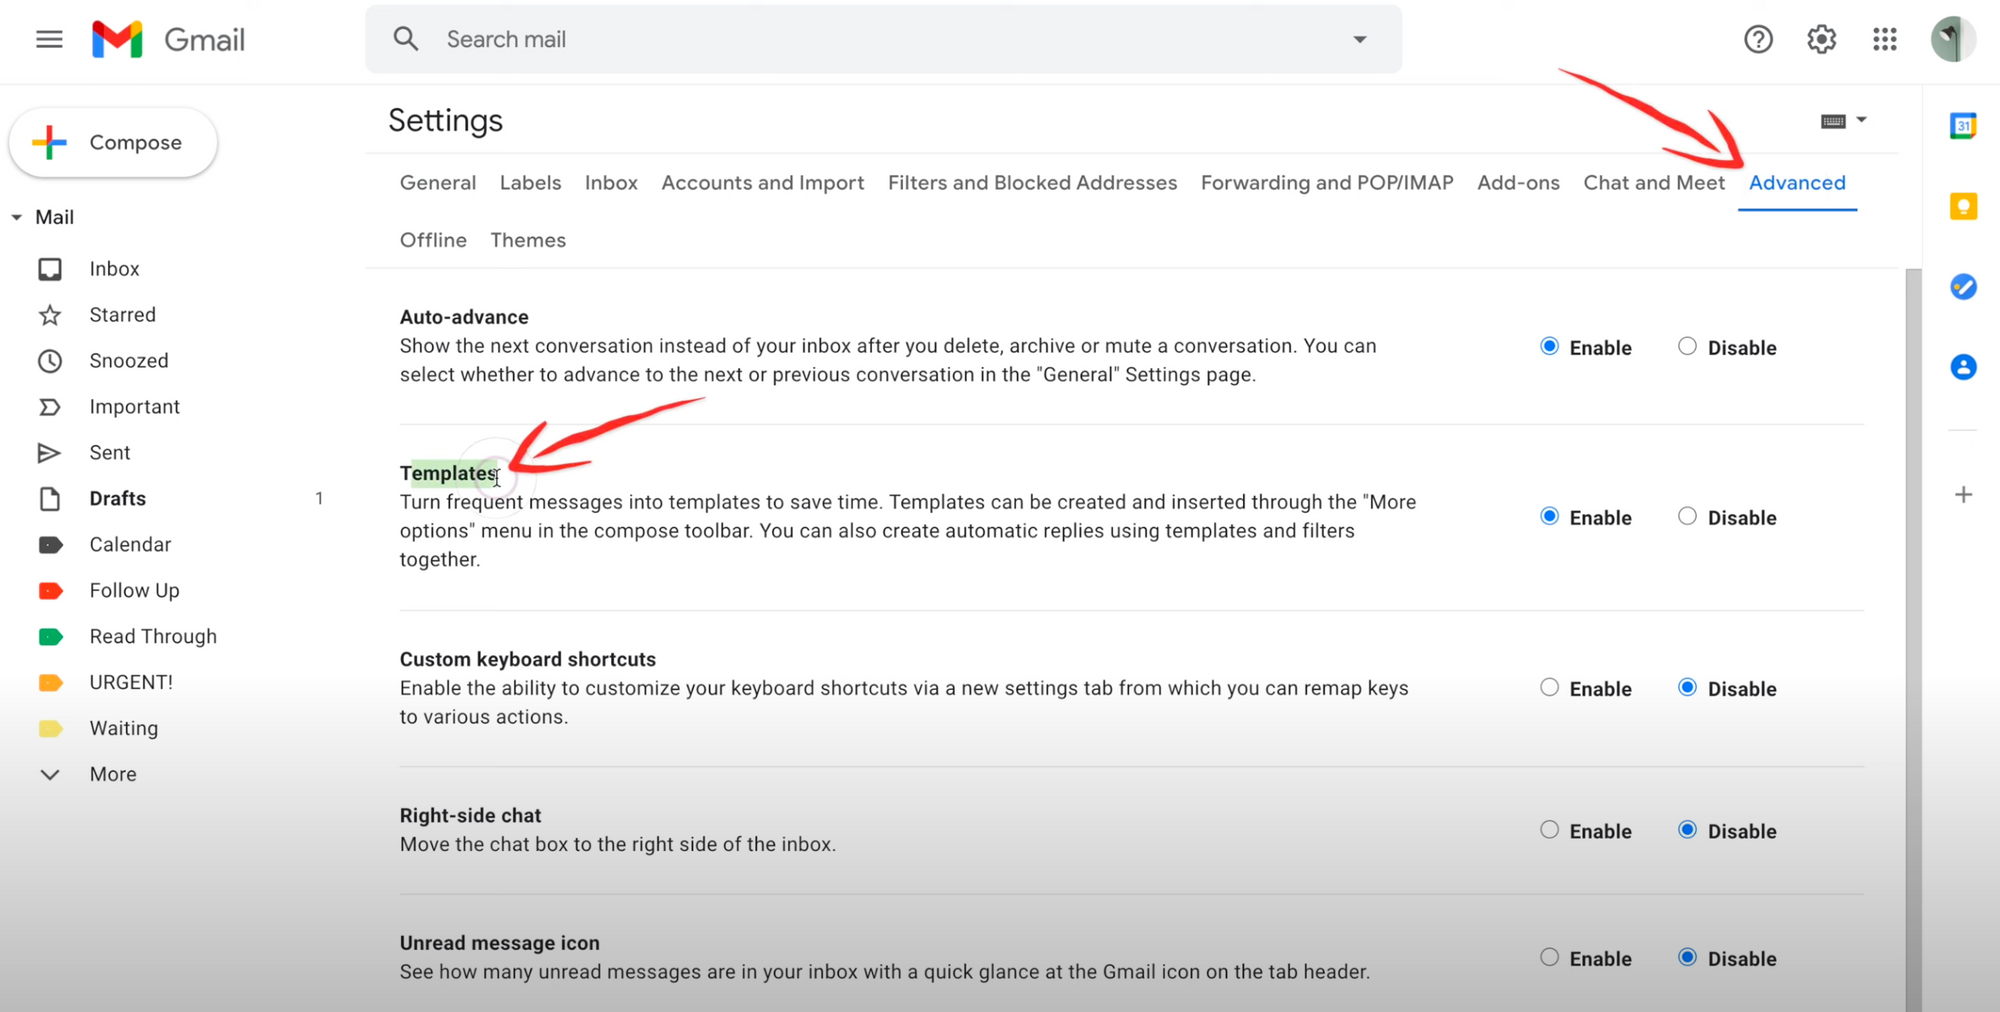
So, instead of turning on vacation responder, first go to your settings, advanced, and make sure templates is enabled, and click save changes.
Then, in a new compose window, create two templates:
Save both of these as templates by clicking the three dots, Templates, save draft as new template, save as new template.
Then, go back to your settings, Filters, Create New Filter, and in the from field, input “*@workdomain.com”, create filter, check “Send template” and choose the internal template. After this, create another filter only this time in the from field, input “-@yourworkdomain.com” and choose the external template.
Don’t forget to turn these off after you get back!

Or just have a template with the word “Yes” in it and have that as an auto-response for whenever your significant other emails you, you can thank me later 😉.
If you think about it, there’s no real benefit to receiving an email when other people accept your calendar invite, because there’s no additional action for you to take. The notification is just a distraction.
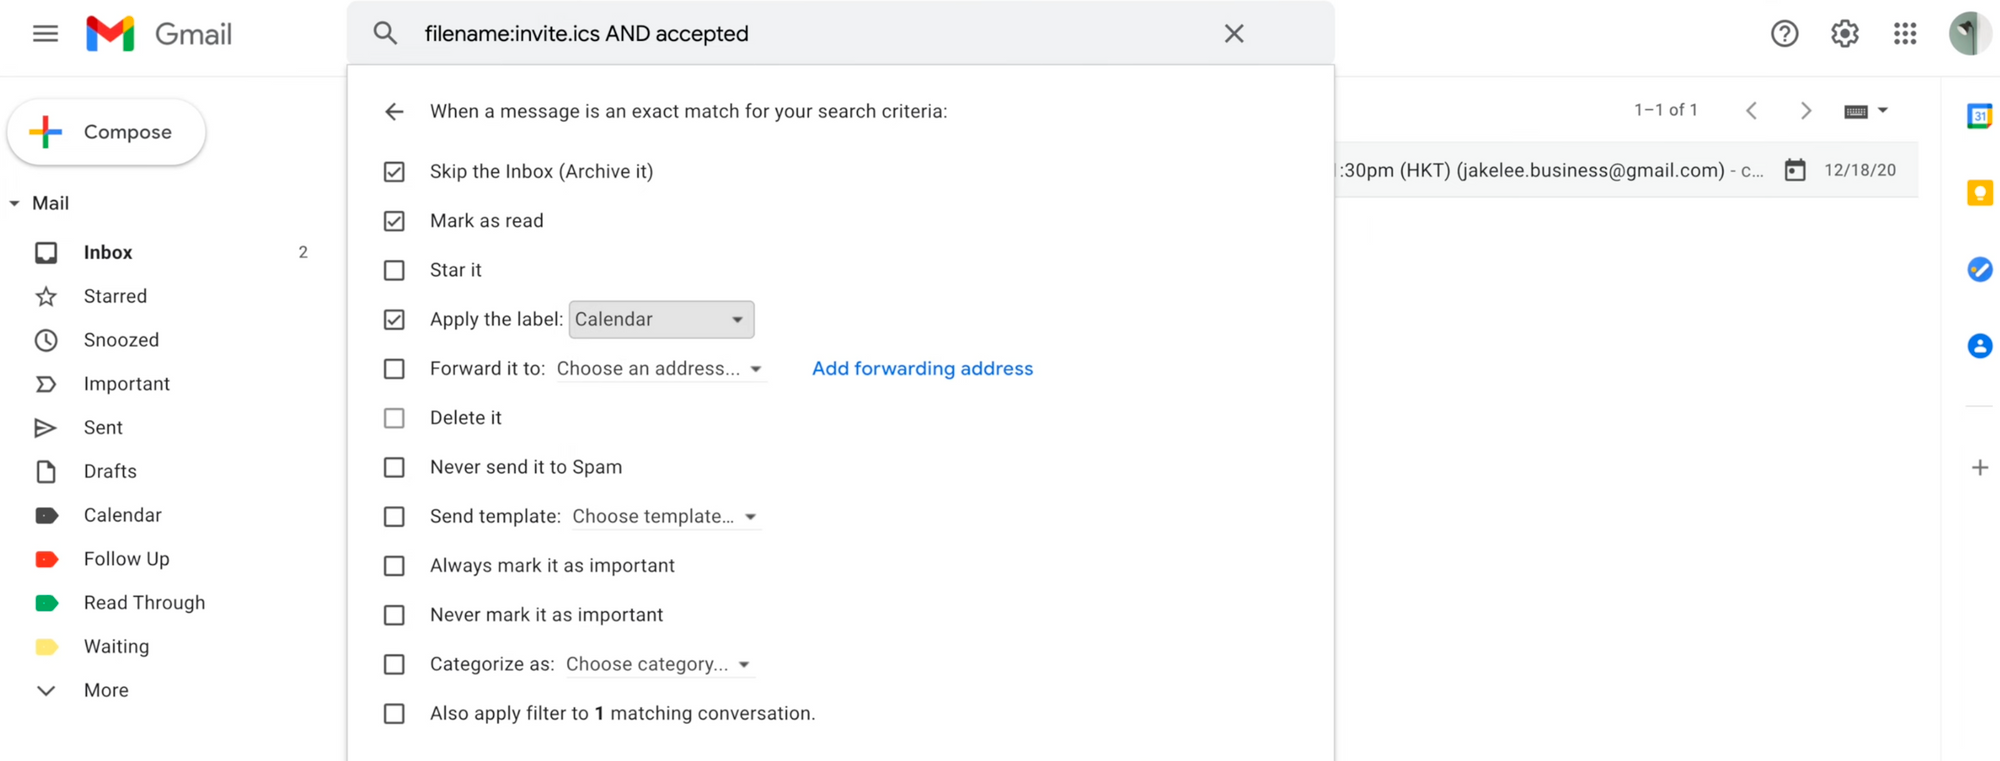
Now you’ll never receive an email after someone accepts your invitation but you’ll still be notified if someone rejects your invite. In that scenario you actually have to take action: you have to follow up and find a new time, so that notification is “useful”.
The plus sign is super cool because you can put your username, PLUS, whatever you want, and gmail will still recognize the email is directed towards you.
So I would highly recommend creating two filters and their corresponding labels: one is for newsletters, and the other for promotions.
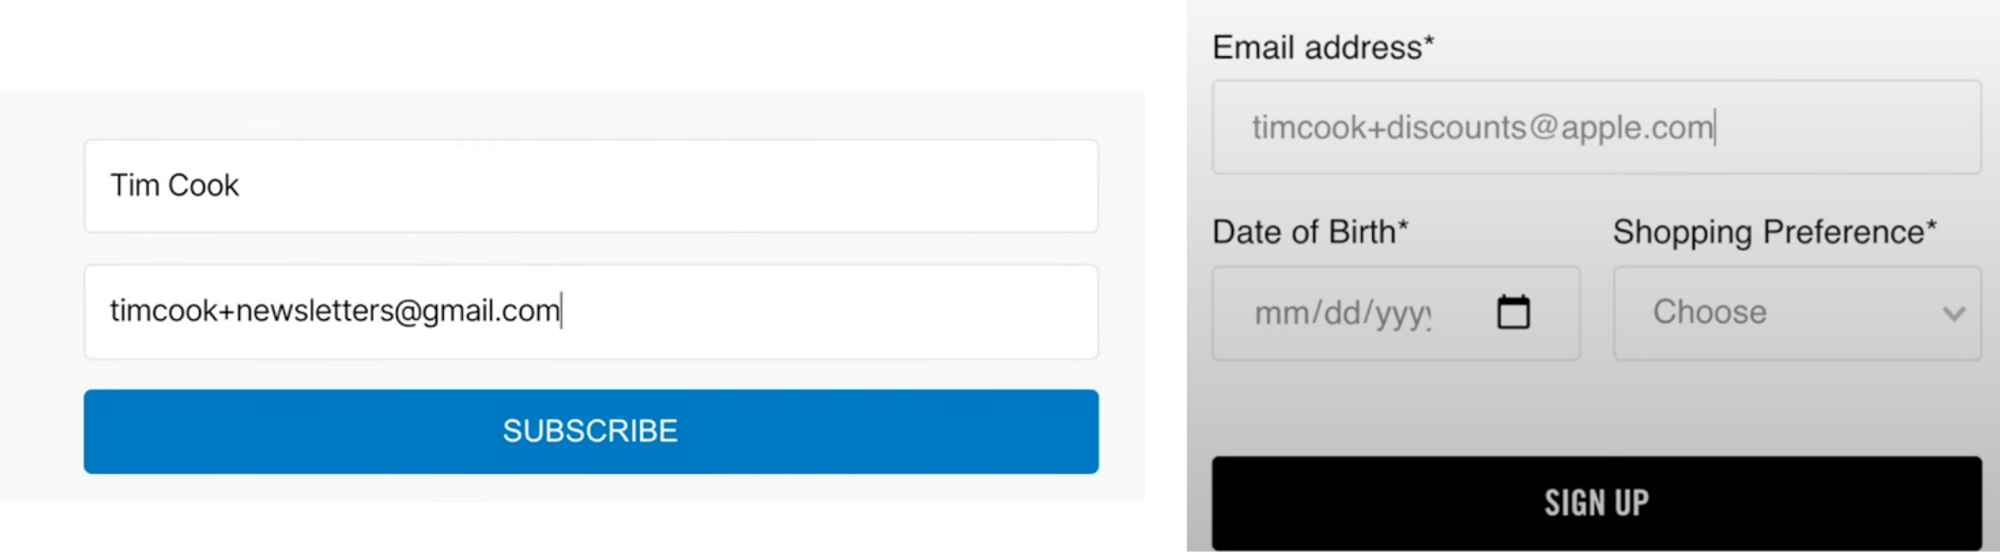
Simply create a new filter, in the “to” field, input “youremail+newsletters@gmail.com” and click “Create filter” and since newsletters should theoretically have higher quality content, we don’t have to check “Skip the inbox” since you might actually want it to hit your inbox and be notified so just apply the label “newsletter” and create filter.
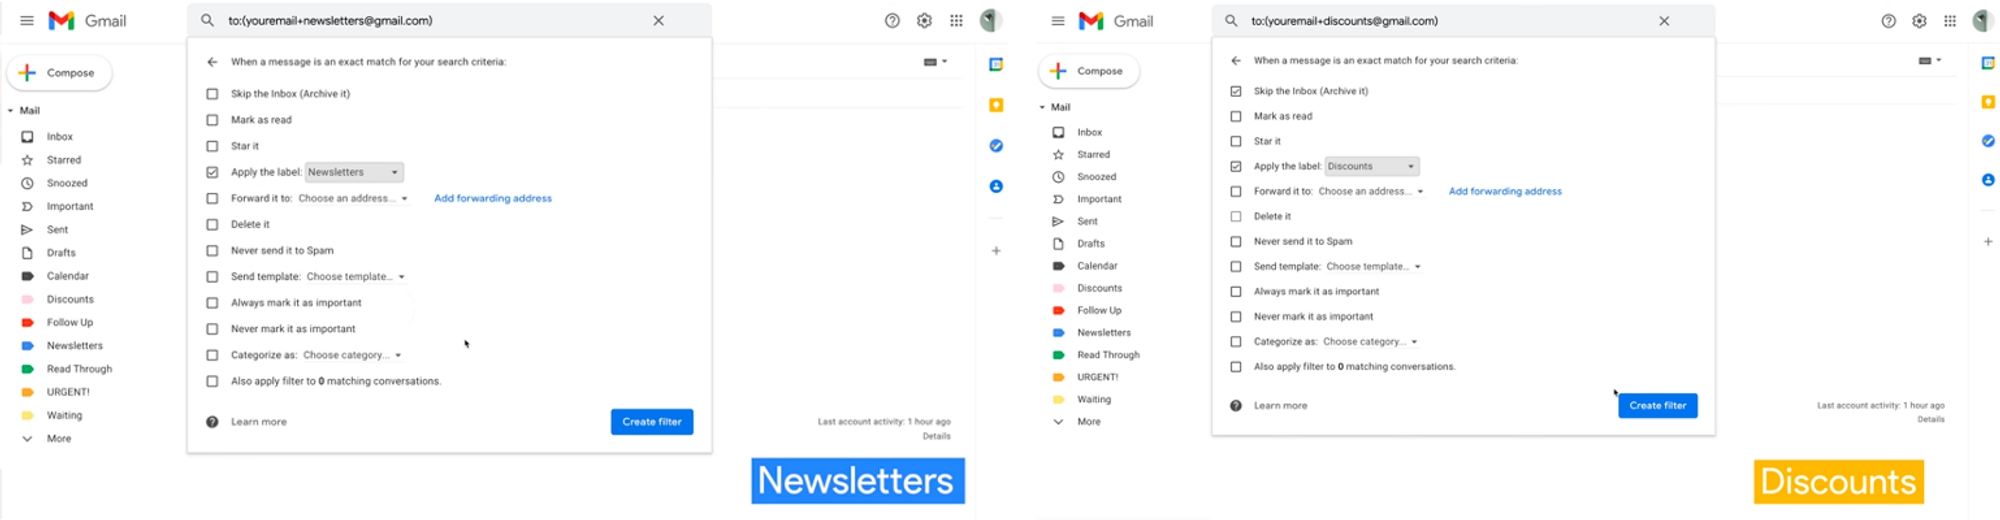
In the “to” field, input “youremail+discounts@gmail.com” and these should be de-prioritized in order to minimize the number of distractions so when you create the filter for this category, you want to check “Skip the inbox”, apply the label “discounts”, create filter, and change the discounts label to “show only if unread”.
By doing this, promotional emails will not hit your inbox by default, but you still have the choice to see there is 1 unread discount email and you can choose to view it if you want, adding just a slight layer of friction to stop you from being distracted or potentially spending a lot of money on useless gadgets.
So let’s say you currently have an “Urgent” label in red color tagged for all emails from your manager but you want something that looks simpler instead of the big ugly word “URGENT”.
You can create a new label, then go to the 3 dots, Label Color, add custom color. Make sure the background color matches the text color, and click apply.
Now you have a block of solid color that some people may enjoy more than having the word itself.
If after watching this video you create some amazing gmail filters and you want to humble brag, or just brag, to the rest of your colleagues and friends, you can easily do so by exporting your filters and sending that to them!
Then, send them the .xml file and have them import the filters in the same page.
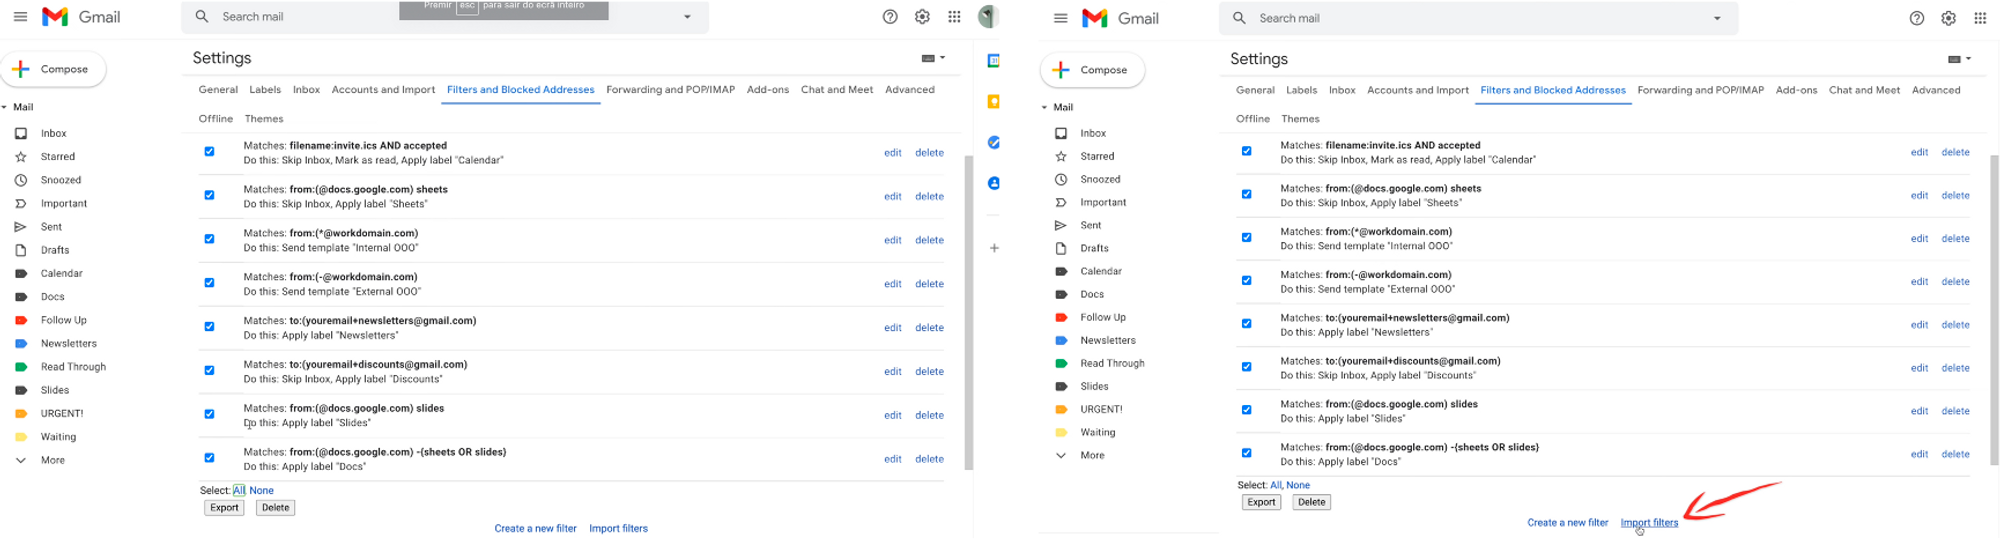
Now, because I’m such an angel, I have actually exported the relevant filters from today’s post and uploaded it to my website.
All you have to do is to import those files in your own gmail accounts and make some slight tweaks and adjustments!
Check this out if you want to achieve inbox zero in Outlook!