In this article we'll go through MacBook productivity tips like how to quickly move files between folders and presenting your iPhone screen during meetings. Let's go!
Watch it in action
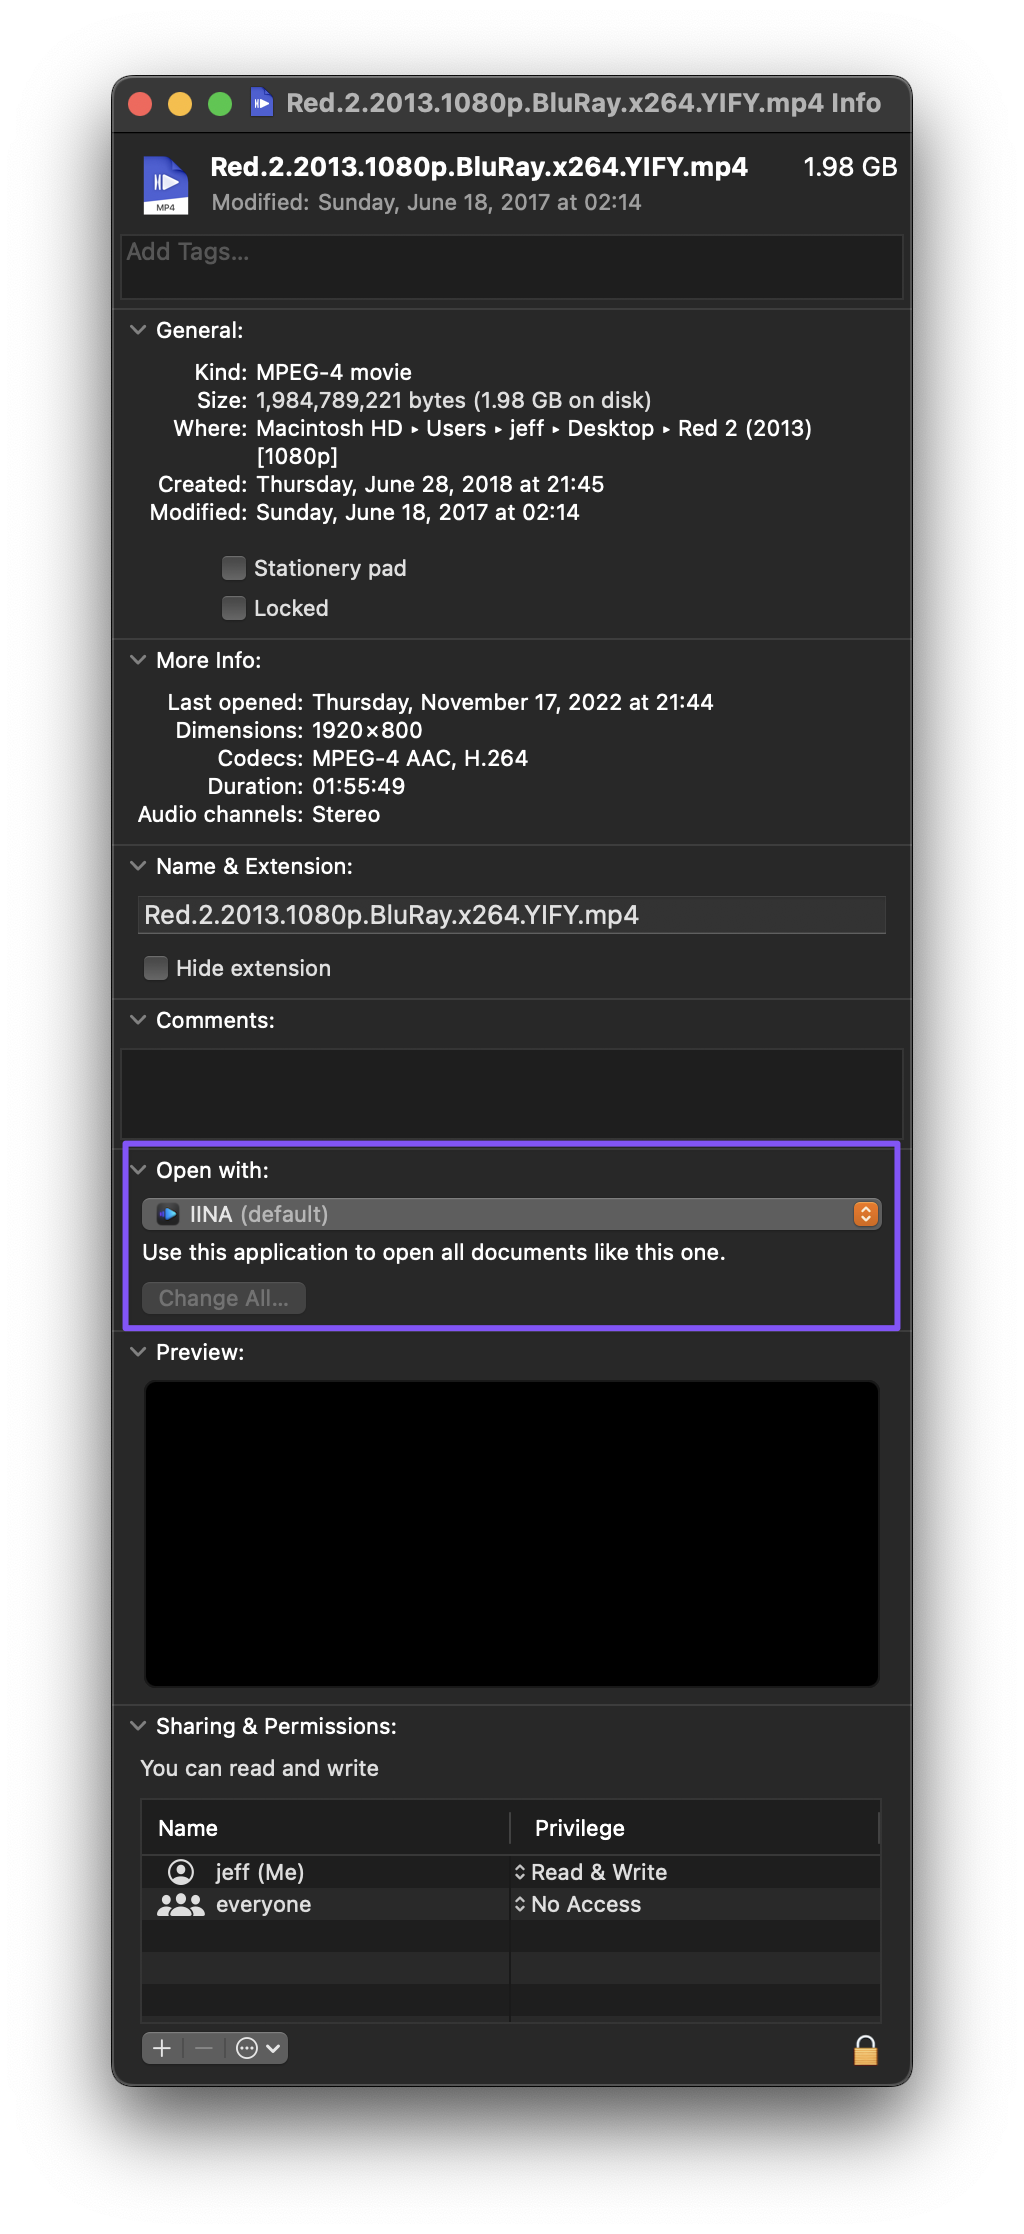
Tip #1 - Open with Default App
Select file > press CMD+I (or CTRL+I for Windows)
Under “Open with”, select the default app you want to use moving forward
Press “Change All”
Tip #2 - Show Path Bar & Status Bar
Within Finder, click “View” from the menu tab
Click “Show Path Bar” and “Show Status Bar”
This lets you see exactly where you are in the file management hierarchy and how much storage you have left!
Tip #3 - Change General Settings in Finder
Now that you have the path and status bar enabled…
Click Finder > Preferences
Under the General tab, uncheck “Open folders in tabs instead of new windows”
You no longer need this option checked because you can easily retrace your path to go to a previous folder.
Tip #4 - Change Tags & Sidebar Settings in Finder
For tags:
Click Finder > Preferences
Under Tags, you can uncheck the tags you don’t use
For sidebar:
Under the Sidebar tab, uncheck the ones you don’t use to keep your sidebar nice and clean!
Tip #5 - Change Advanced Settings in Finder
Under Finder > Preferences > Advanced
For “When performing a search”, select “Search the Current Folder”
This ensures you search only within the intended folder instead of the entire Mac, which will often give you irrelevant results!
Tip #6 - Move Files between Folders
When moving folders between Finder windows, drag your cursor to the right where the “Kind” column is to make sure you never drag and drop it to the wrong location!
Tip #7 - Enable Battery Percentage
Want to see how much battery you have left?
Go to System Preferences > Dock & Menu Bar
Scroll down to Battery on the left sidebar
Enable “Show Percentage”
Tip #8 - Change Dock Settings
To change the position of the dock:
Hold down SHIFT and drag the vertical line on your dock to the left or right side of your screen
To keep your dock menu nice and clean:
Right click the vertical line on your dock > click System Preferences
Uncheck “Show recent applications in dock”
Tip #9 - Option Key Tips
The option key gives you a lot of options…😉
To create an alias folder:
Hold down OPT+CMD (or OPT+CTRL for Windows) and drag a folder down to create an alias folder
Drag this alias folder onto your dock
I like to create an alias for my Downloads folder and drag it to my dock because the default Downloads folder on my dock opens up in a weird stack way that I don’t like!
To open a file with another app:
Hold down OPT and right click
You can now choose to “Always Open With” your chosen app of choice!
To make a copy of a file:
Hold down OPT and drag the file down or to another folder
To expand all your Finder folder views at once:
Hold down OPT and click the dropdown arrow for the folder
This lets you expand all the child folders and files immediately instead of having to expand folders one level at a time.
When hovering over any menu tab:
Hold down OPT to view hidden directories or new functions
To close all windows for a given application:
Hold down OPT and click the red X button to close
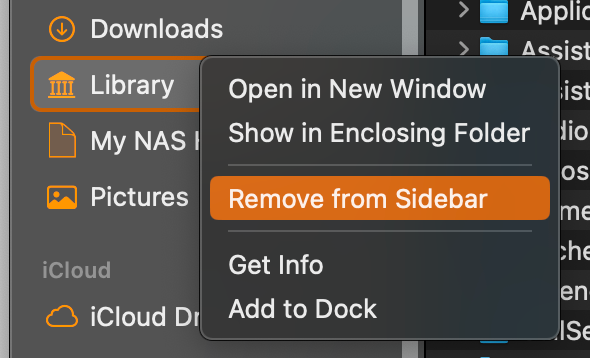
Tip #10 - Add Library Folder to Sidebar
To access the hidden library folder:
From the Finder menu tab, hover over “Go”
Hold down OPT > select “Library”
Go to File > Add to Sidebar
Now you can navigate to this folder easily from any Finder window!
💡
Pro Tip: Easily add and delete fonts by going to the Fonts folder within your Library!
Tip #11 - Present iPhone Screen on Mac
To do this…
Connect your iPhone to your Mac using a cable
Open QuickTime Player
Go to File > New Movie Recording
Next to the record button, click the dropdown arrow
Select your iPhone as the camera
Now you can make recordings of your iPhone directly on your Mac! This is especially useful if you need to present product demos during meetings!
Tip #12 - Settings for Default Screen Recorder
Don’t like the default settings every time you open up the screen recorder?
Press CMD+SHIFT+5 to bring up the default Mac screen recorder
Click Options to choose where you want to save the screen recording, the timer, your microphone source, or even show mouse clicks for a better viewer experience!
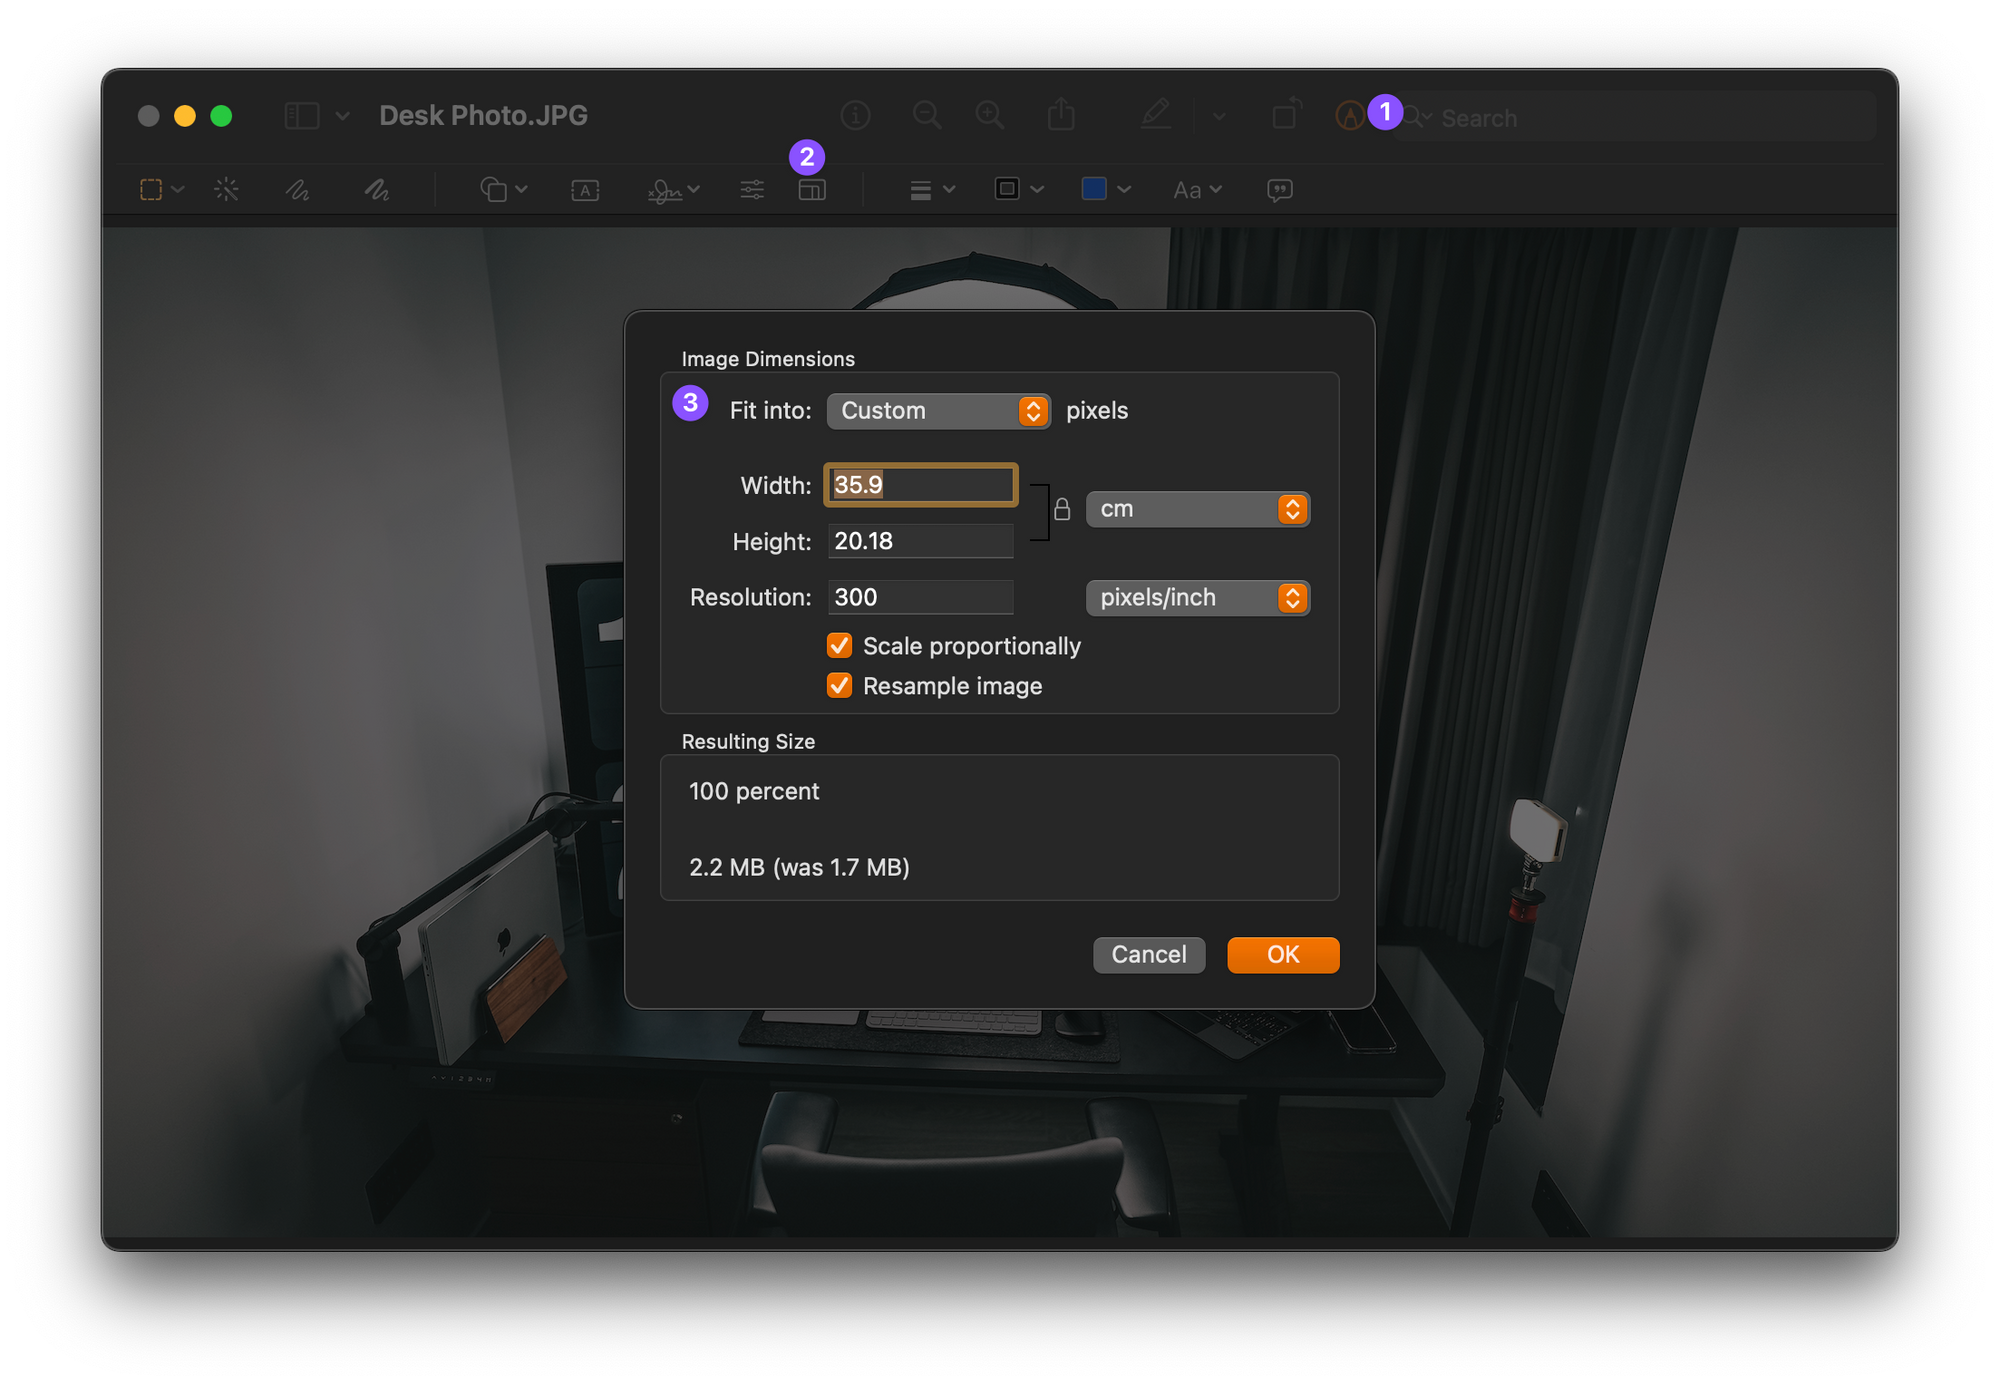
Tip #13 - Change Image Size
Open up an image in Preview
Click the markup icon > edit size icon
Now you can adjust the dimensions in case you need to stay below a certain size!
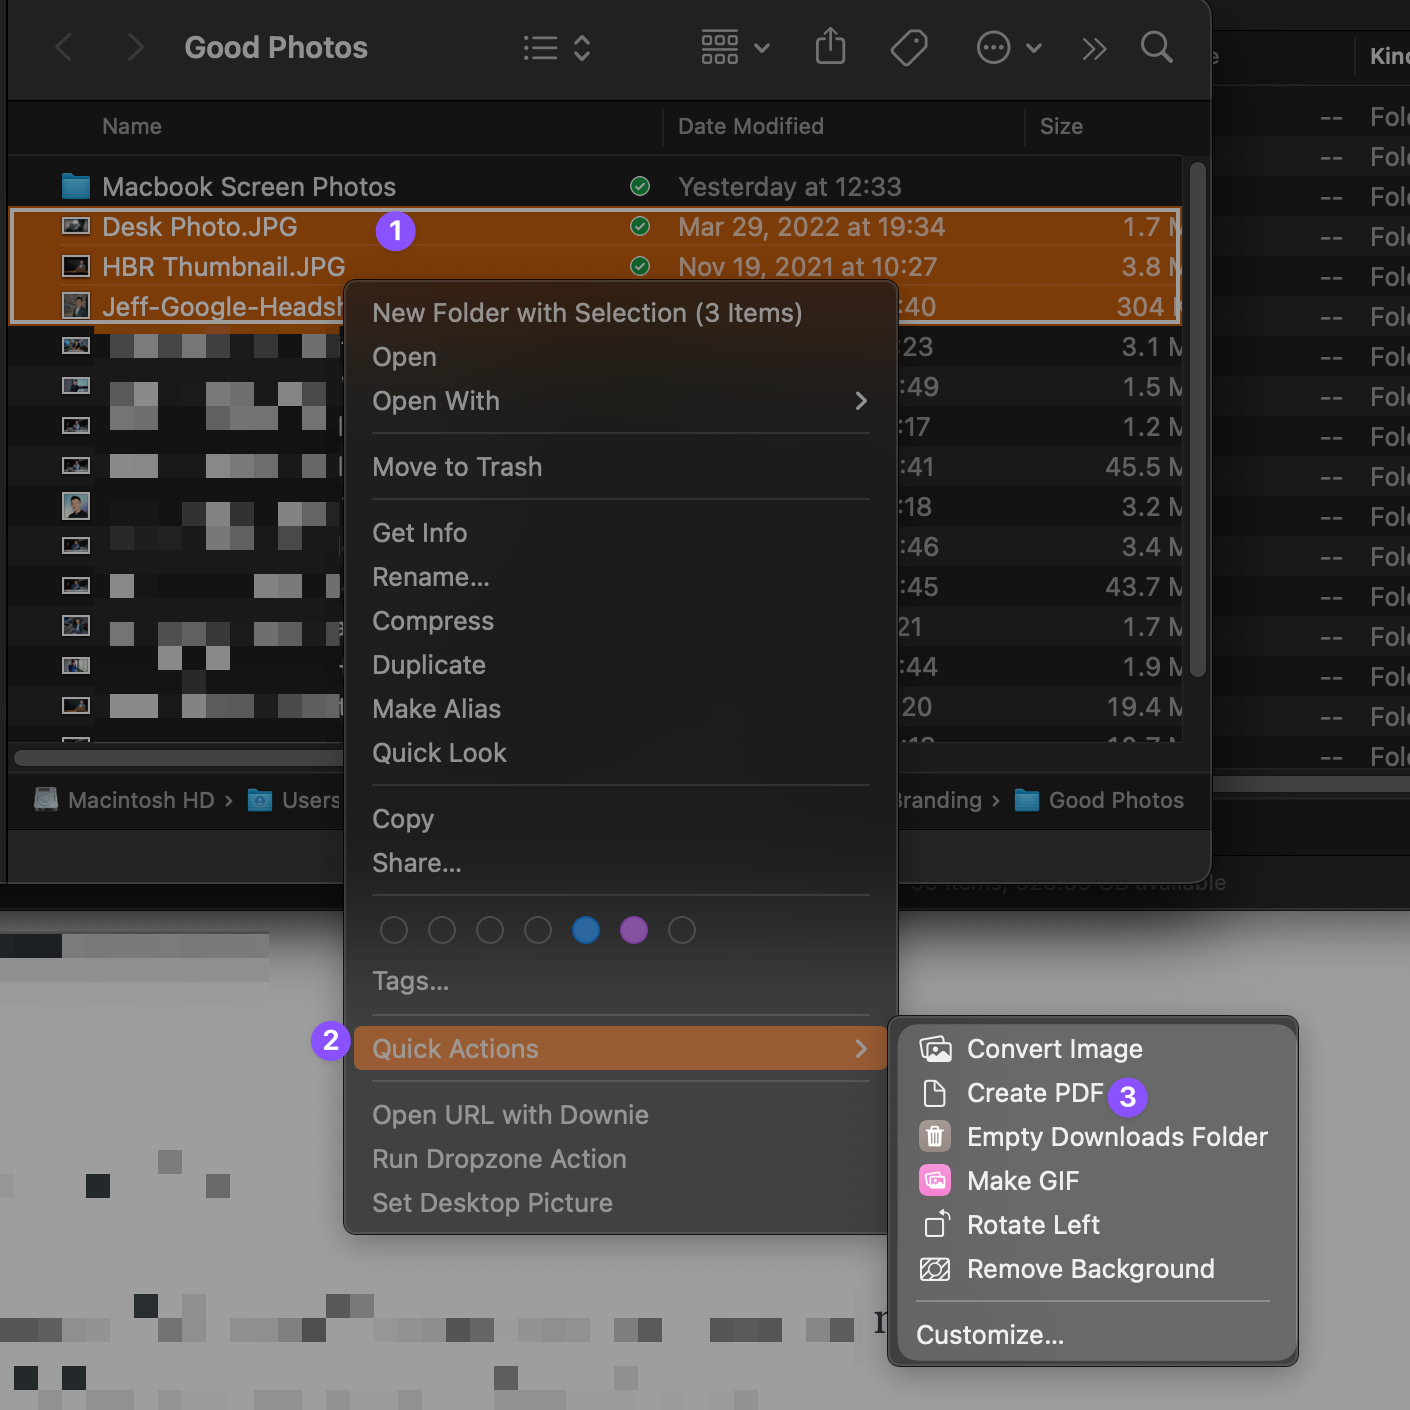
Tip #14 - Create PDF from Images
Hold down CMD (or CTRL for Windows) and select multiple images
Right click > Quick Actions > Create PDF
💡
Pro Tip: After opening the PDF file, you can actually move the pages around to change the order!
Tip #15 - Export Images to PDF
After opening a PDF document:
Go to File > Export
Select PNG as the format > click Save
Now you have an image file of the PDF page! This is useful for when you need to upload documents to a website that only accepts a certain file type.
Tip #16 - Export from Keynote, Pages, Numbers
To export Keynote presentations as Powerpoint documents:
Within Keynote, go to File > Export to > select Powerpoint
Follow these same steps to turn Pages into Doc, and Numbers into Excel!
Tip #17 - Force Quit Applications
If a program stops responding, here are 3 ways to deal with it.
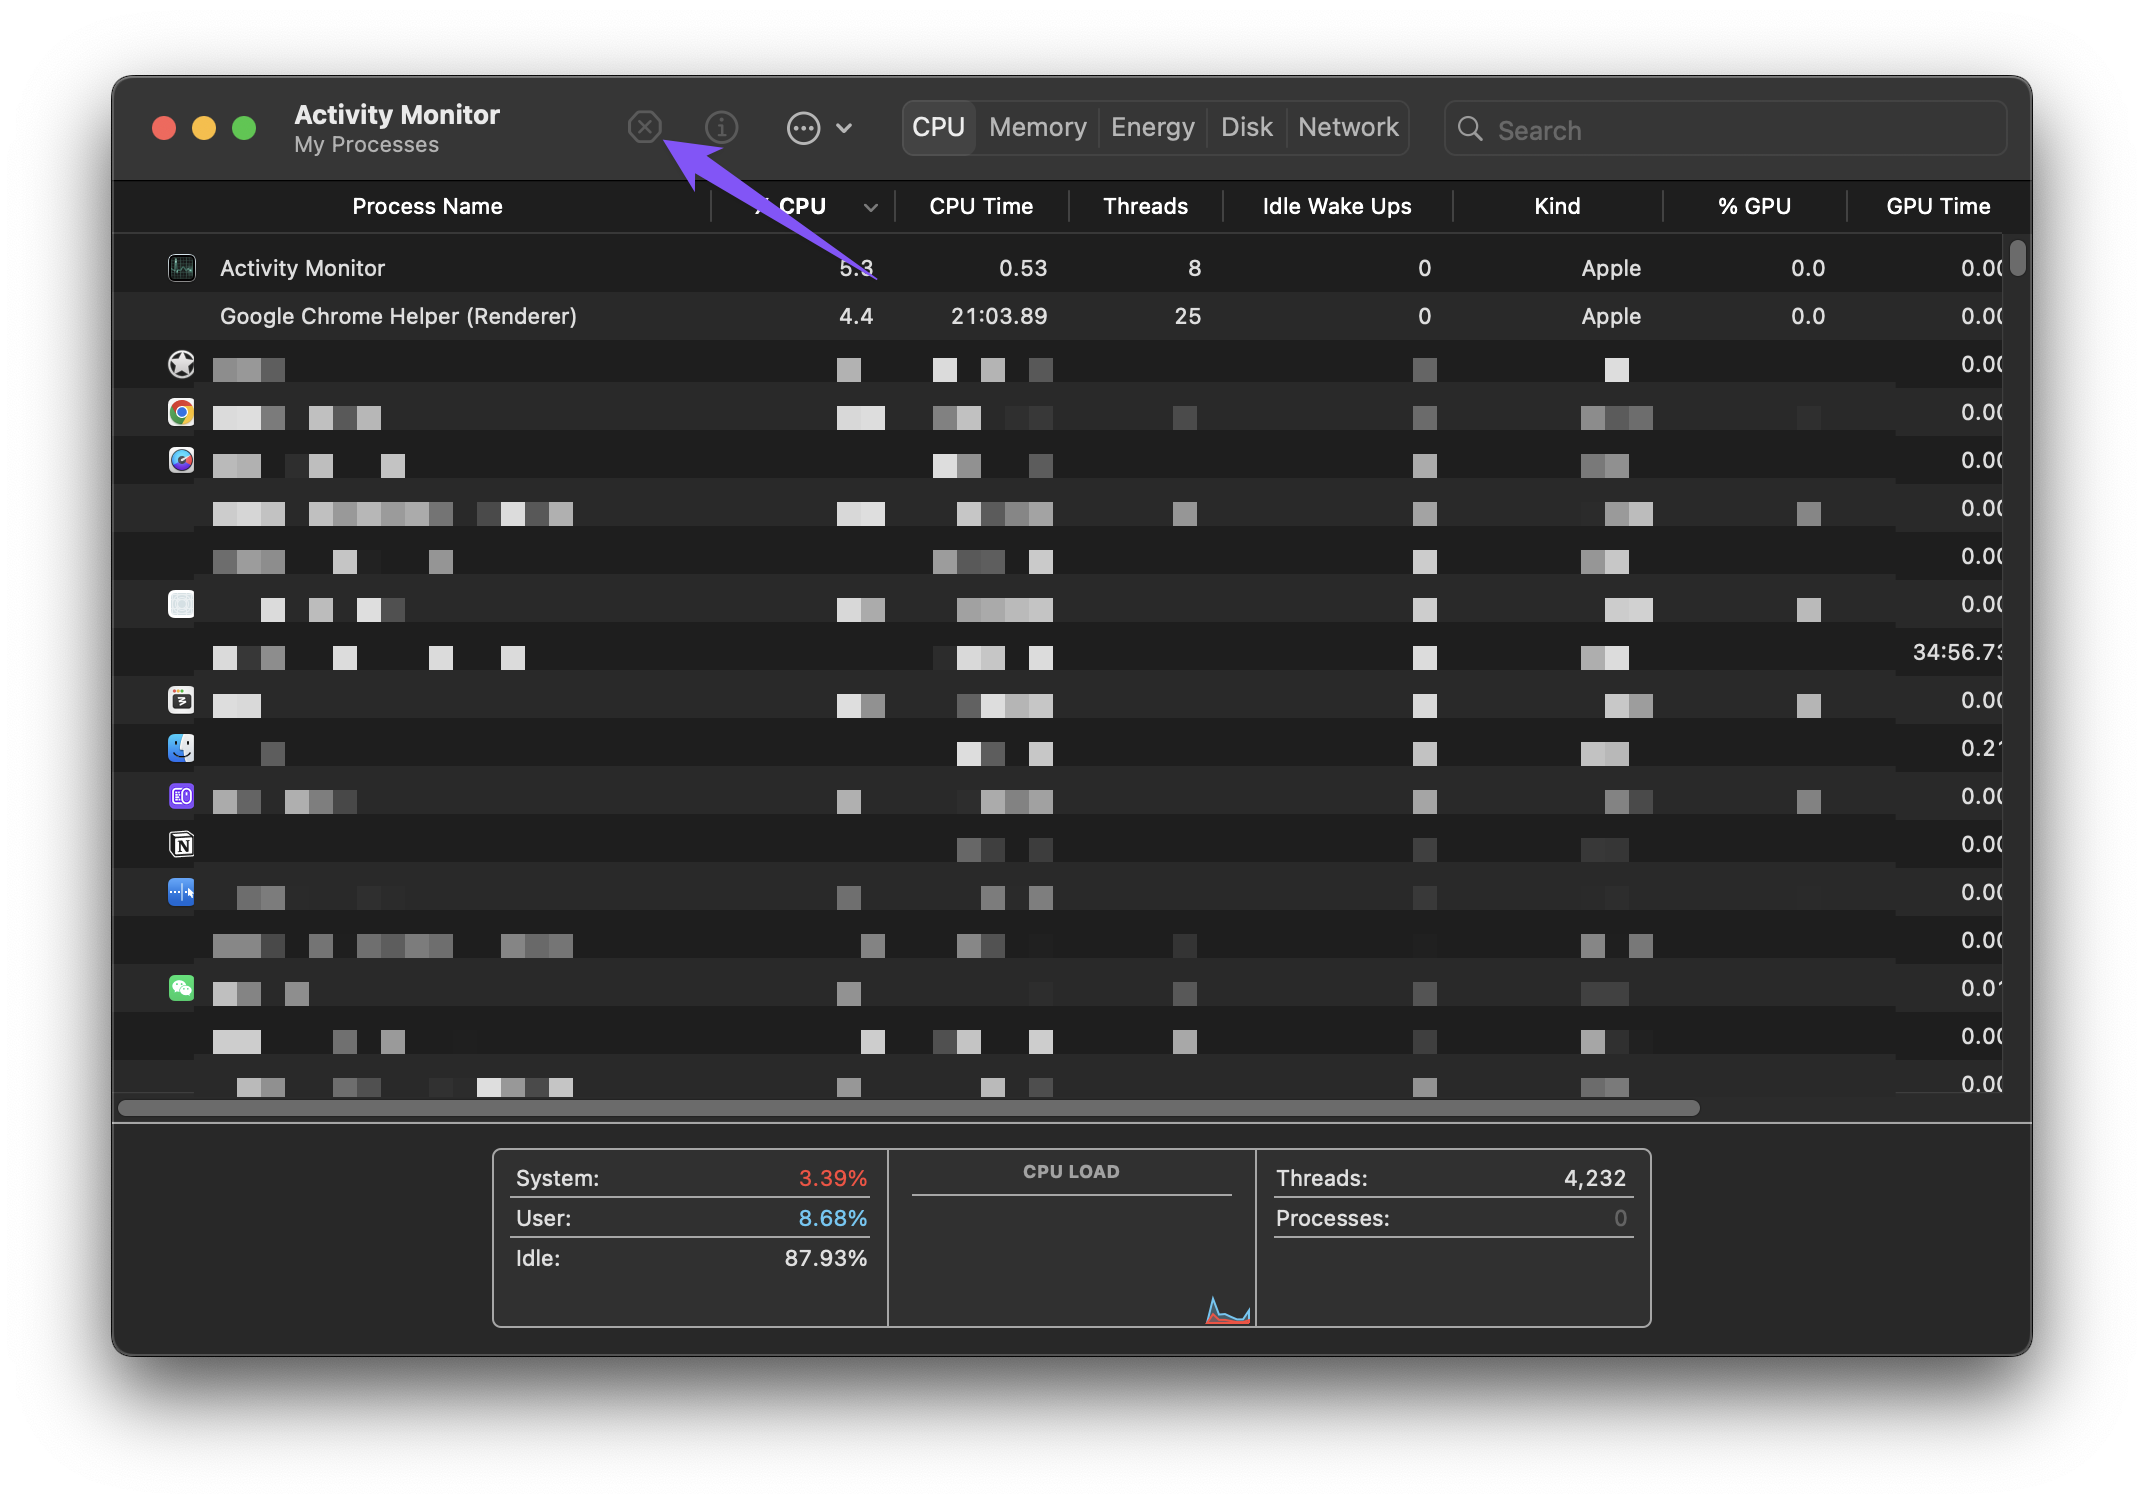
Force quit using Activity Monitor:
Open up Spotlight Search > type in “Activity Monitor”
Select the App or process > click the “x” on the top to stop
Force quit using keyboard shortcut:
Hold down CMD+OPT+ESC (or CTRL+OPT+ESC for Windows) to open up the force quit applications window
Select the application > Force Quit
Force quit from the dock:
Go to your application from the dock menu
Right click > hold down OPT > select Force Quit
Tip #18 - Check MacBook Warranty & Support
If you’re selling a MacBook or buying one secondhand:
Click the Apple logo on the top left corner > About This Mac
Make sure to input the respective code and click Continue
This shows you whether your support and warranty have expired!
Tip #19 - Function + Delete
This one probably only makes sense to PC users…
On a PC, the text deletes forwards, which is especially useful when you are trying to get rid of a top line. On a Mac, by holding down FN+DEL, you can delete like you would on a PC!
Tip #20 - Show Accented Alphabet Characters
Long press a key to reveal accented alphabet characters
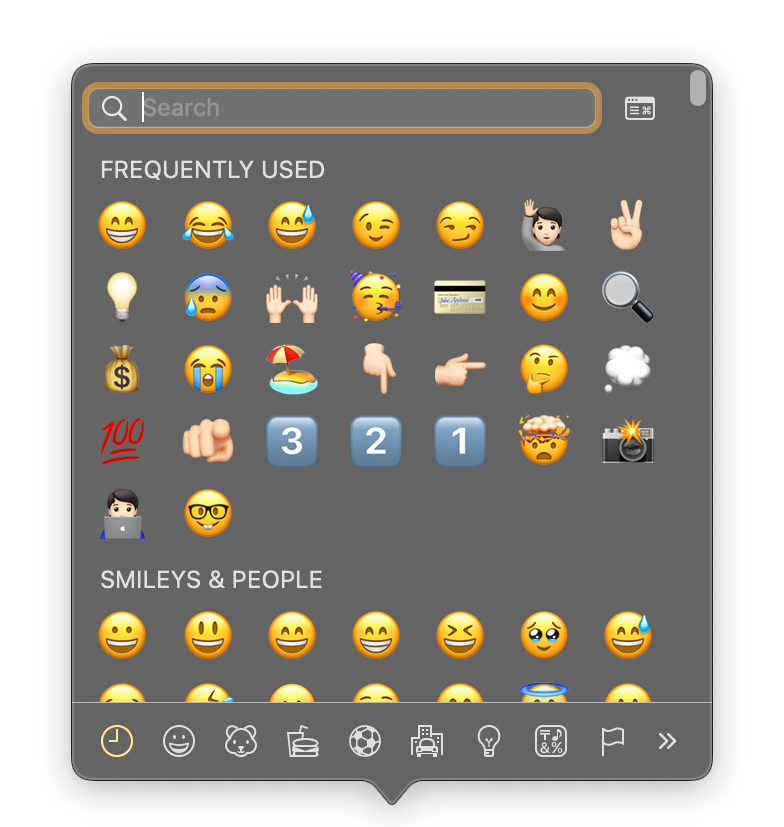
Tip #21 - Quick Access to Emojis
Press CMD+CTRL+SPACE to bring up the searchable emoji bar
Tip #22 - Secret Apple Logo Shortcut
This may or may not be the coolest trick…
OPT+SHIFT+K to input the Apple logo anywhere
There’s more…
Make sure to check out these 10 MacBook tips that feel illegal to know!