Master 80% of Notion with this ONE Feature
| Notion
It's weird how a free app can completely change the way you use an entire operating system. What a game-changer.
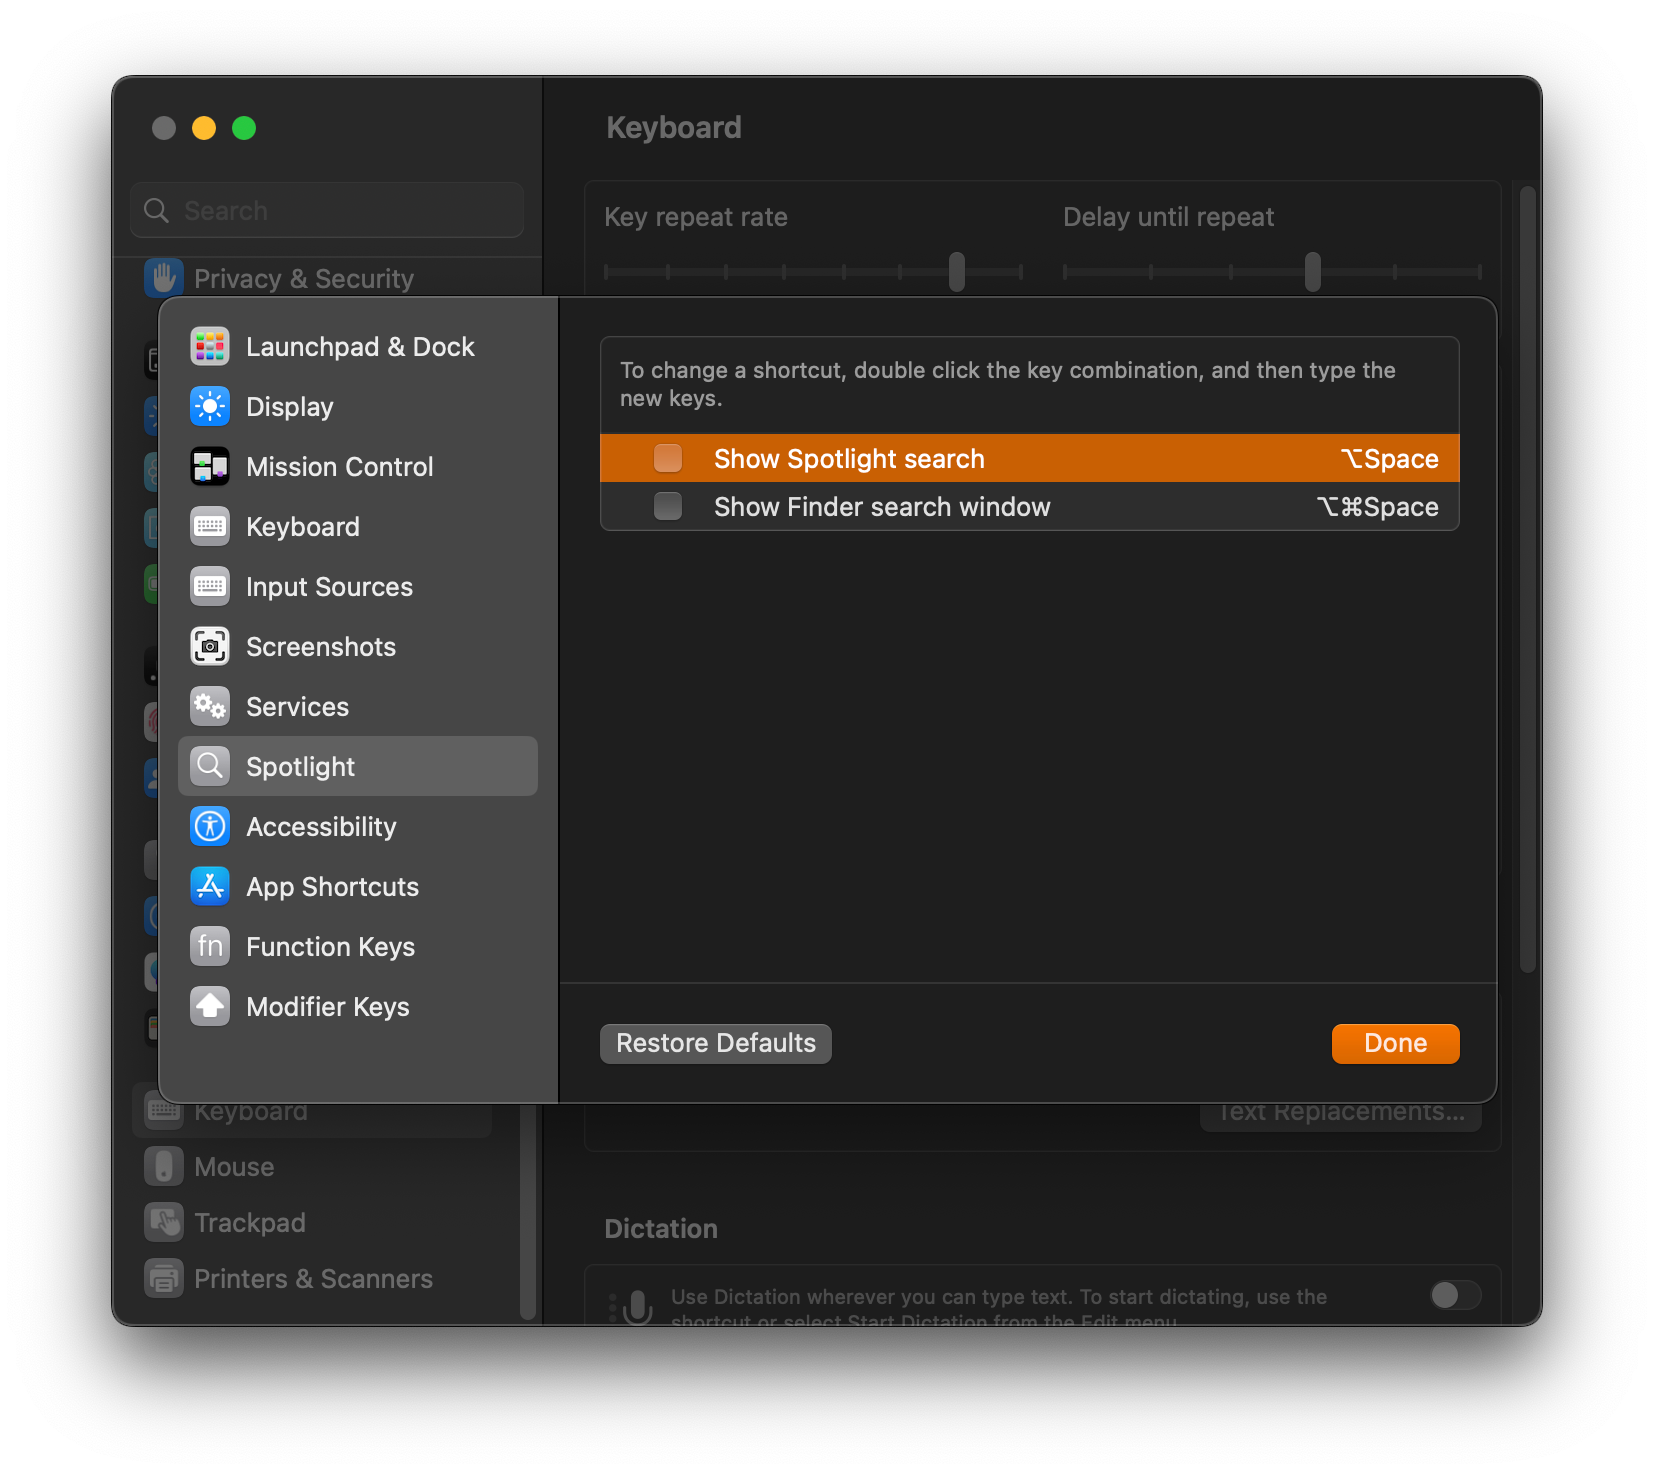
Let’s start with the basics. In your keyboard settings, go to shortcuts > spotlight, and uncheck these two options: “Show Spotlight search” and “Show Finder search window”, because you’ll have the Alfred hotkey set to command+space.
Then under your general preferences, it’s important to note that Alfred will use whatever default browser you have by default.
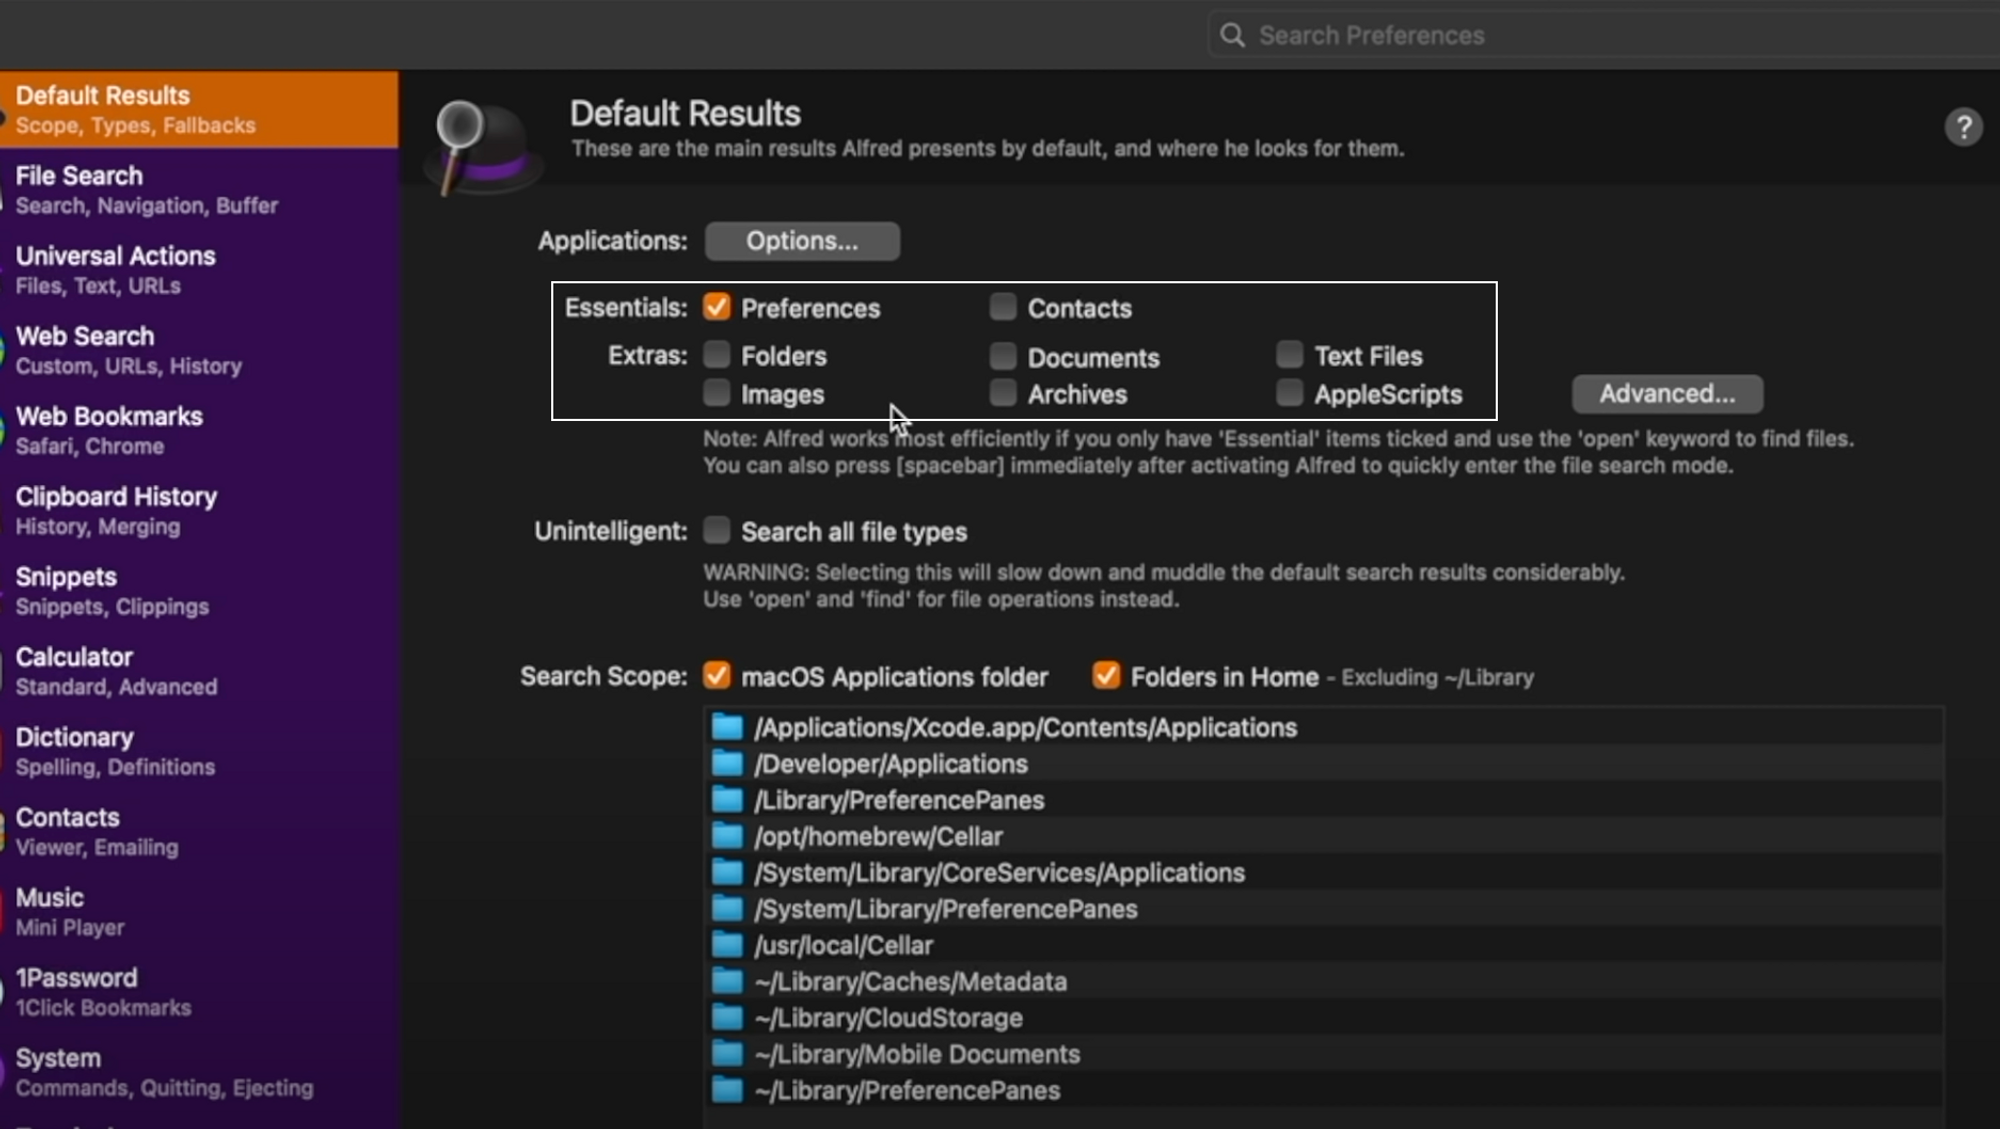
Go to Features > Default results. This tab controls what you see with just 1 command space, and that’s why I intentionally don’t check any of the extras file types, for example if I type “Downloads” in Alfred, nothing comes up, but with “Folders” checked, the download folder will appear.
And the reason I keep these extras unchecked is because I want to access these file types using CMD+Space,Space.
I don’t use Apple contacts, but if you do, you can keep the “Contacts” checked.
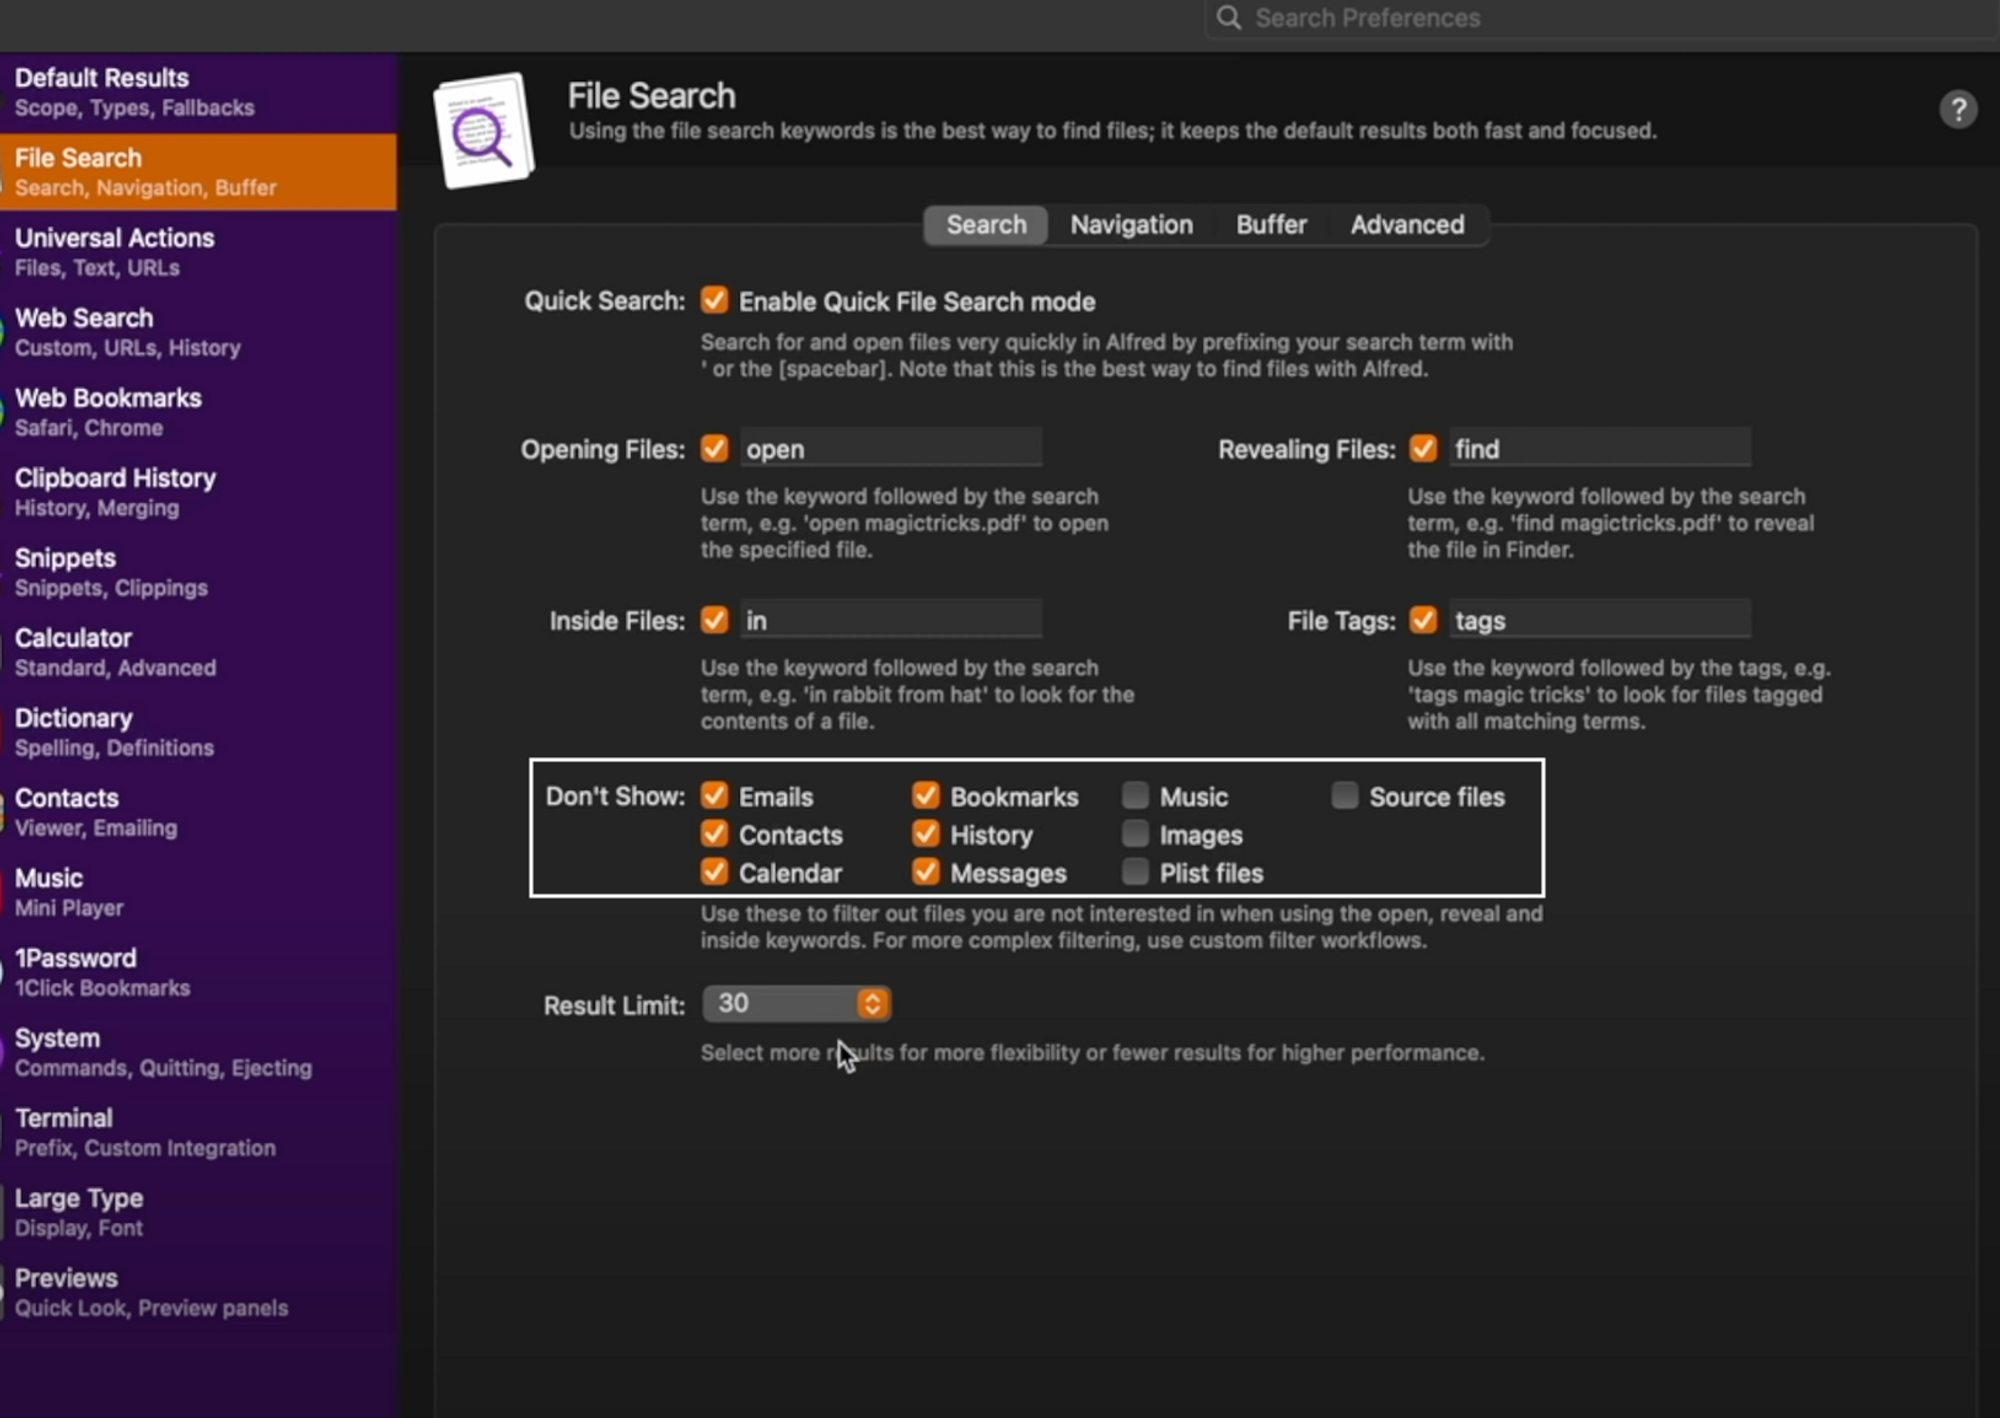
This tab controls how you search for files on your Macbook. And you do this by pressing CMD+Space, Space. I don’t want to show emails, contacts, calendar, bookmarks, history, and messages, but I do want files like images.
I limit my search results to 30. In the Navigation tab I uncheck the 2 shortcuts, because I don’t want to use the command bar for folder navigation, I just want to open the folder or document, and I don’t change anything under buffer and advanced tabs.
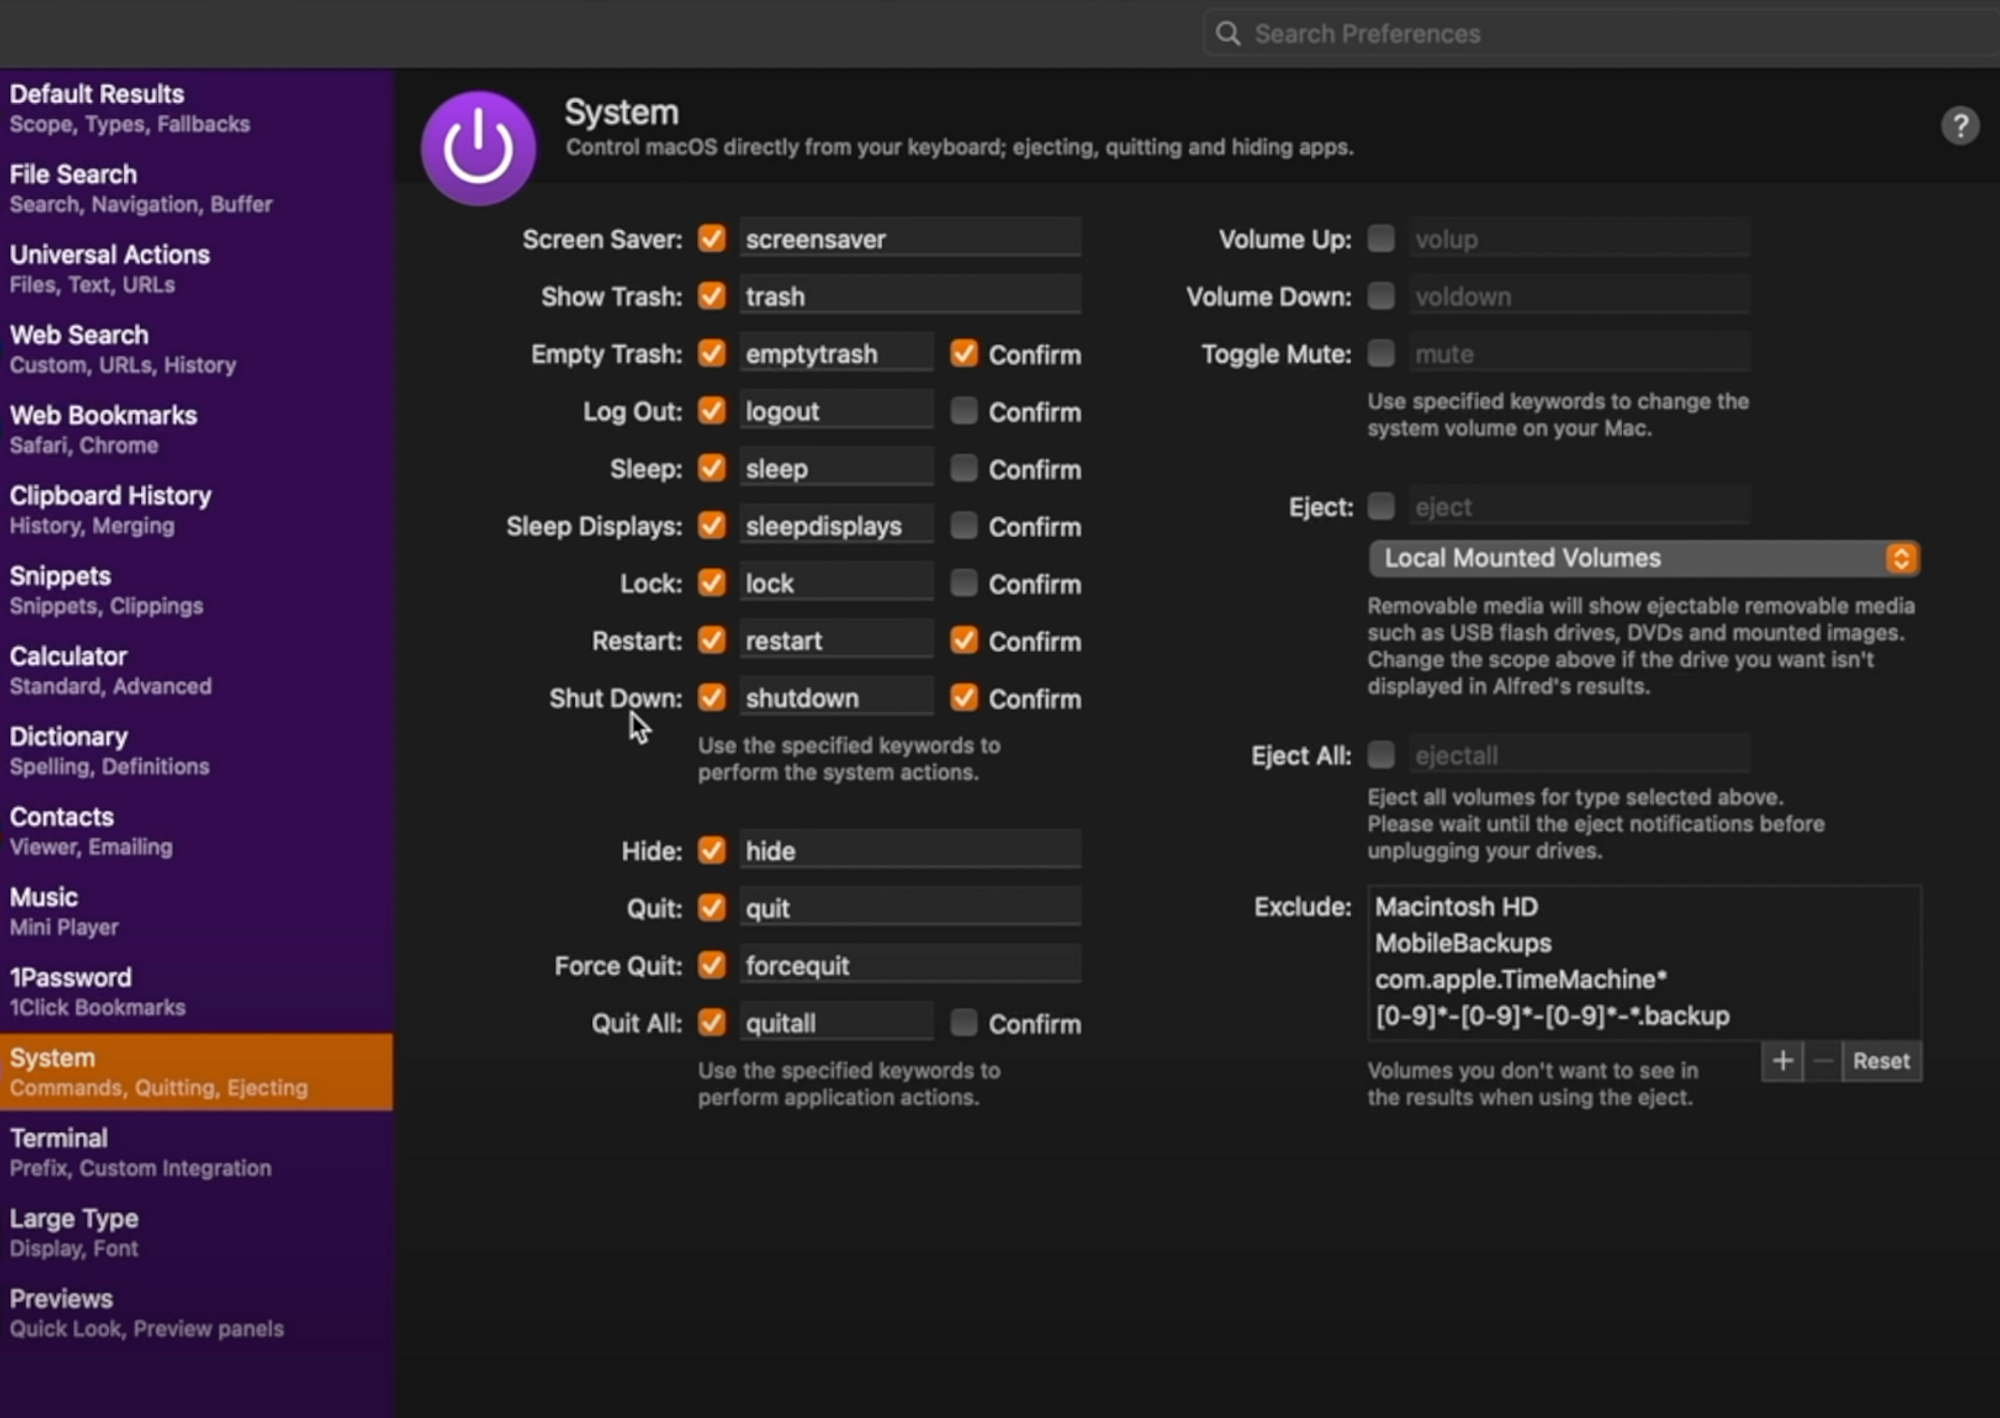
For me, I uncheck all the volume related ones, because I use my keyboard for those.
The 3 commands I use the most frequently are: empty trash, lock, and restart.
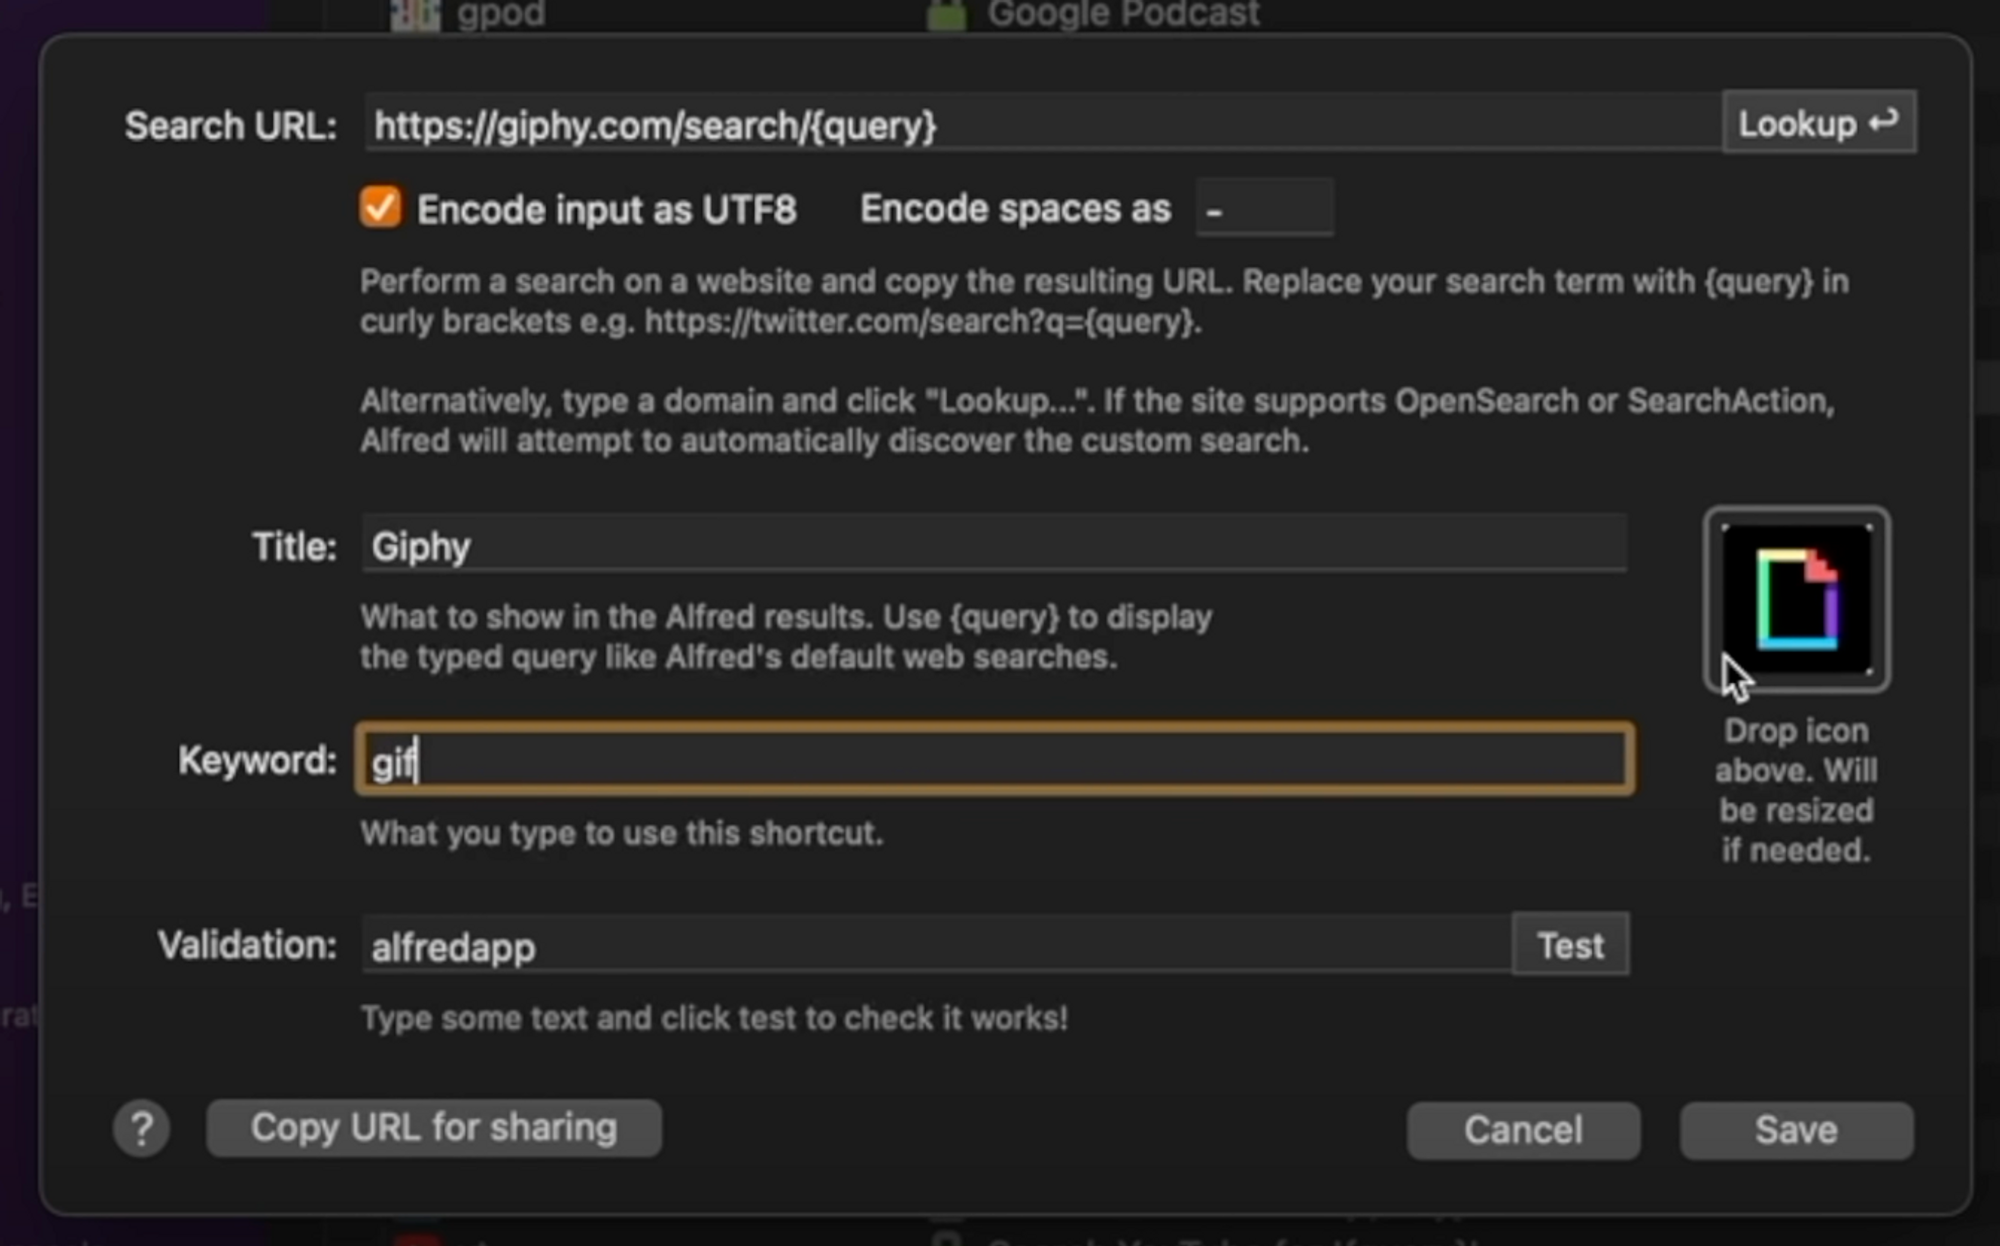
Moving over to Web Search, everything is enabled by default and this is where you can type the keyword and perform the search immediately.
My tip here is to shorten the keyword of the most common ones, youtube I have as yt, double click on google and change it to “g”, maps to “m”, and I have translate as “tran”.
Let’s use Giphy as an example and search for some gifs. And follow the steps:
Now you can test it by clicking “Test”.
Also, you can choose to just open the URL directly without performing a search. For example, I open up my Google Photos album a lot to upload all your super positive comments 🤩, all I did was paste the URL without the query in curly brackets. This has saved me a bunch of time.
Another great thing you can do is create your own application using Automator, a free app that comes in every single Mac, and using Alfred, you can run the application using the command bar. If I type “clipboard” and press enter, the text in my clipboard will be saved in a new file on my desktop.
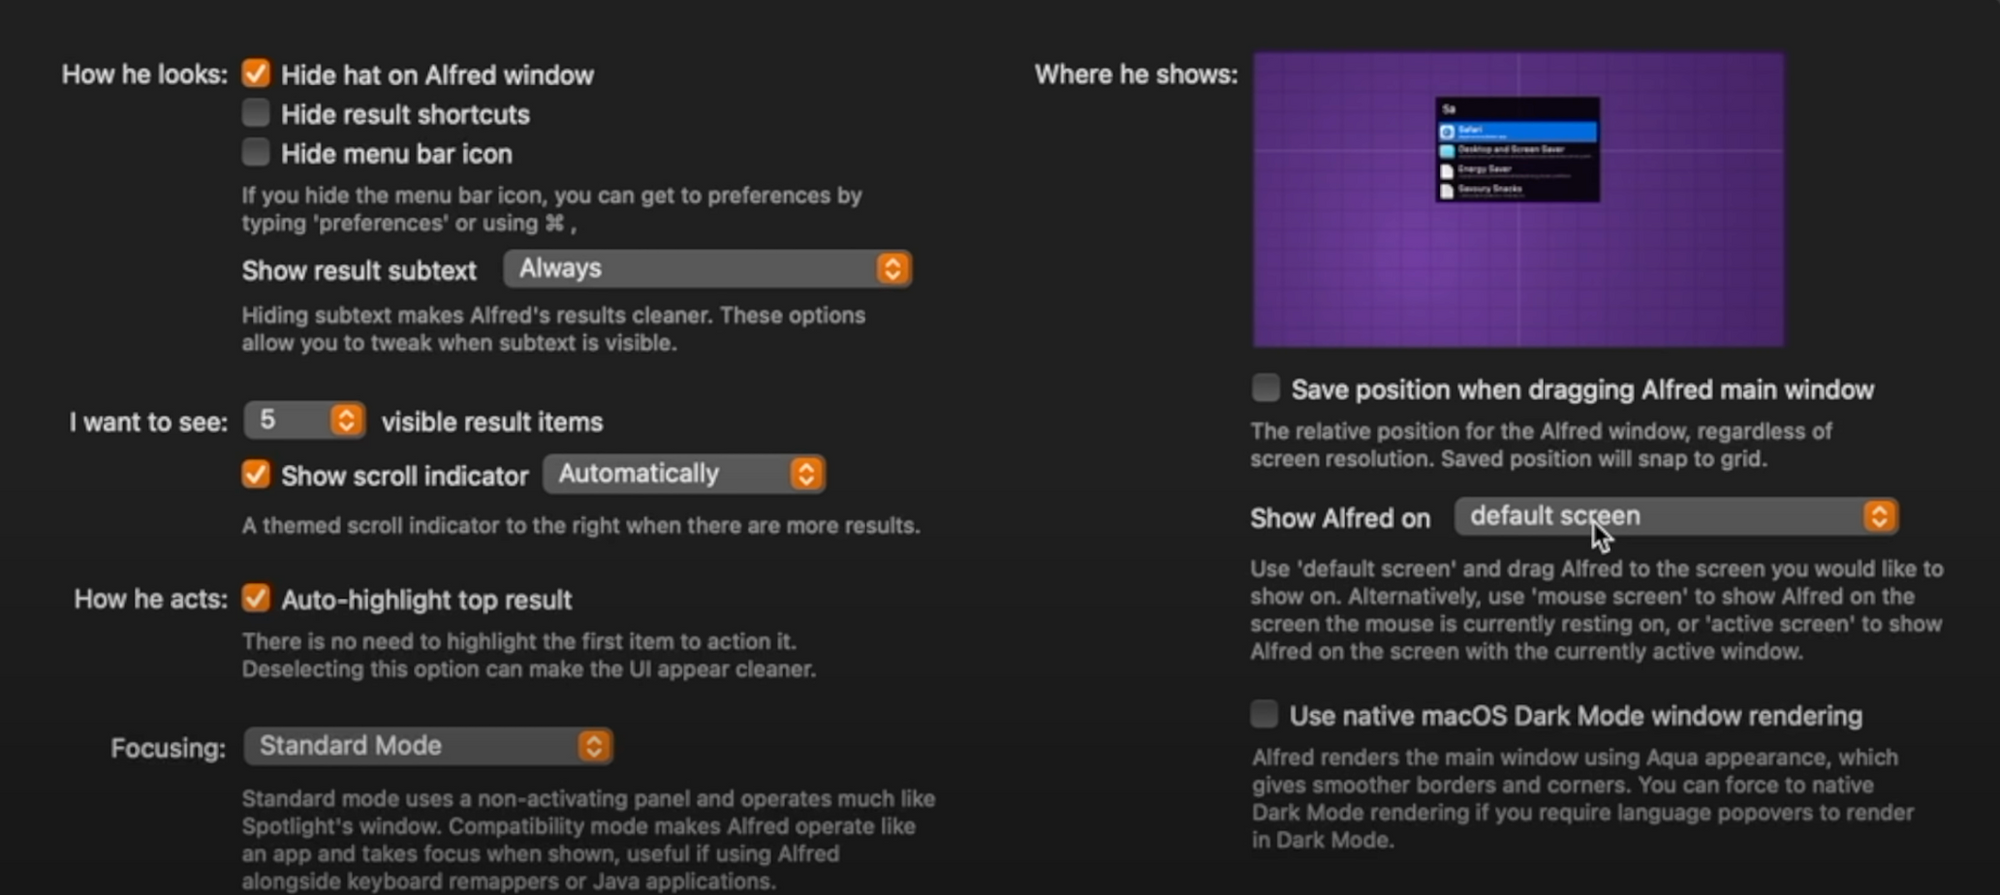
I currently use the Alfred macOS dark theme, and under “Options” I checked the “Hide hat on Alfred window” to keep it clean and minimal, I choose 5 visible result items and I choose to show Alfred on default screen because I have multiple monitors, and that is how I basically use the free version of Alfred.
As much as I like this app and although I paid the one-time fee, the vast majority of users do not need to upgrade.
It’s like the 80/20 rule, the free features - 20% of Alfred’s capabilities , already makes a 80% difference in how you use your mac moving forward.
That being said, I’ll quickly touch upon some of the paid features I find interesting.
Now that you have supercharged your MacOS workflow with Alfred, feel free to check out more MacOS tips and tricks!