Master 80% of Notion with this ONE Feature
| Notion
The default Archive Utility tool on the Mac does a good job 80% of the time. However, it's not as reliable as other free apps like The Unarchiver or Keka so it's a good idea to have those on hand when the Utility Tool runs into issues
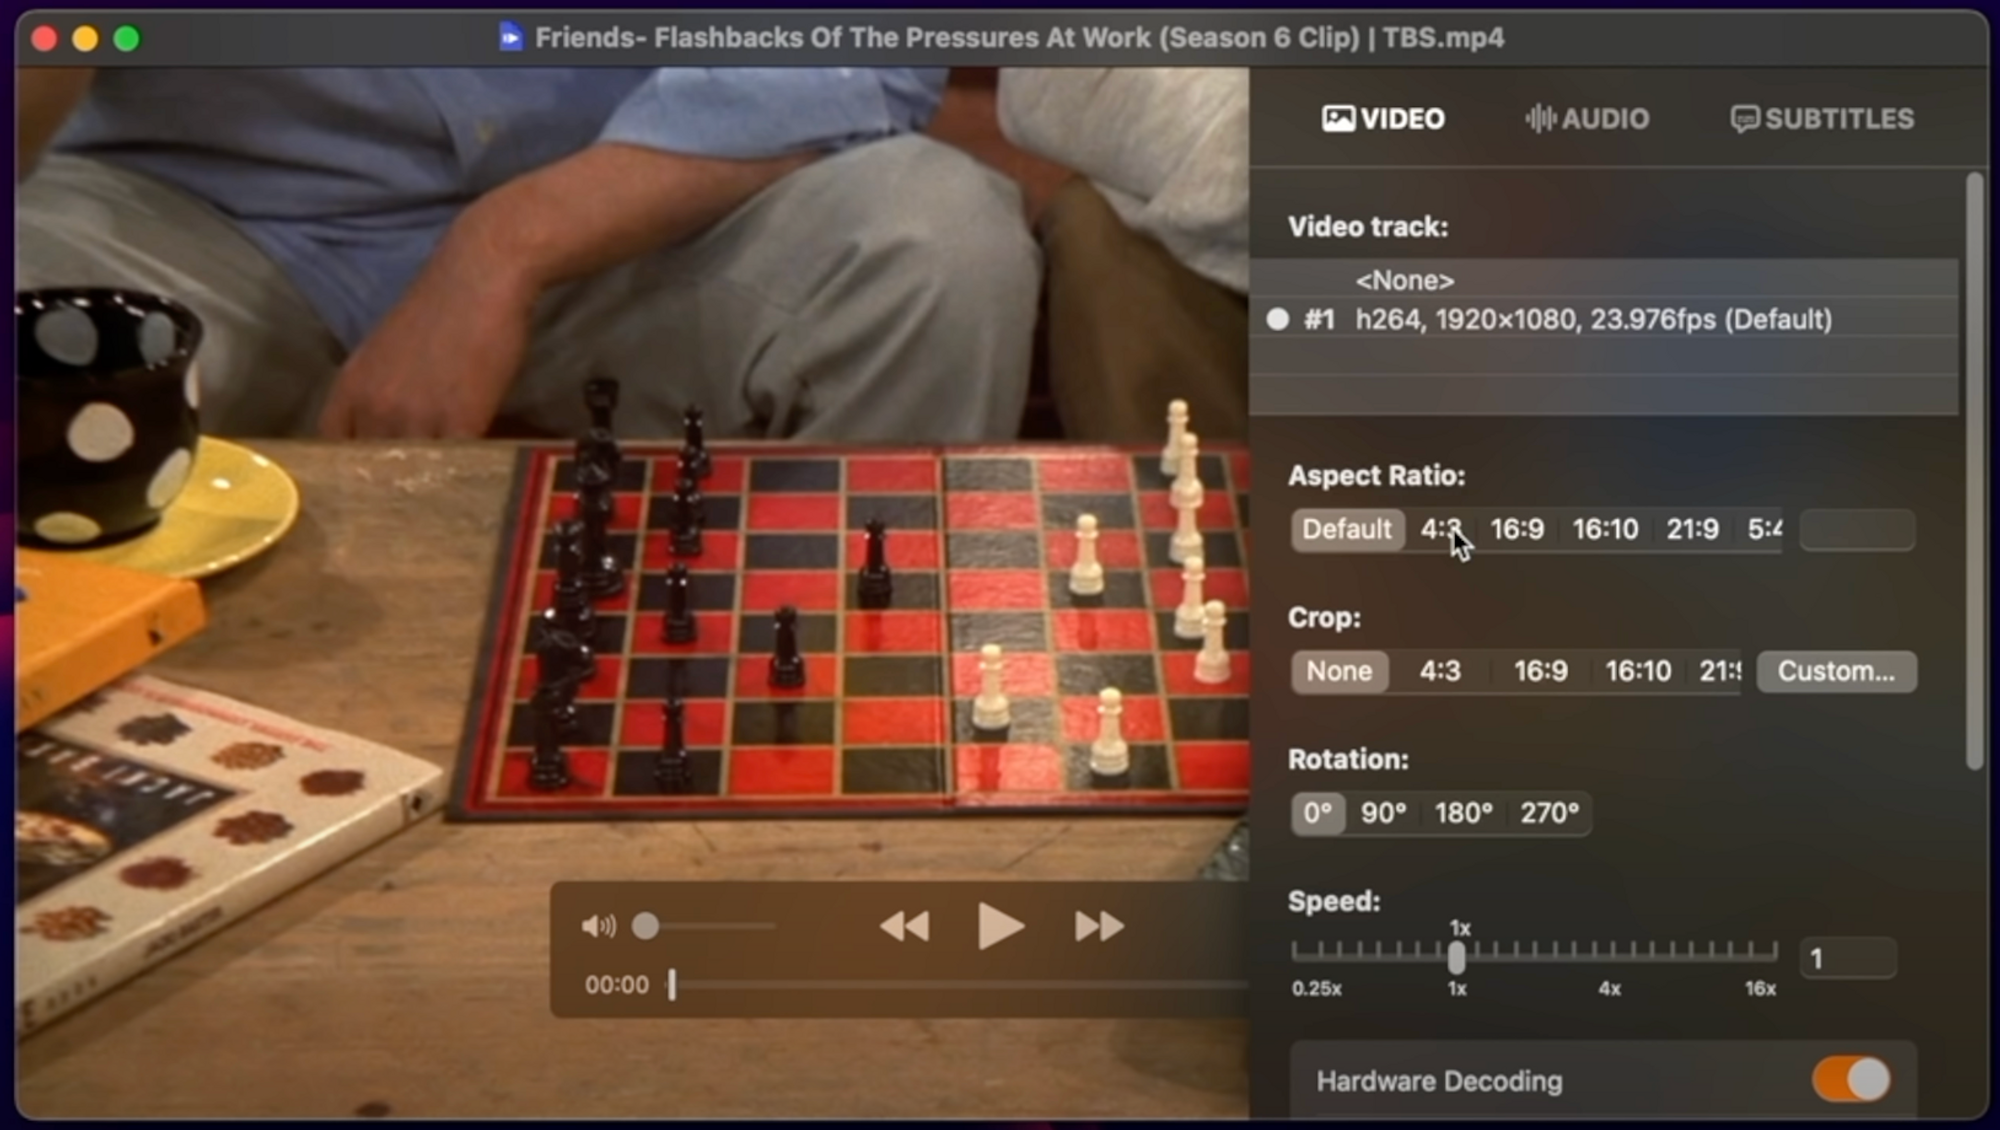
If you are looking for a free, open source media player that actually looks like an app developed for the 21st century, INNA video player has got you covered.
Features include:
In addition, you can change aspect ratios, the speed of the video, turn on and off subtitles, and even change the color of the subtitles to your liking.
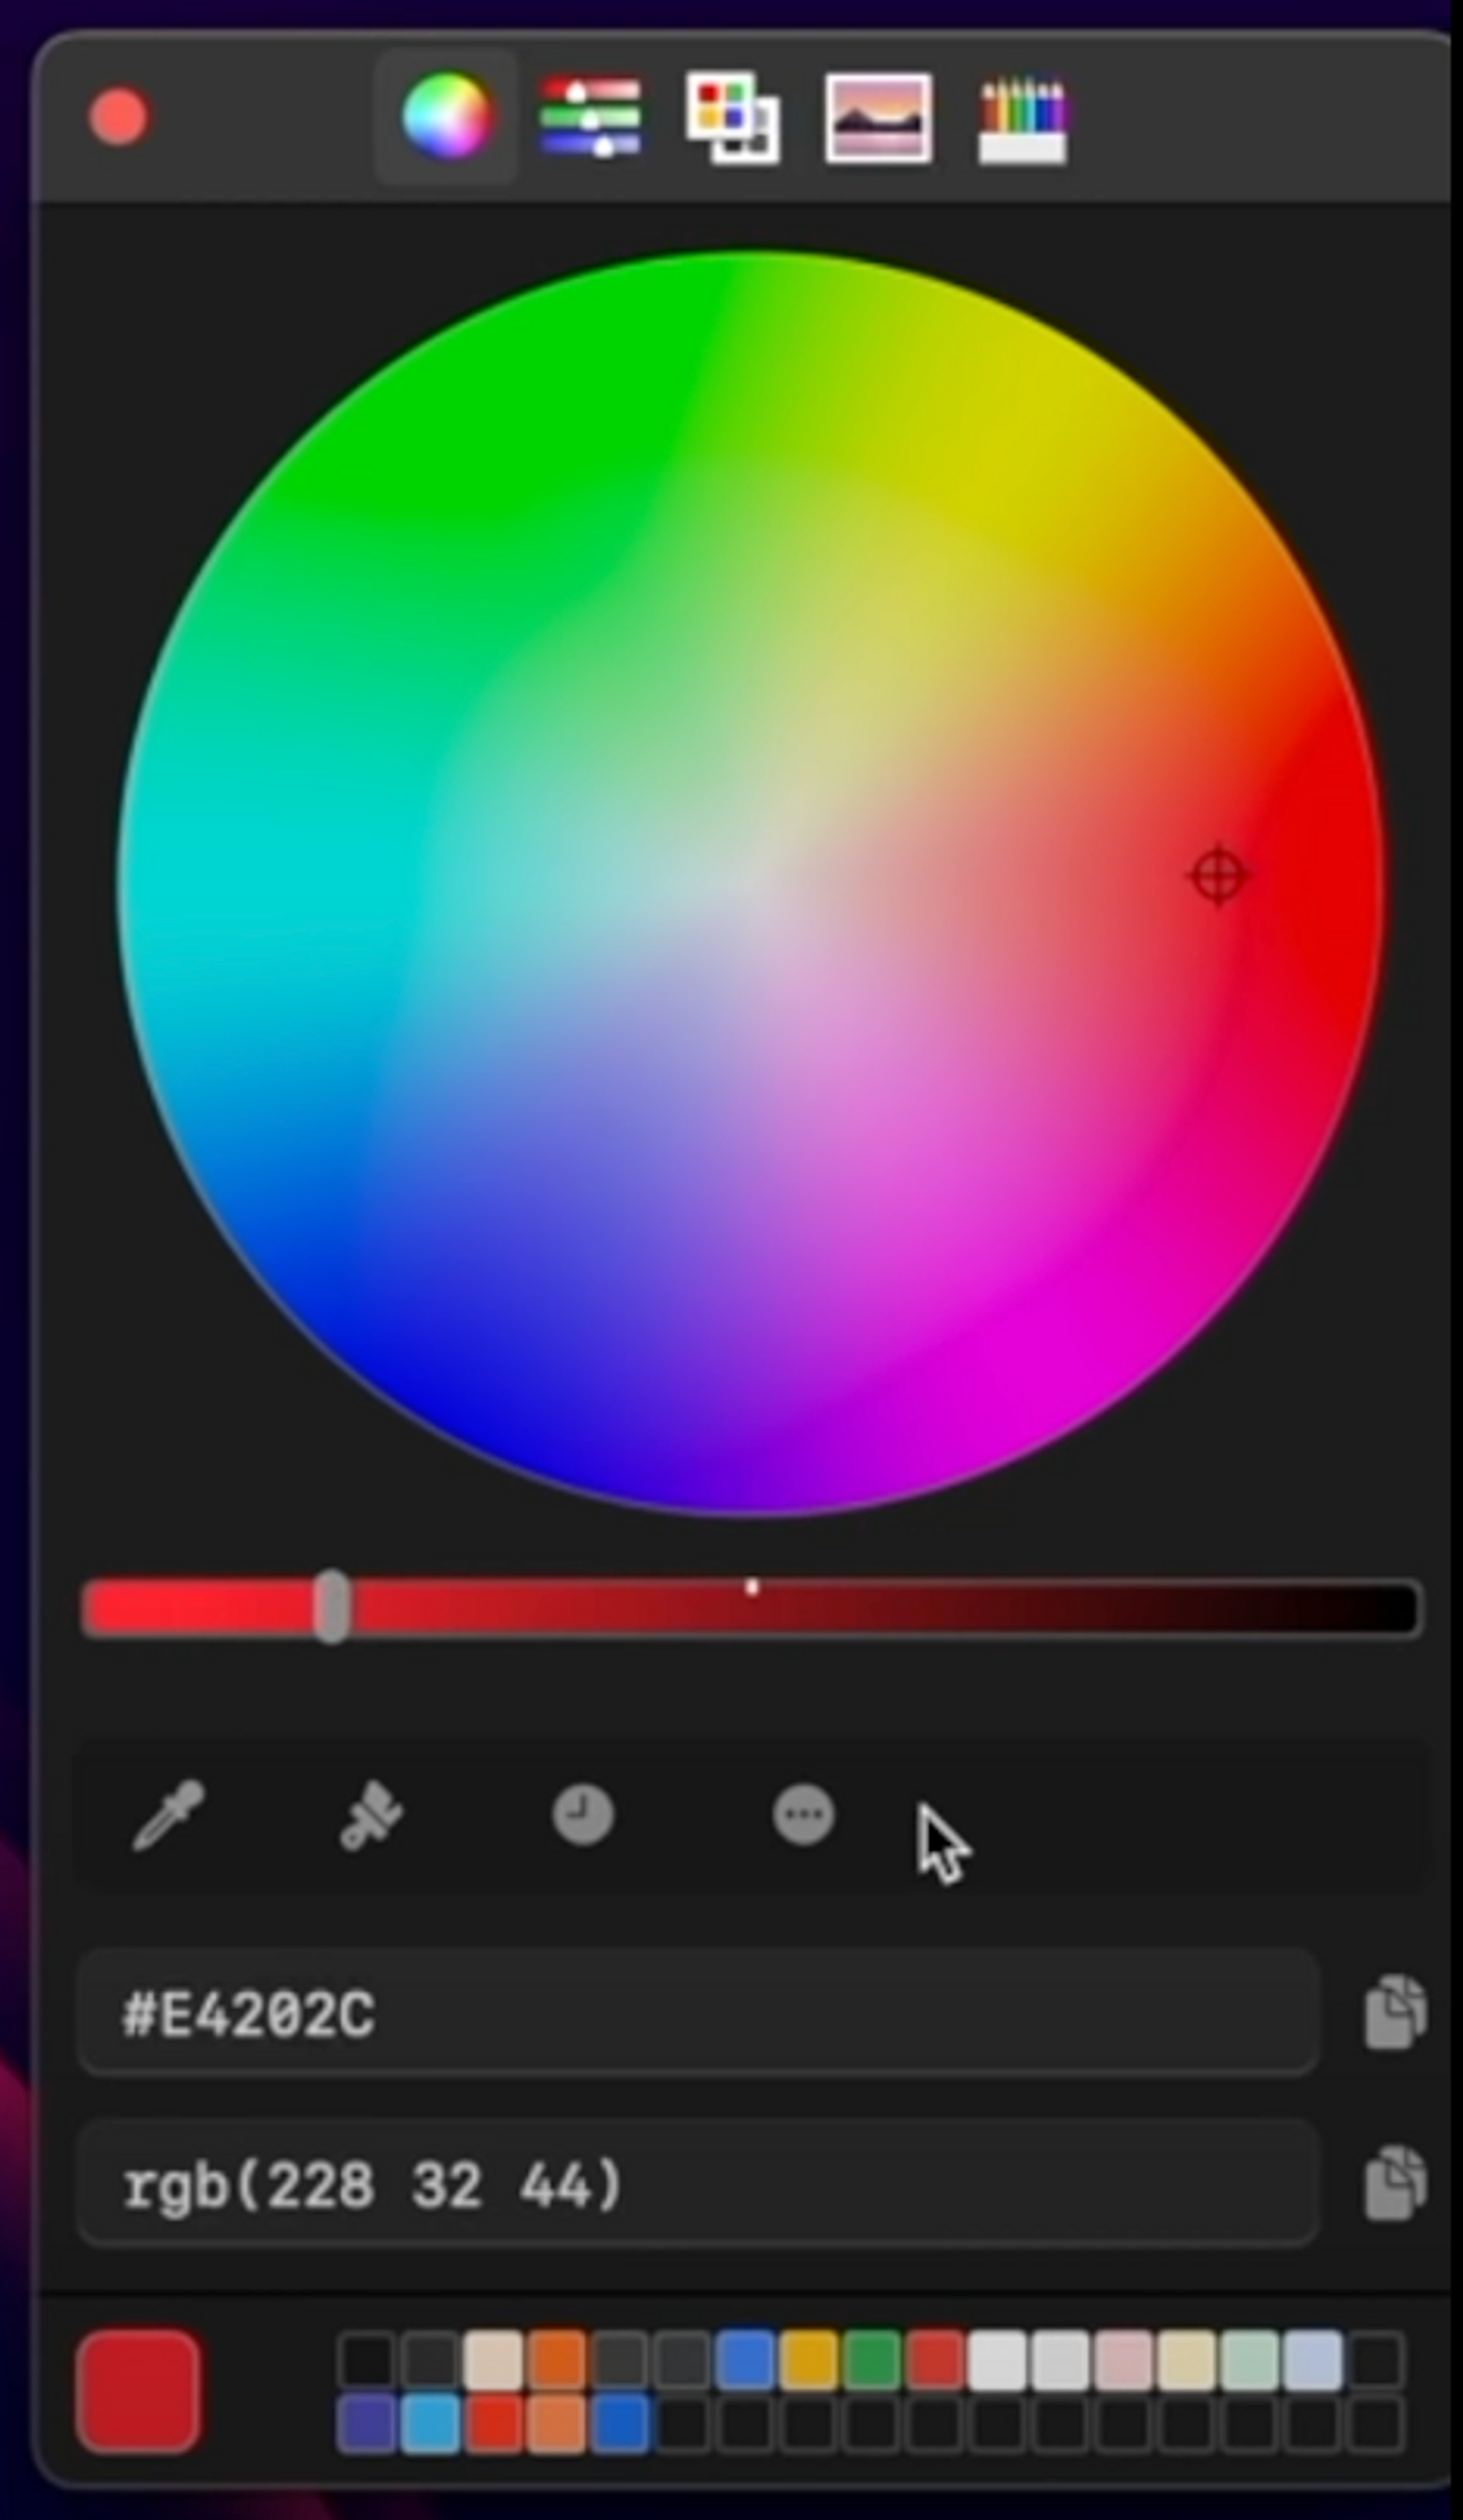
Even if you’re not in the creative or design fields, this color dropper tool - System Color Picker - is amazing for students or working professionals.
Let’s say you’re creating a presentation and you need to use a specific set of colors or a theme you found online, just follow these steps:
In order to do this, you have to change some settings first:
Bartender helps you to keep the top menu bar super clean. It is a paid app, but 2 great alternatives are Dozer and Hiddenbar, both free and both open source.
Here are the changes I made to my Bartender settings:
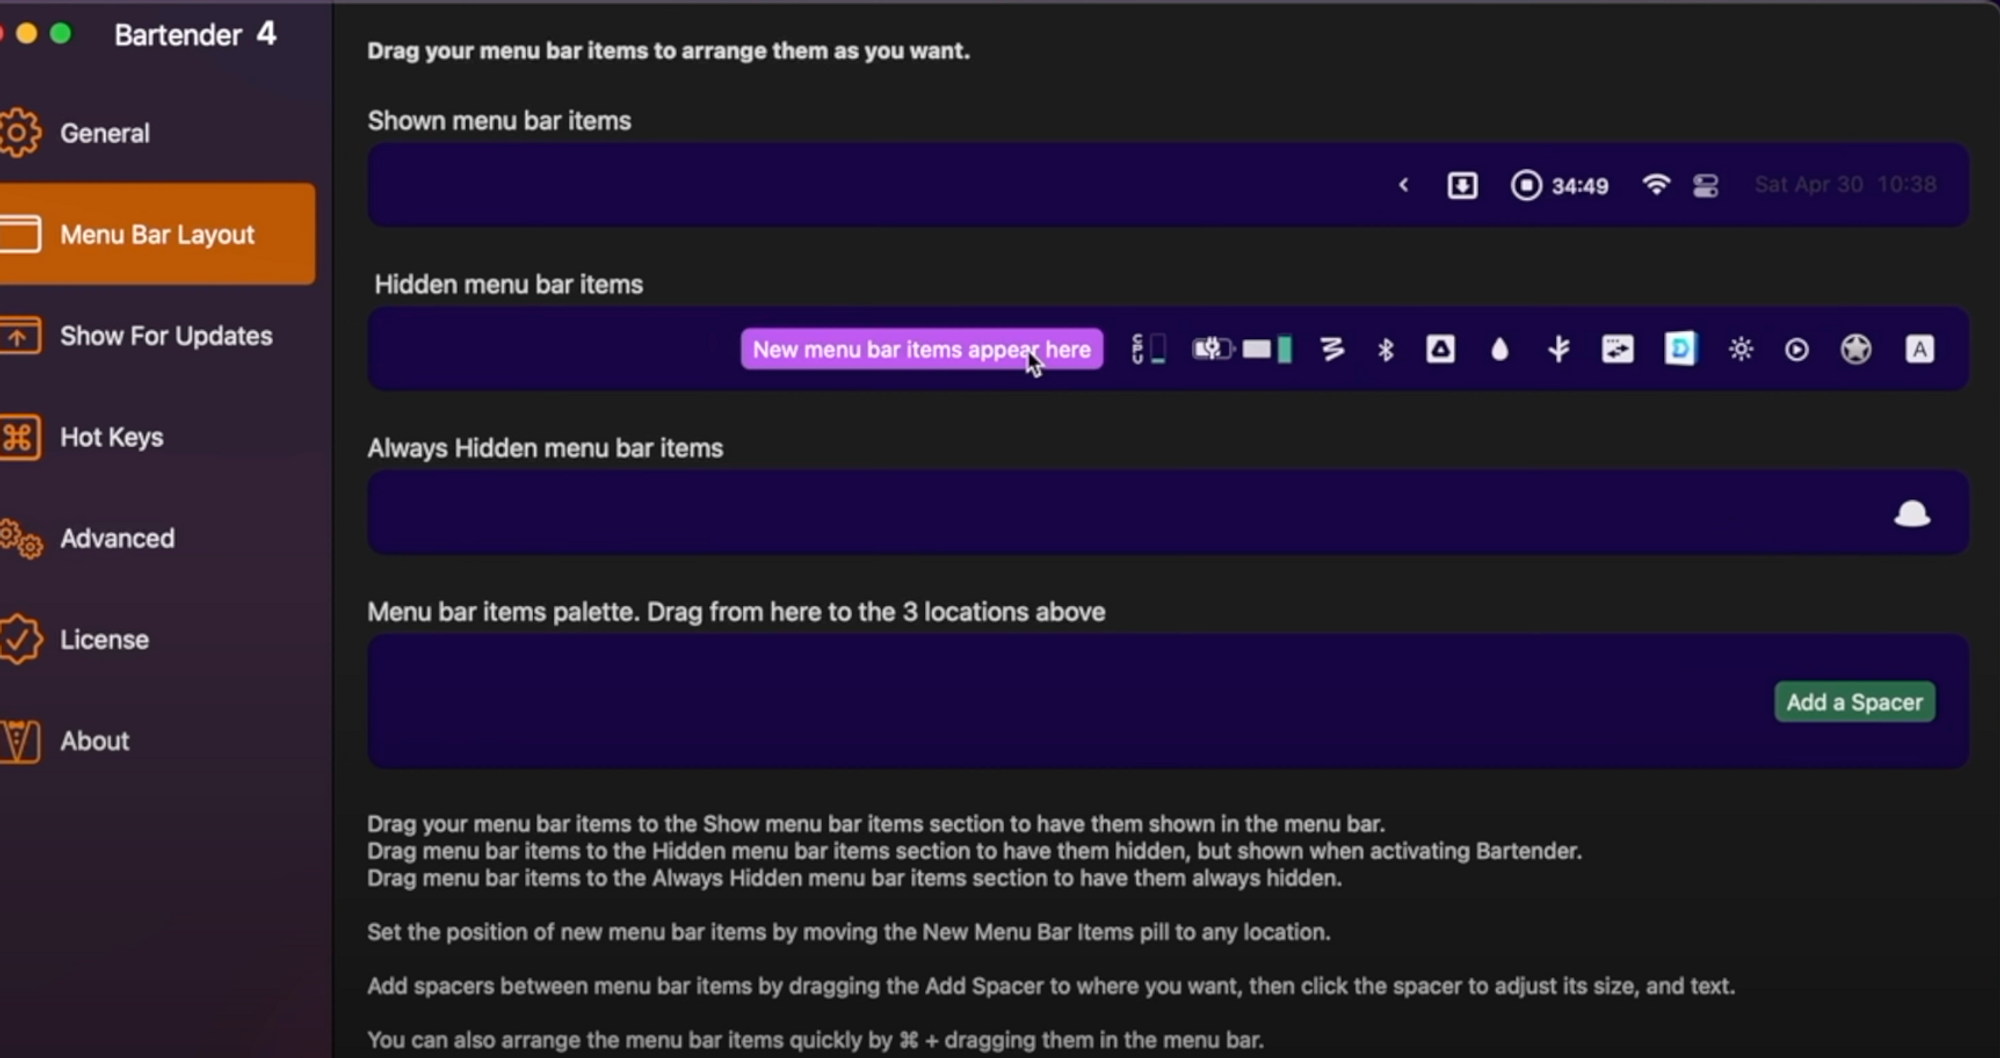
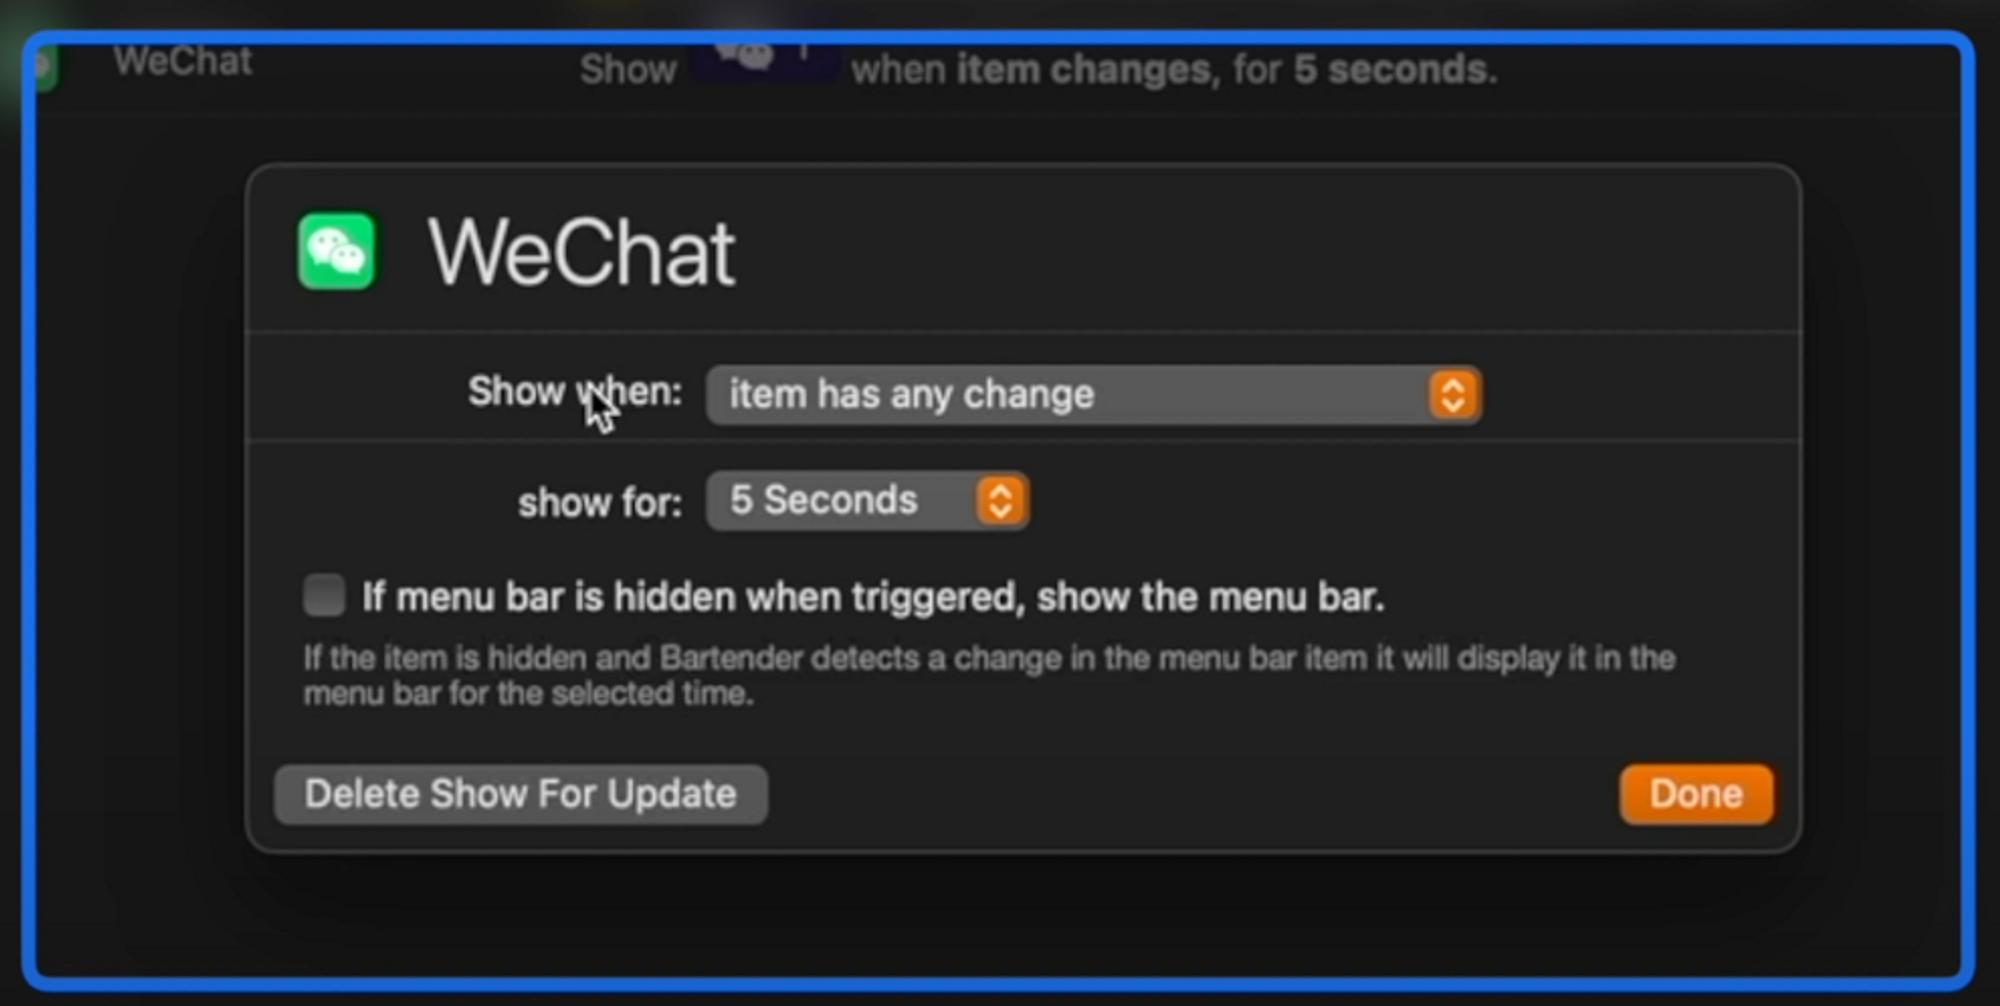
Now what I find super useful is the “Show For Updates” tab. Basically you can set a rule where if a condition is triggered, that app icon will appear for a brief period of time before being hidden again! For example:
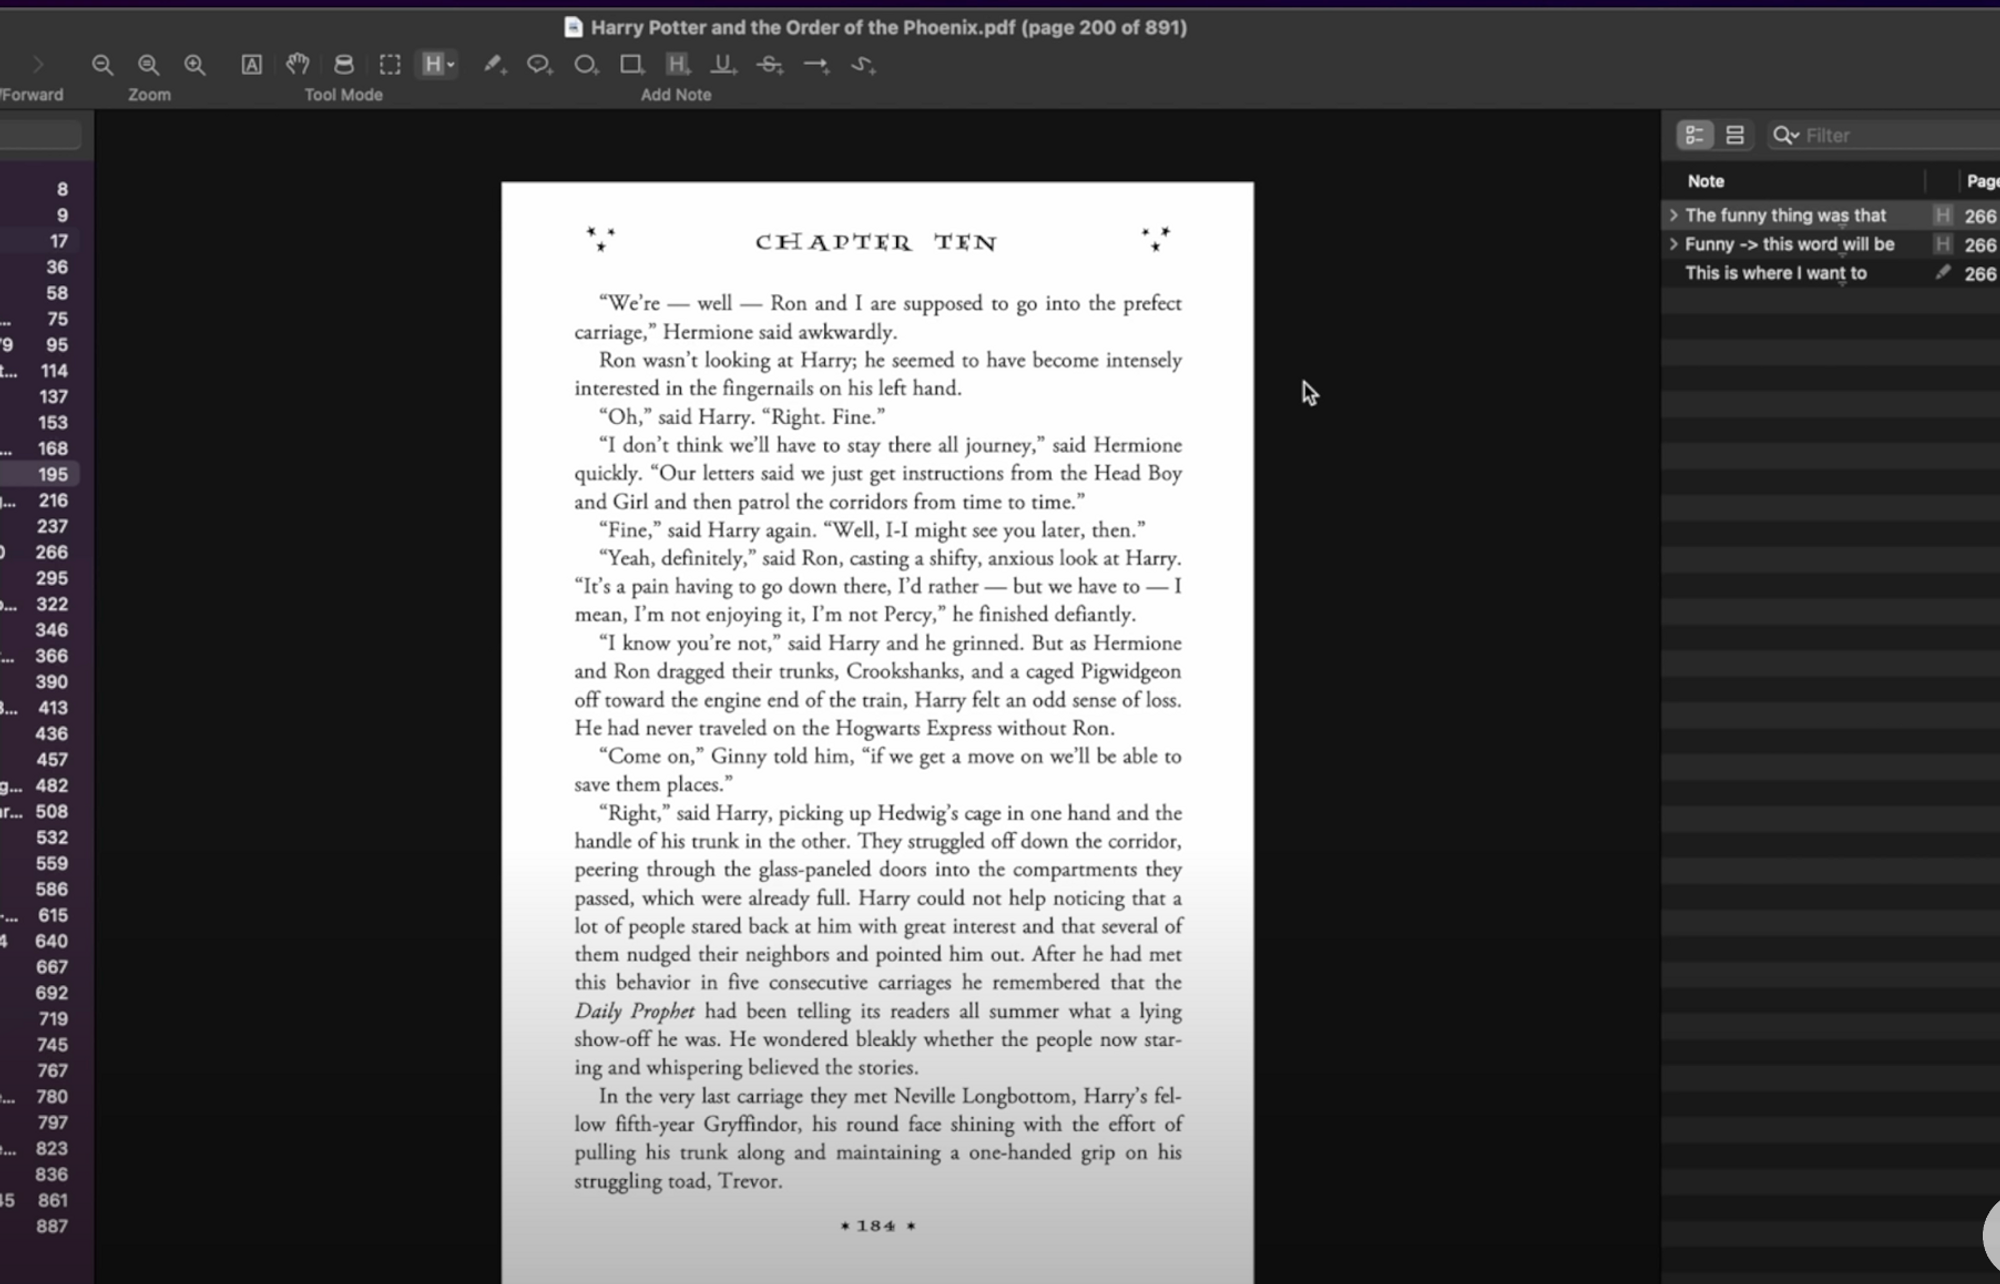
I have to admit, Mac’s built-in Preview app is already pretty handy for PDFs, you can perform all the basic functions like annotation and even insert signatures you’ve created.
Skim is specifically designed to improve the reading and note-taking experience. It is very clean and tidy interface. Chapters and pages on the left, notes you’ve taken on the right.
Under PDF > PDF Display > I like to pick “Horizontal Continuous”, so I can read and scroll from left to right, and I make sure to “Use Current View Settings as Default” so the next time I don’t have to do that again.
I can highlight a specific passage with the highlight tool and add a note. With this note tool, if I press CMD+SHIFT+N, we can see all the highlights and notes I’ve created, and double clicking in one note lets you jump to that page immediately.
That’s basically how I use this app but if you’re a student, professor, or PHD candidate who takes lots of notes, the great thing about Skim is when you export the PDF, you can choose to export with embedded notes so others can see your highlights and notes when they open the file. Alternatively, you can just export your notes in the Skim notes format, so everything you’ve written can be saved and backed up
If you’ve seen these types of photos on instagram and wondered how to get flip clock screen savers, you can download fliqlo completely for free for desktop, and in “Desktop and Screensavers” preferences, you can choose the scale and choose to show on multiple displays.

Downie is a super intuitive to use, you just copy and paste the URL of any video online into this app and it will even prompt you to download any subtitles it has found as well.
An advanced use case is within the app, press CMD+E to bring up something called “User-guided Extraction” and after pasting a website into the address bar, all video files available for download will pop up in the right, and you get a list of images available for download in another tab as well. Obviously be ethical, do the right thing and do not abuse these features.
A free alternative to Downie I’ve found is NeatDownloadManager and although it doesn’t look as fancy and polished, it does a great job for an app that is completely free to use.
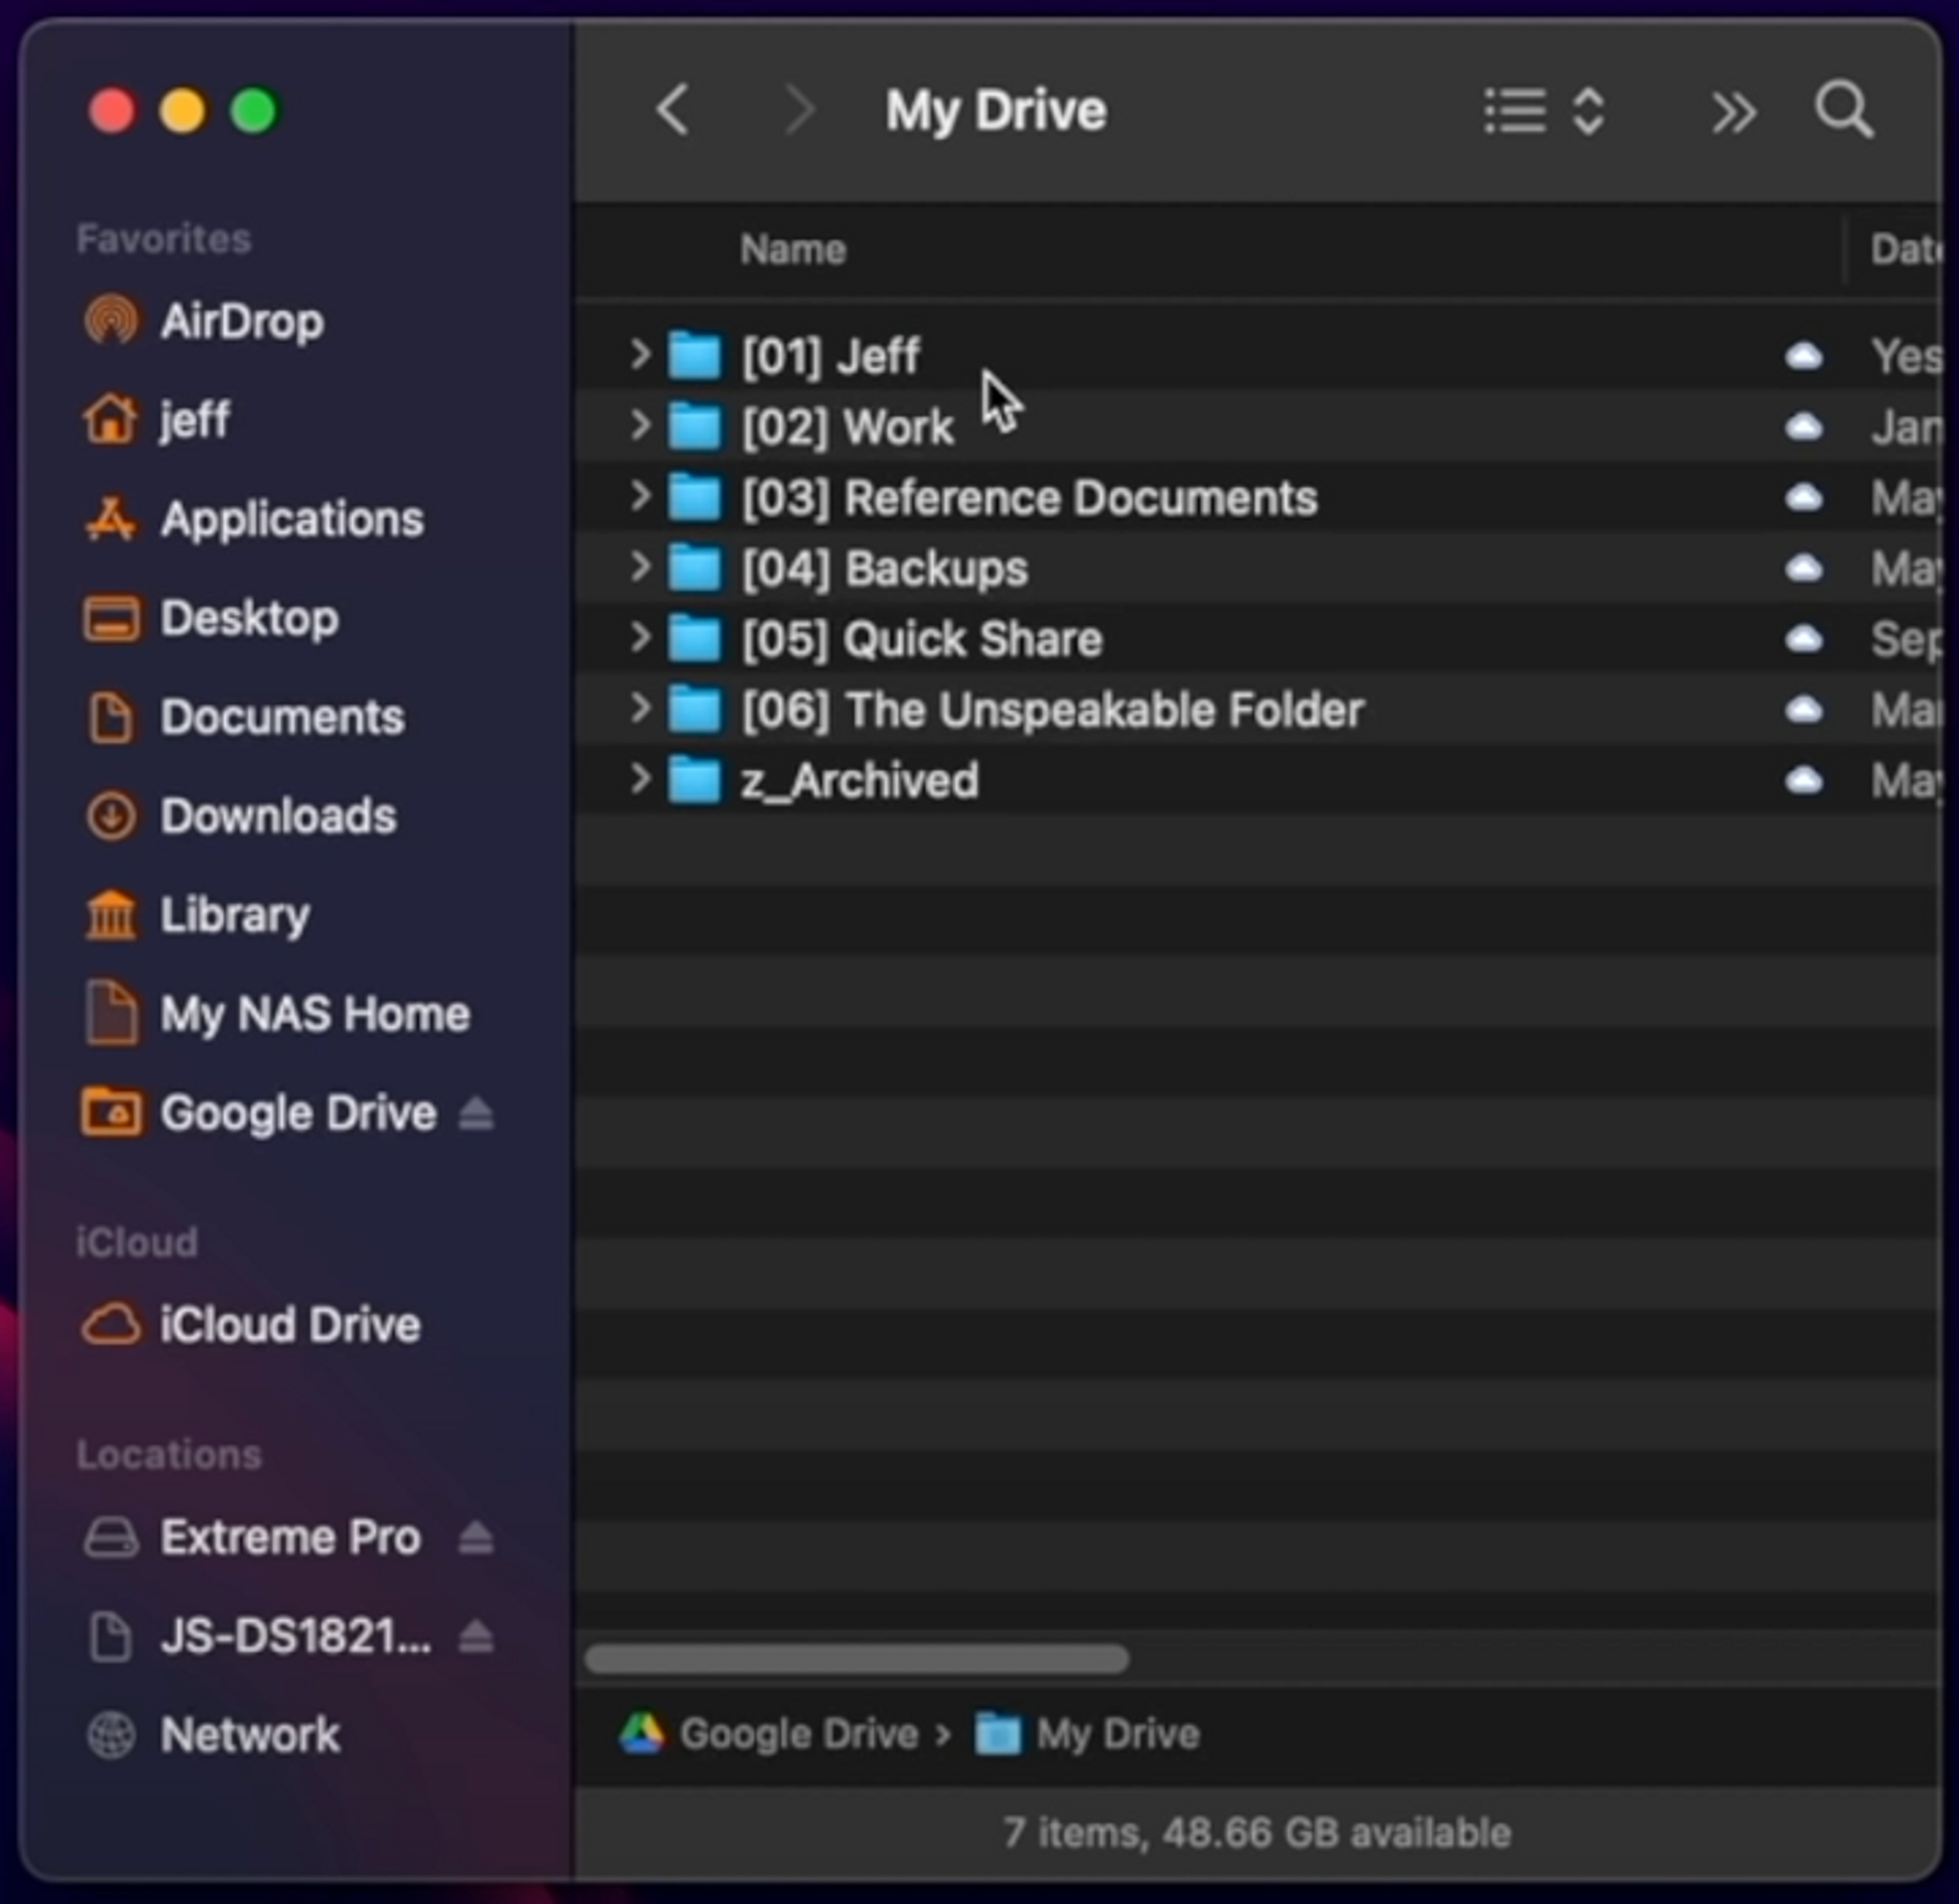
I’ve made an entire video about how to get Google Drive for Desktop up and running so I won’t go into detail here, but the main gist is if you use the Google Suite of tools personally or at work, it’s super convenient to access your files directly in Finder and the ability to make a folder or document available offline anytime you want can be game-changing!
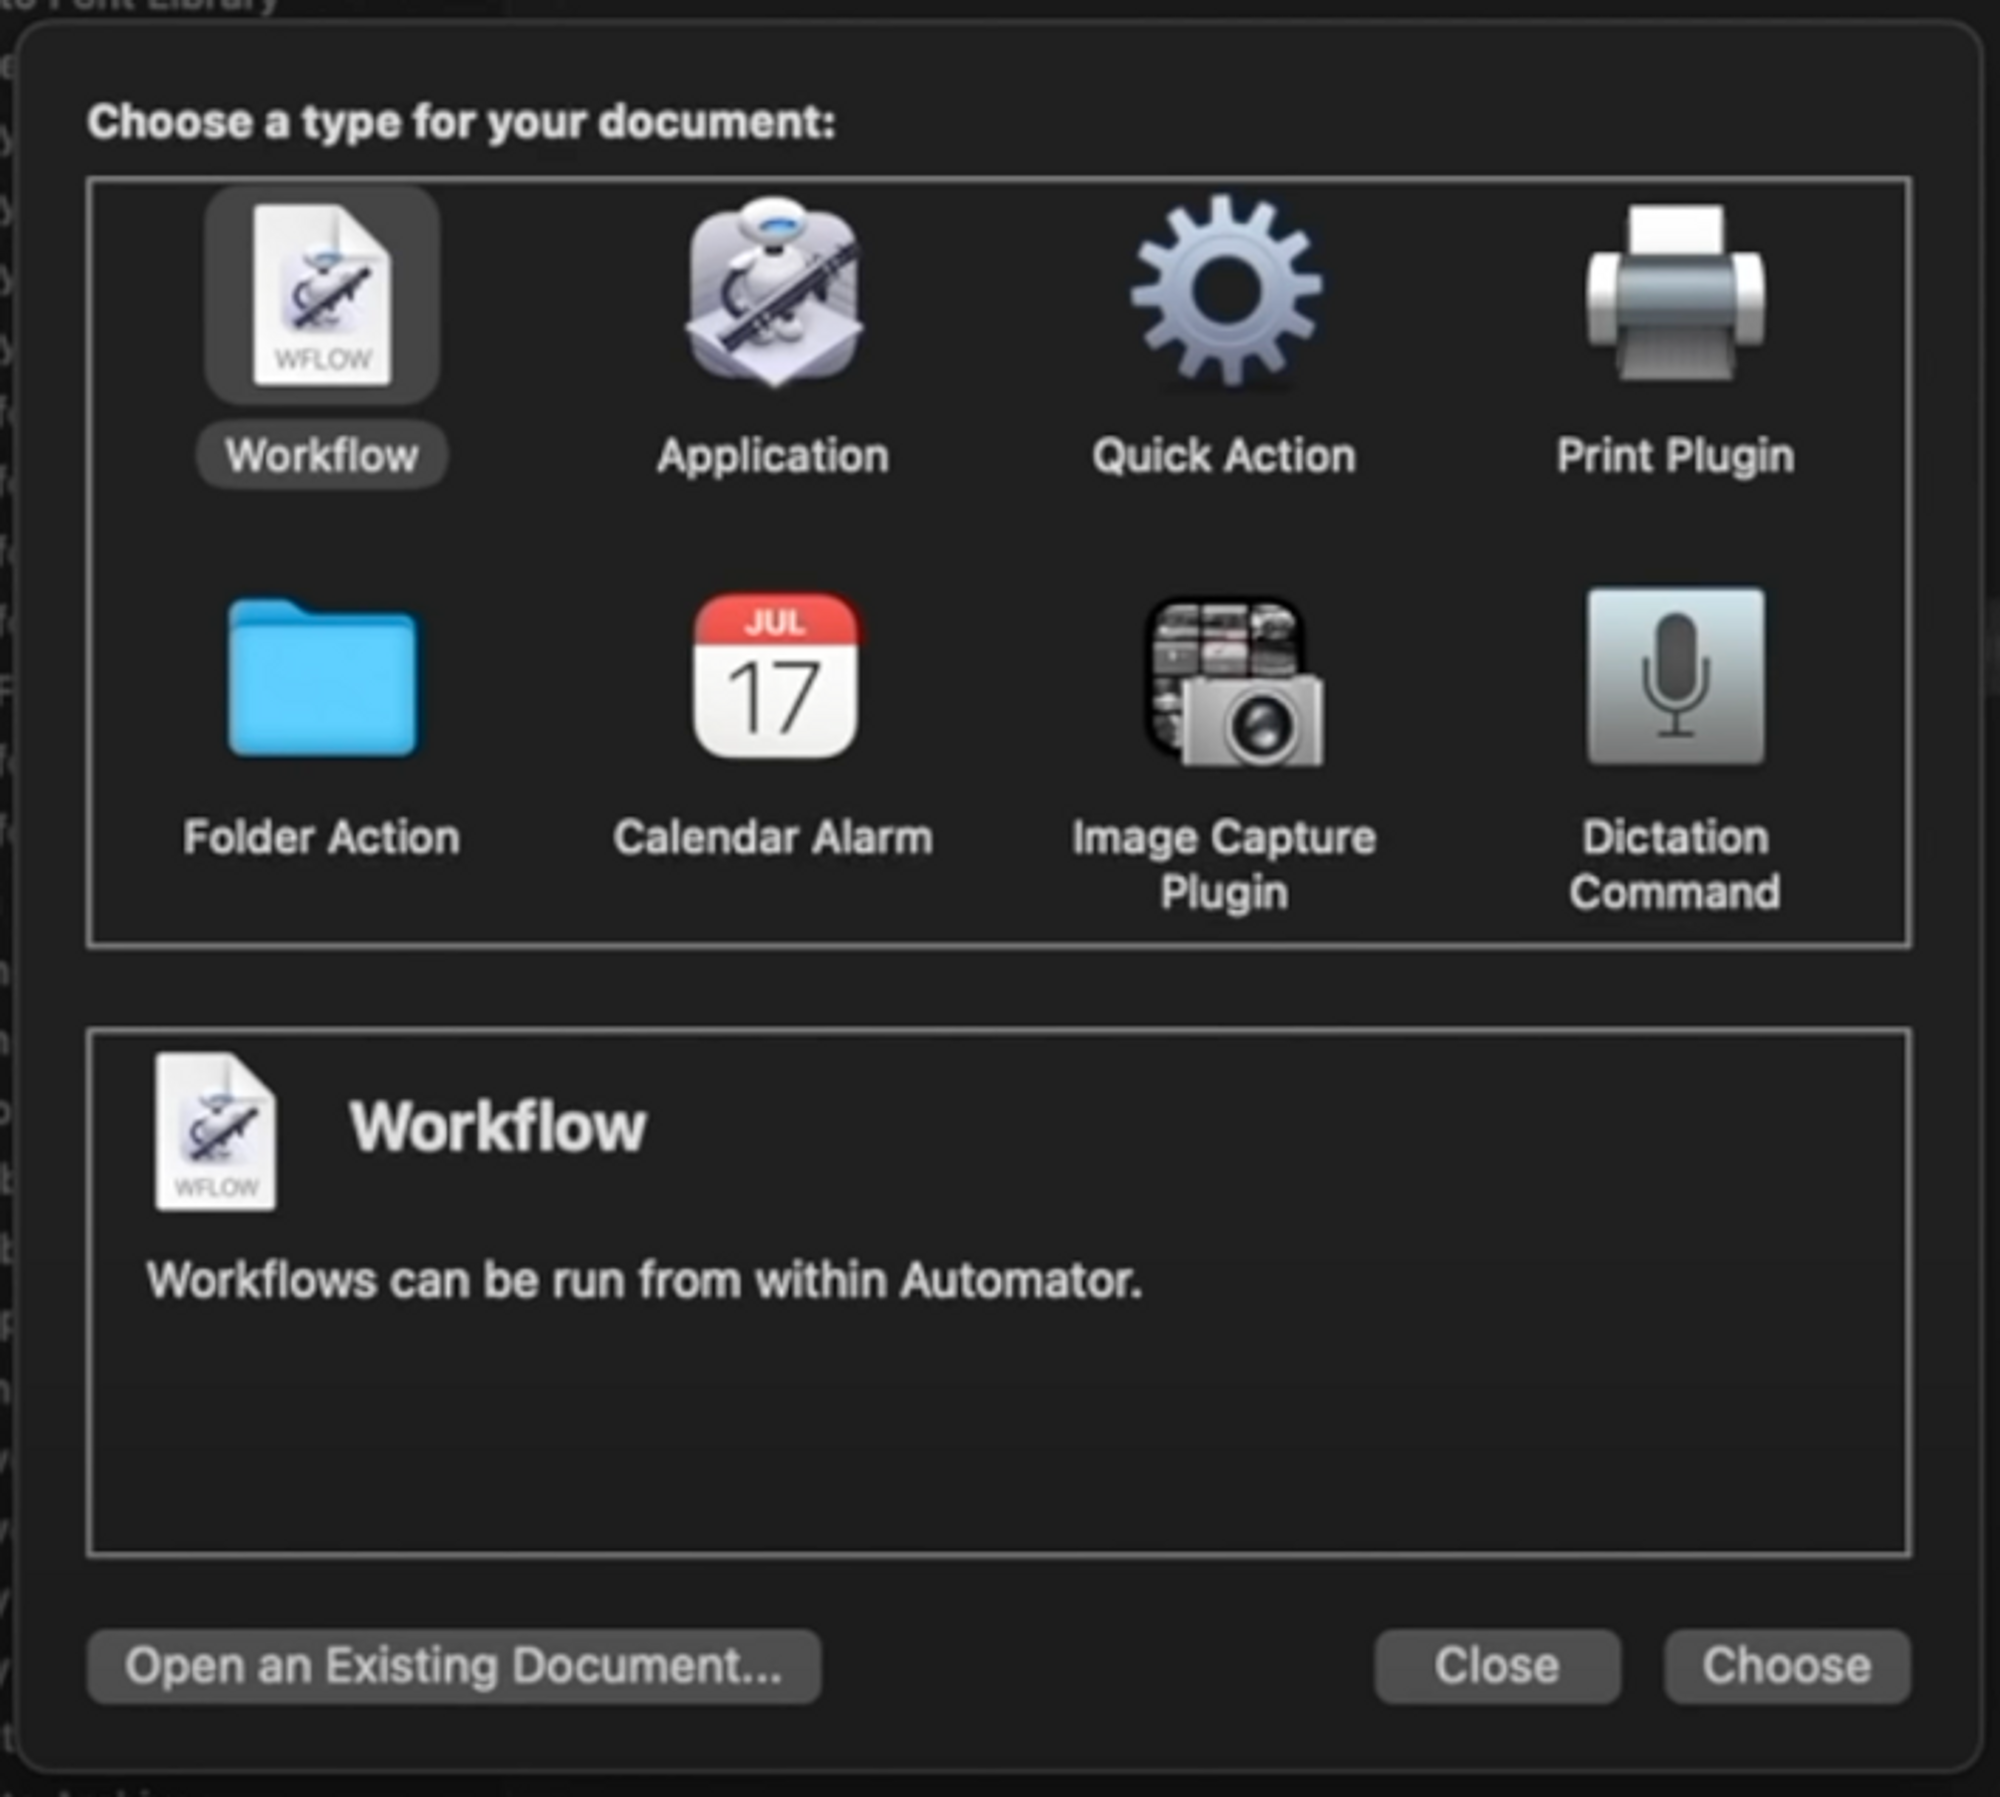
If you open up Automator, file > New, you’ll be greeted with this seemingly complicated menu. But don’t worry, I’m going to show you a very practical use case: where downloaded documents are automatically moved to specific folders based on a rule you create.
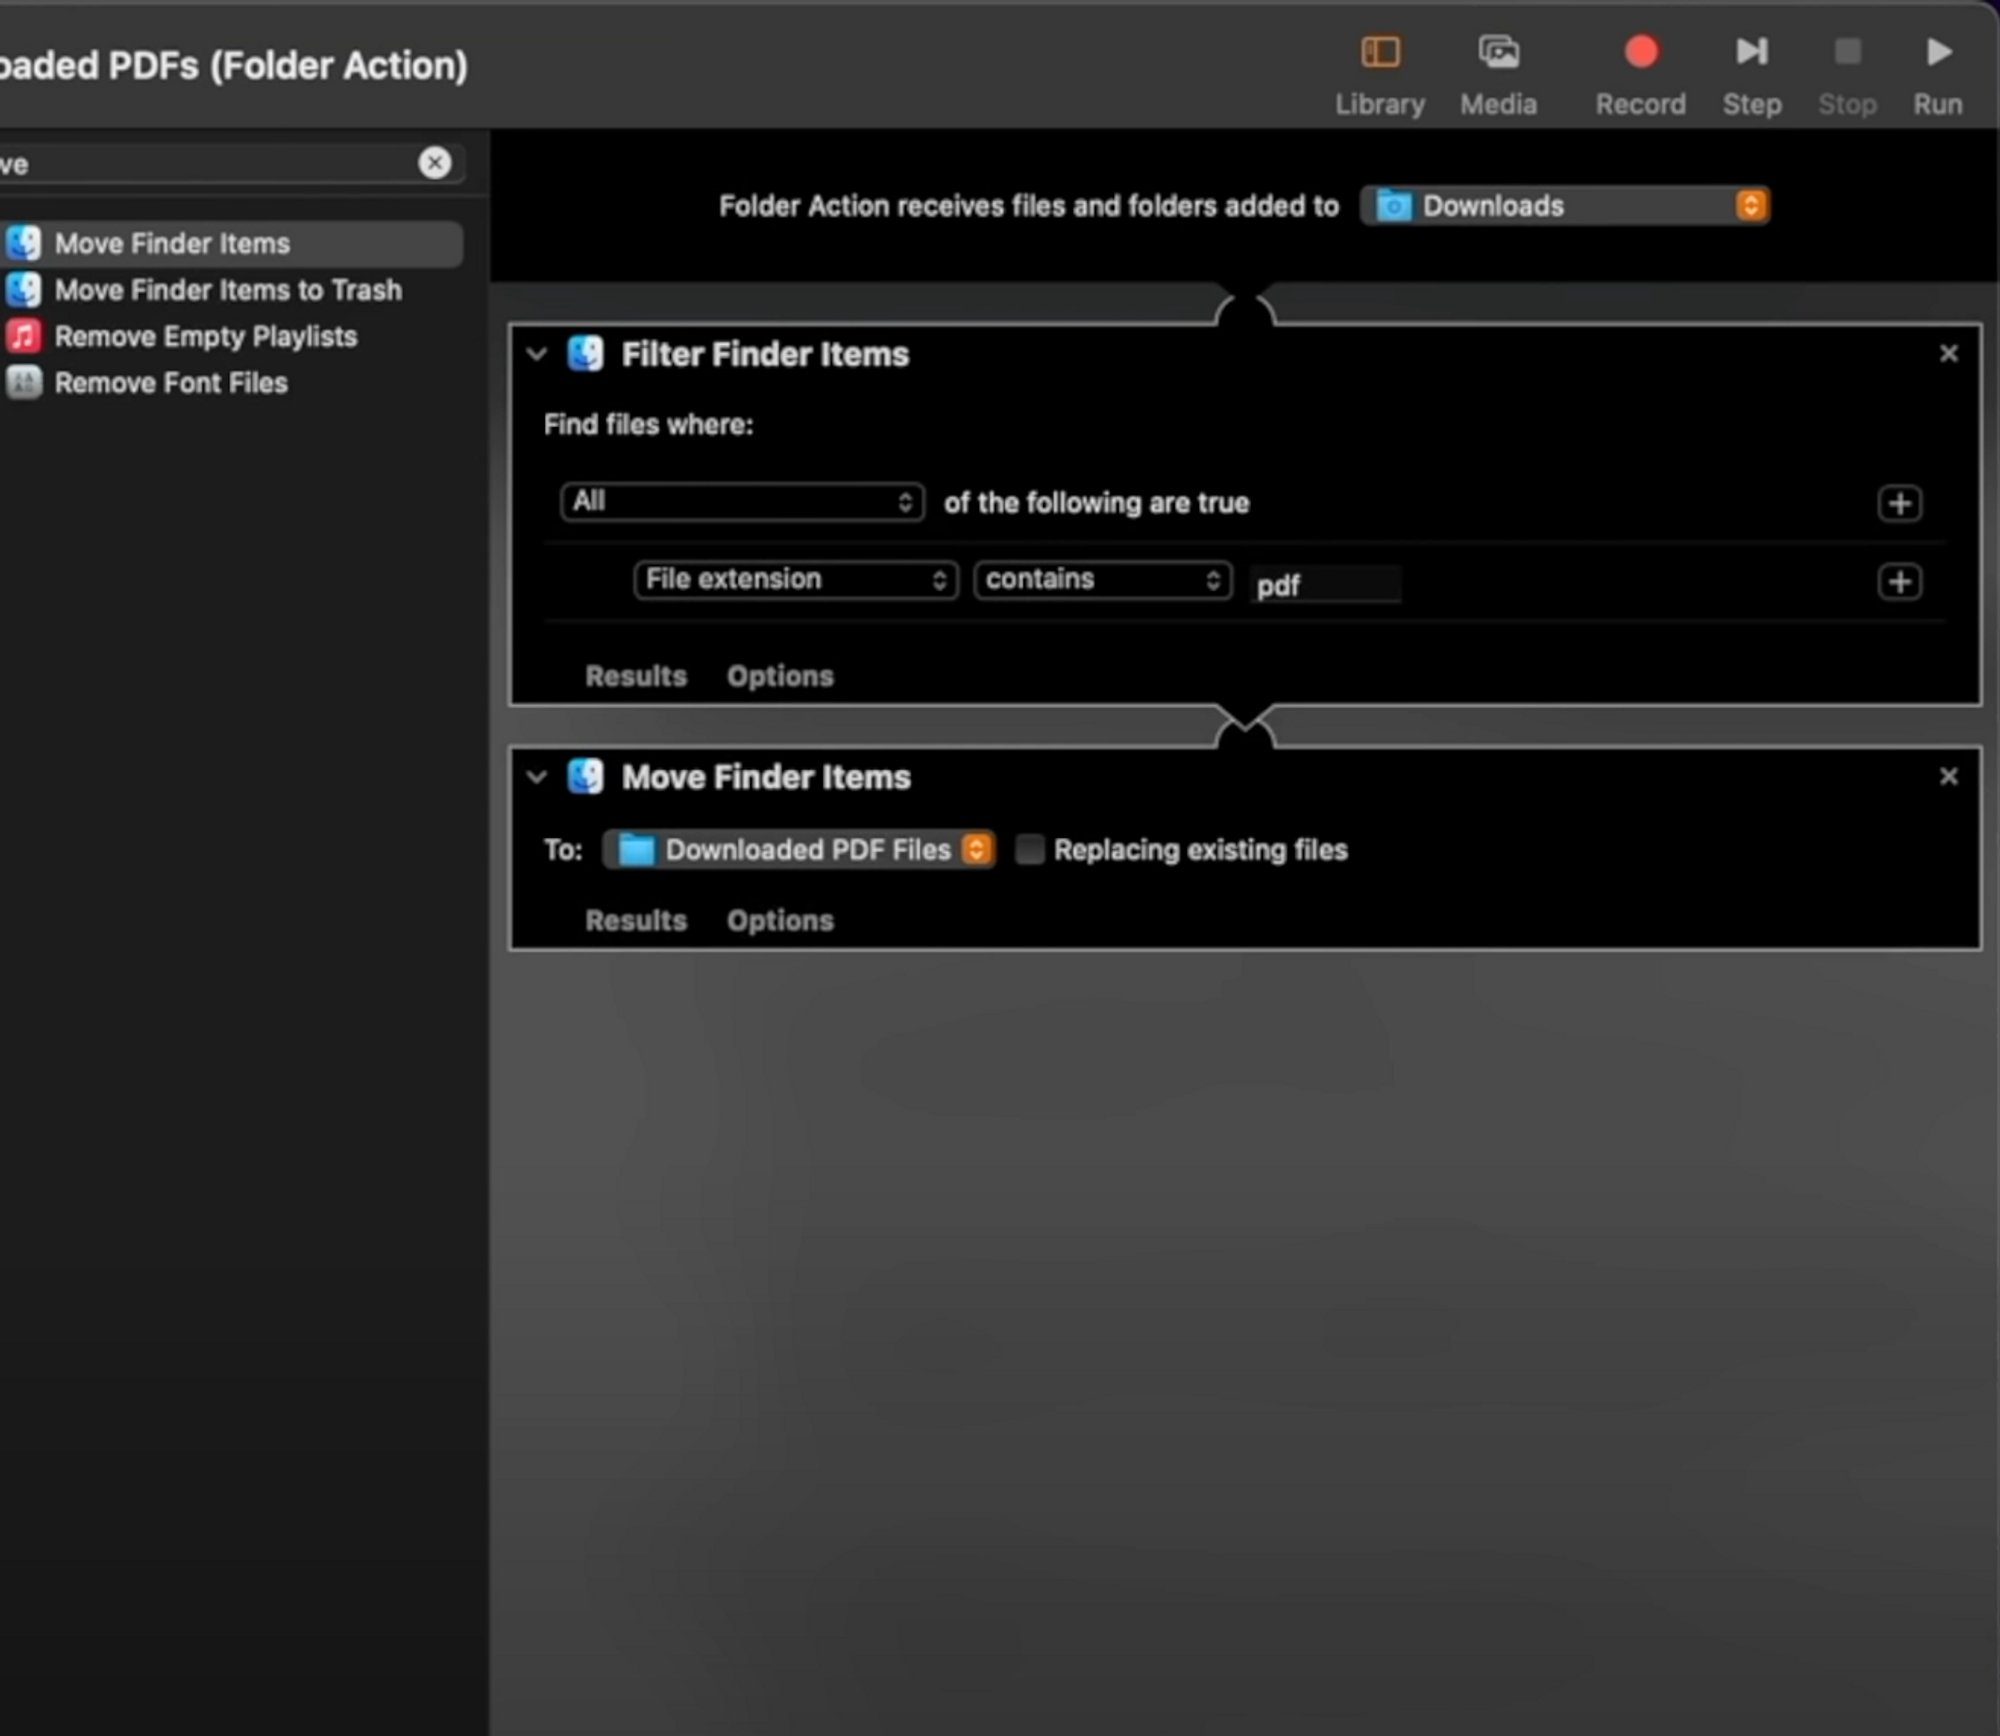
You can now press CMD+S to save this folder action, I’ve named mine “Move Downloaded PDFs,” and now, go online, download a PDF file, and if everything was done correctly, the pdf should move automatically to the destination folder you selected.
If you want to delete or edit a folder action you have to go to Library > Workflows > Applications > Folder actions.
Check out my Increase Your Productivity at Work playlist!