If you’re bored of the default blue folder icons on your Macbook, you can change it by doing the following:
Open an icon image you like and press CMD+A to select, then CMD+C to copy to clipboard
Right click on the folder and select “Get Info” (or use the keyboard shortcut CMD+I)
Select the icon on the top left and press CMD+V to paste!
I’ve created light and dark versions so you can mix and match to your liking—or you can use icons from flaticons.com or thenounproject
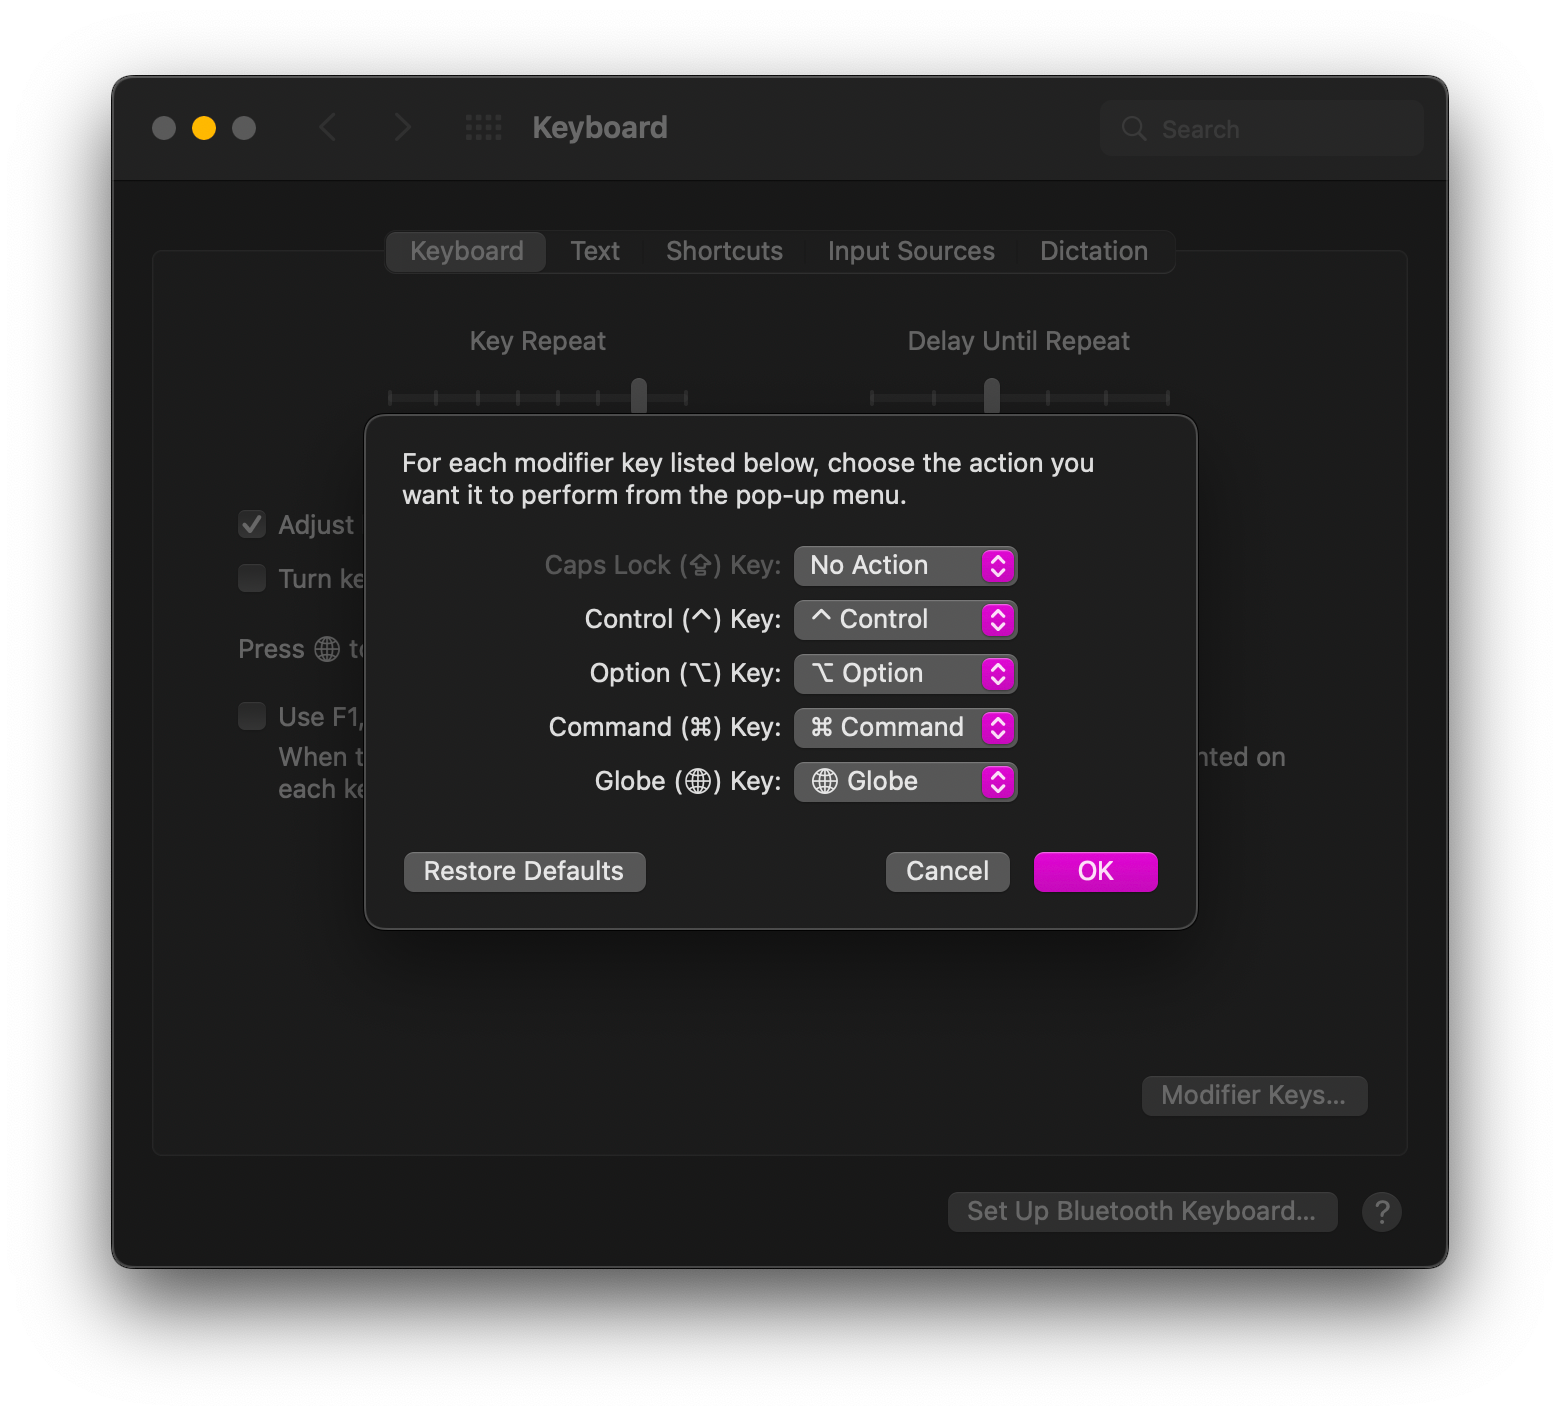
#2 - Disable Caps Lock
If you don’t want to turn on caps lock by mistake, you can actually disable it.
Open System Preferences > Keyboard > Modifier keys > you should see caps lock and select “No Action”
#3 - Customize View for System Preferences
To keep your System Preferences window clean and minimal:
Menu Bar > View > Customize > deselect all the preferences you never use
Click “Done”
This will NOT delete the system settings and you can always get to the deselected page through Spotlight or Alfred—a spotlight alternative. Here is a video explaining everything about Alfred.
#4 - Quick Access to Sound Preferences
To access both the speakers and microphone:
Go to Quick Menu (in the top right) > hold down OPTION > click “Sound” and you’ll see all the available sound input and output selections
This is much faster than using Spotlight or even Alfred to access Sound preferences
💡
Pro tip: Holding down SHIFT+OPTION will give you granular control over volume and brightness
#5 - Move Windows without Selecting them
An extremely underrated feature:
If you hold down the COMMAND button, you can move and drag windows without leaving your active application
This is helpful when you have multiple finder windows open and want to find the right one without getting lost in all the windows.
💡
Pro tip: While holding down COMMAND, select different tabs within your browser without selecting the browser, and reference the information you need while still typing in your active window
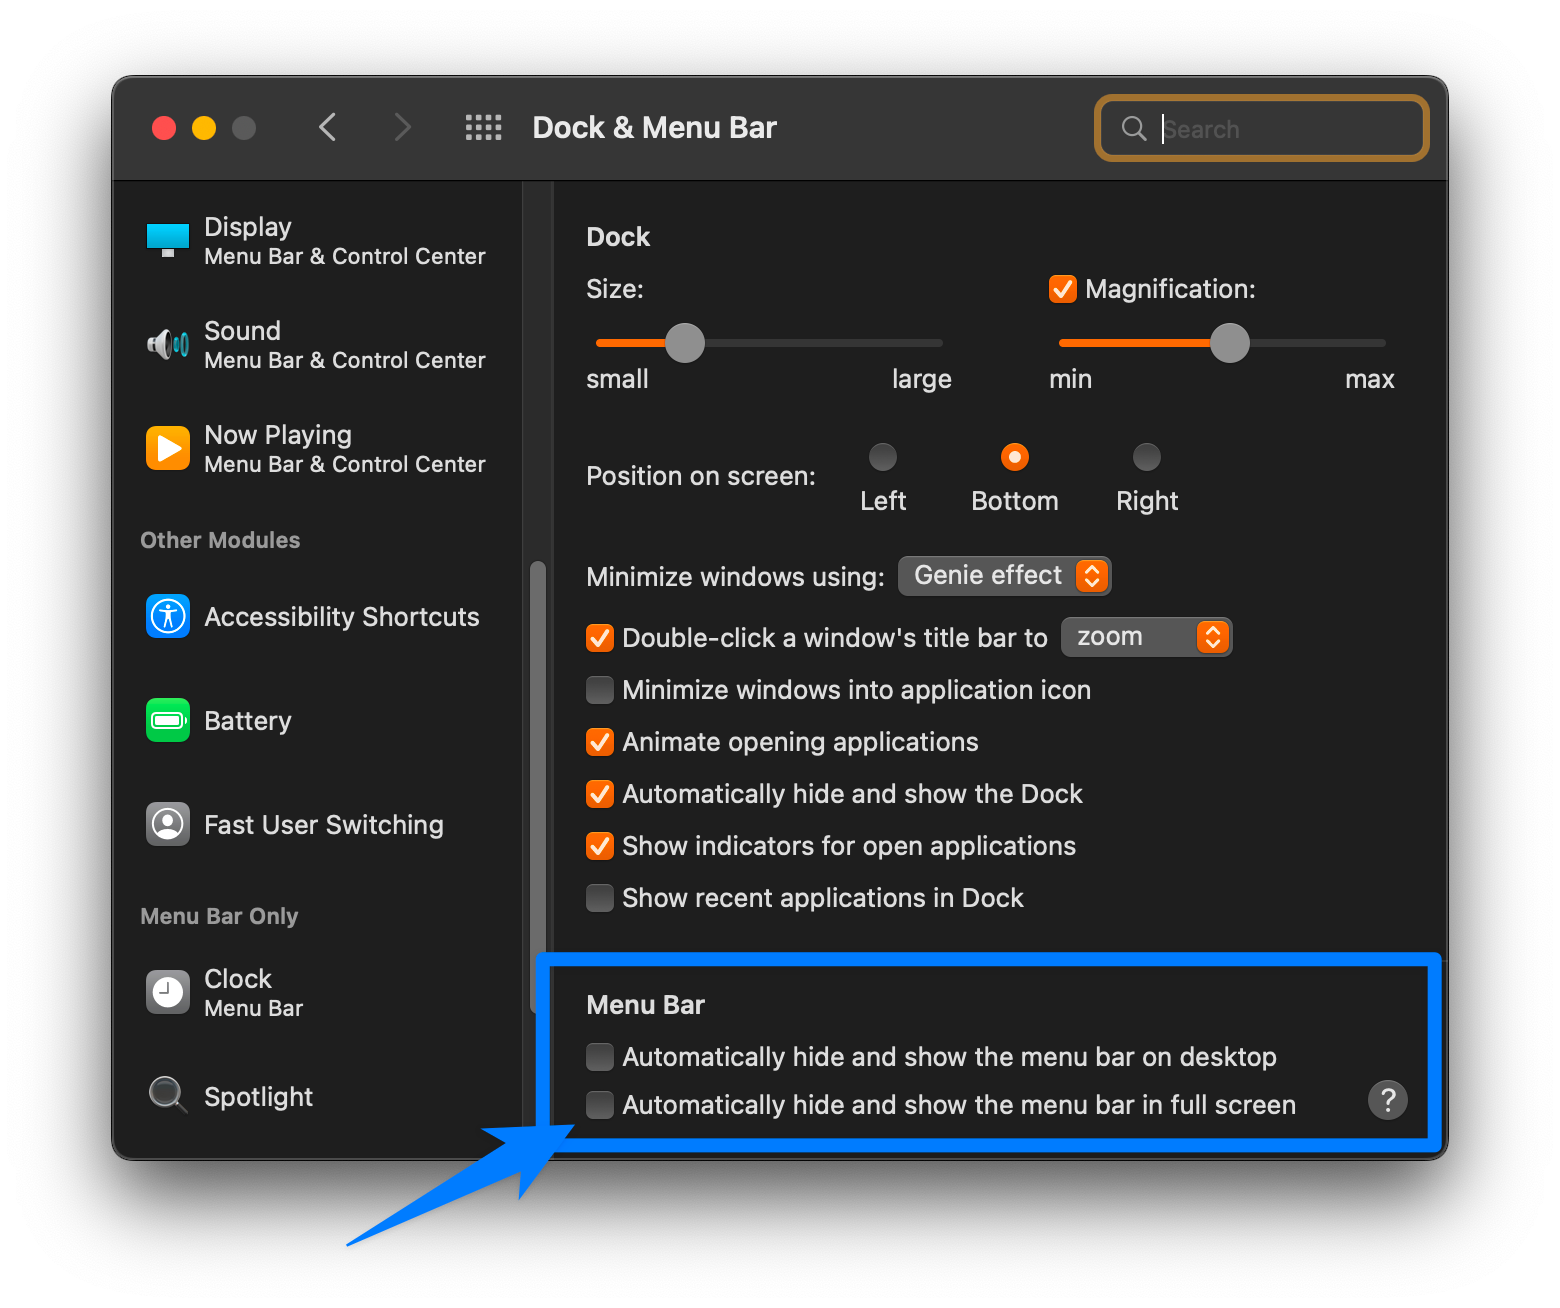
#6 - Show Menu Bar in Full Screen
If you want to always see the menu bar when you expand a window to full screen:
Go to System Preferences > Dock and Menu bar > uncheck “Automatically hide and show menu bar in full screen”
Now, you’ll always have the menu bar up top in full screen!
#7 - Move Files to Location
In Gmail, you can use the keyboard shortcut “V” to label and archive an email in 1 step. This takes the email out of the main inbox, and moves it to a label. You can do something similar in Finder.
To move files:
CMD+C to copy the file you want to move > then CMD+OPT+V to move the file to the new location
This automatically deletes the original file so you don’t have to go back to remove it from the original folder.
#8 - Finder Window Management
If you have multiple windows open within the same app:
When holding down CMD+TAB > press the up or down arrows for that application to clearly see which windows are open
Press enter to select a window
I personally prefer the Alt-tab window management app that’s open source and completely free to use (watch this video for more on my favorite productivity apps for the Mac).
#9 - Preview Files the RIGHT Way
To preview a file:
Press SPACE to preview, and use your arrow keys to go down the list
Press SPACE again and the file you want is already highlighted
Press CMD+C to copy or do something else with it directly
Don’t judge me, I had no idea.
💡
Pro tip: If you’re previewing an image with text, you can just highlight the text with the cursor, CMD+C to copy and paste it directly somewhere else.
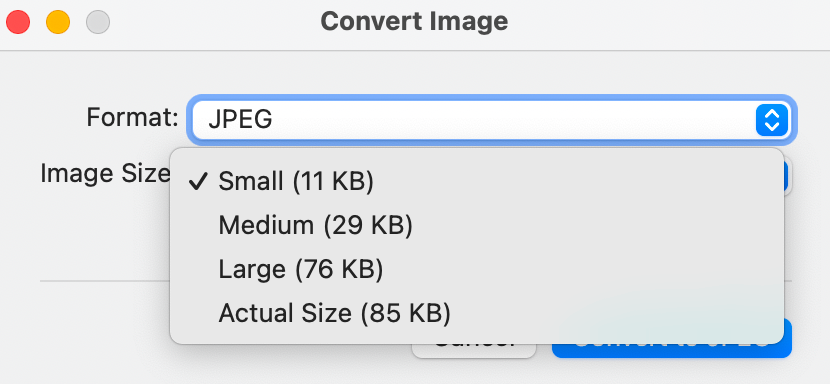
#10 - Convert Images on Mac
Here is a great tip for saving space on your Macbook:
Select all the photos you want to convert
Right click to go to “Quick Actions” > select “Convert Image”
Even if you select the “Large” option, it will be a tenth of the size of the original
Bonus Tip:
Many of you know that my favorite screenshot app is CleanShotX, but unfortunately it’s paid. Here’s a way for Google Chrome users to take a full-page screenshot for free AND without using a third-party app:
Navigate to the webpage you want to take a full-page screenshot of
Press CMD+OPT+I to bring up developer tools
Find the line of code that corresponds to the full page of content, select it
Press SHIFT+CMD+P to bring up the command bar, type in “screenshot” and select > “Capture node screenshot”
After a second or two, the full page screenshot should be downloaded!