If you found my Inbox Zero video helpful, that's fantastic! Just a heads-up that Gmail went through a major upgrade this year so the previous workflow is now outdated.
Since Gmail will never stop evolving (which is a good thing) and to make sure you're getting the absolute most out of your email, I've decided to incorporate the most updated Inbox Zero workflows into my Workspace Academy course.
Why Use Inbox Zero?
Inbox Zero ensures that as each new email arrives, you're not distracted by earlier messages competing for your attention. Inbox Zero works with most email service providers like Email, Outlook and Yahoo.
All emails you receive fall under 3 categories:
Emails you need to take action on
Emails you need ANOTHER PARTY to take action on
Emails you might want to read through again
Don’t worry about screwing up your inbox settings, everything can be undone! Now let’s dive right into it.
First, let's change some settings
Go to your Gmail settings, click “See all settings”
Click on the “’Advanced” tab > enable “Auto-advance” > save changes
On your main page, click “See all settings” again
Click on the “General” tab > scroll down to “Auto-advance”
Make sure the “Go to the next (newer) conversation” option is selected
Scroll down to “Keyboard shortcuts” > select “Keyboard shortcuts on” > save changes
Feel free to take a break here if you need to. 😮💨 I know it’s a lot.
Let's create some labels
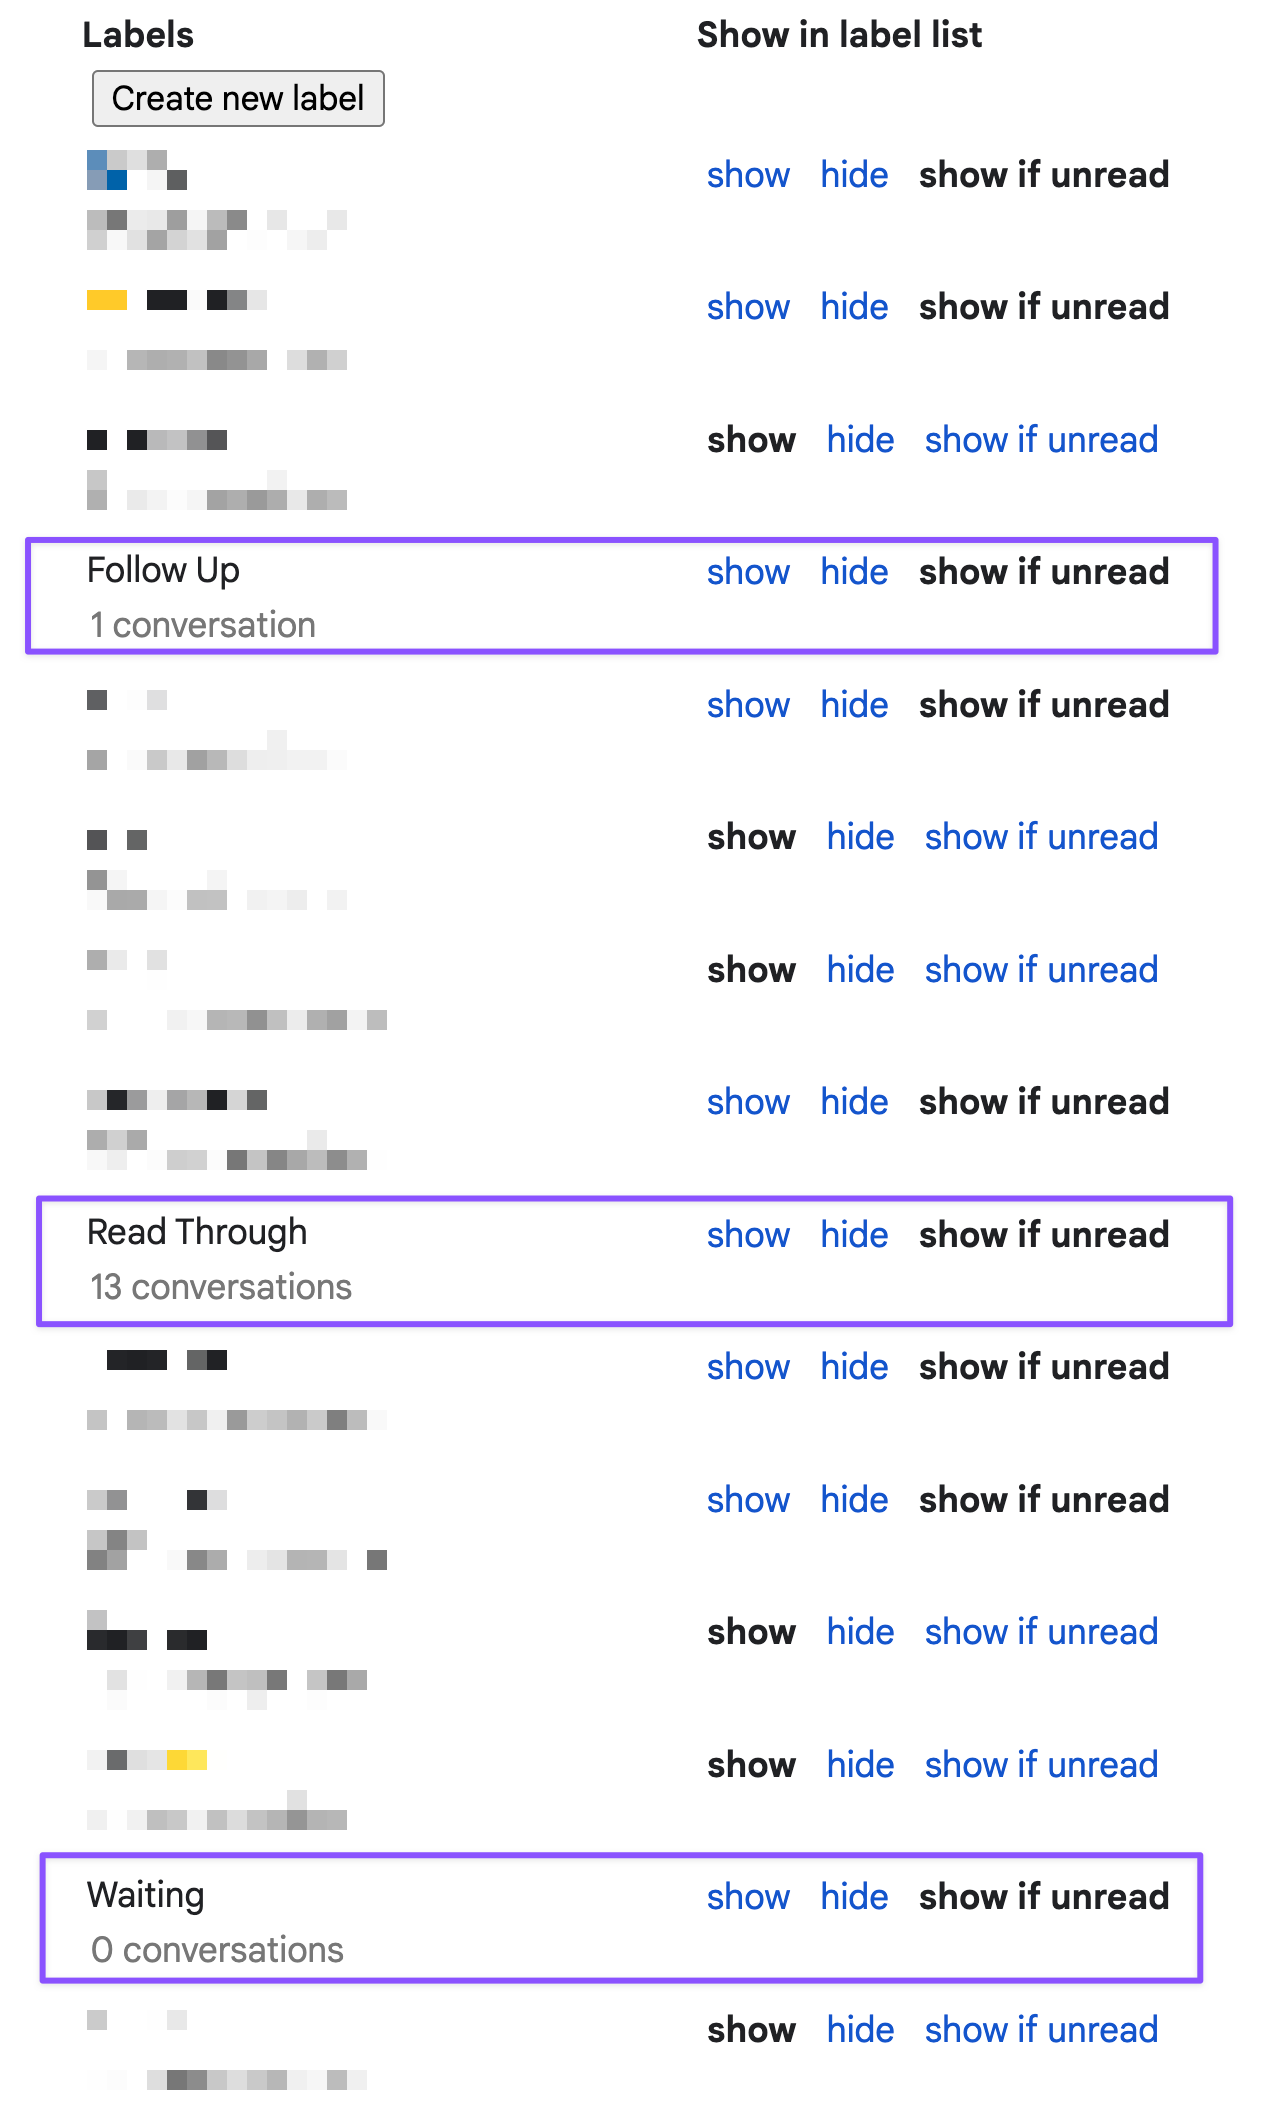
Under “See all settings”, click on the “Labels” tab—we will create 4 labels
At the bottom of the page, click “Create new label”
For the first label, type in “Follow Up“ (with a space in between) > click “Create”
Select “Create new label” > type in “Waiting” > “Create”
Create a new label, type in “Read Through” (with a space in between)
Finally, create another label that says “Calendar”
All caught up? No? Perfect.
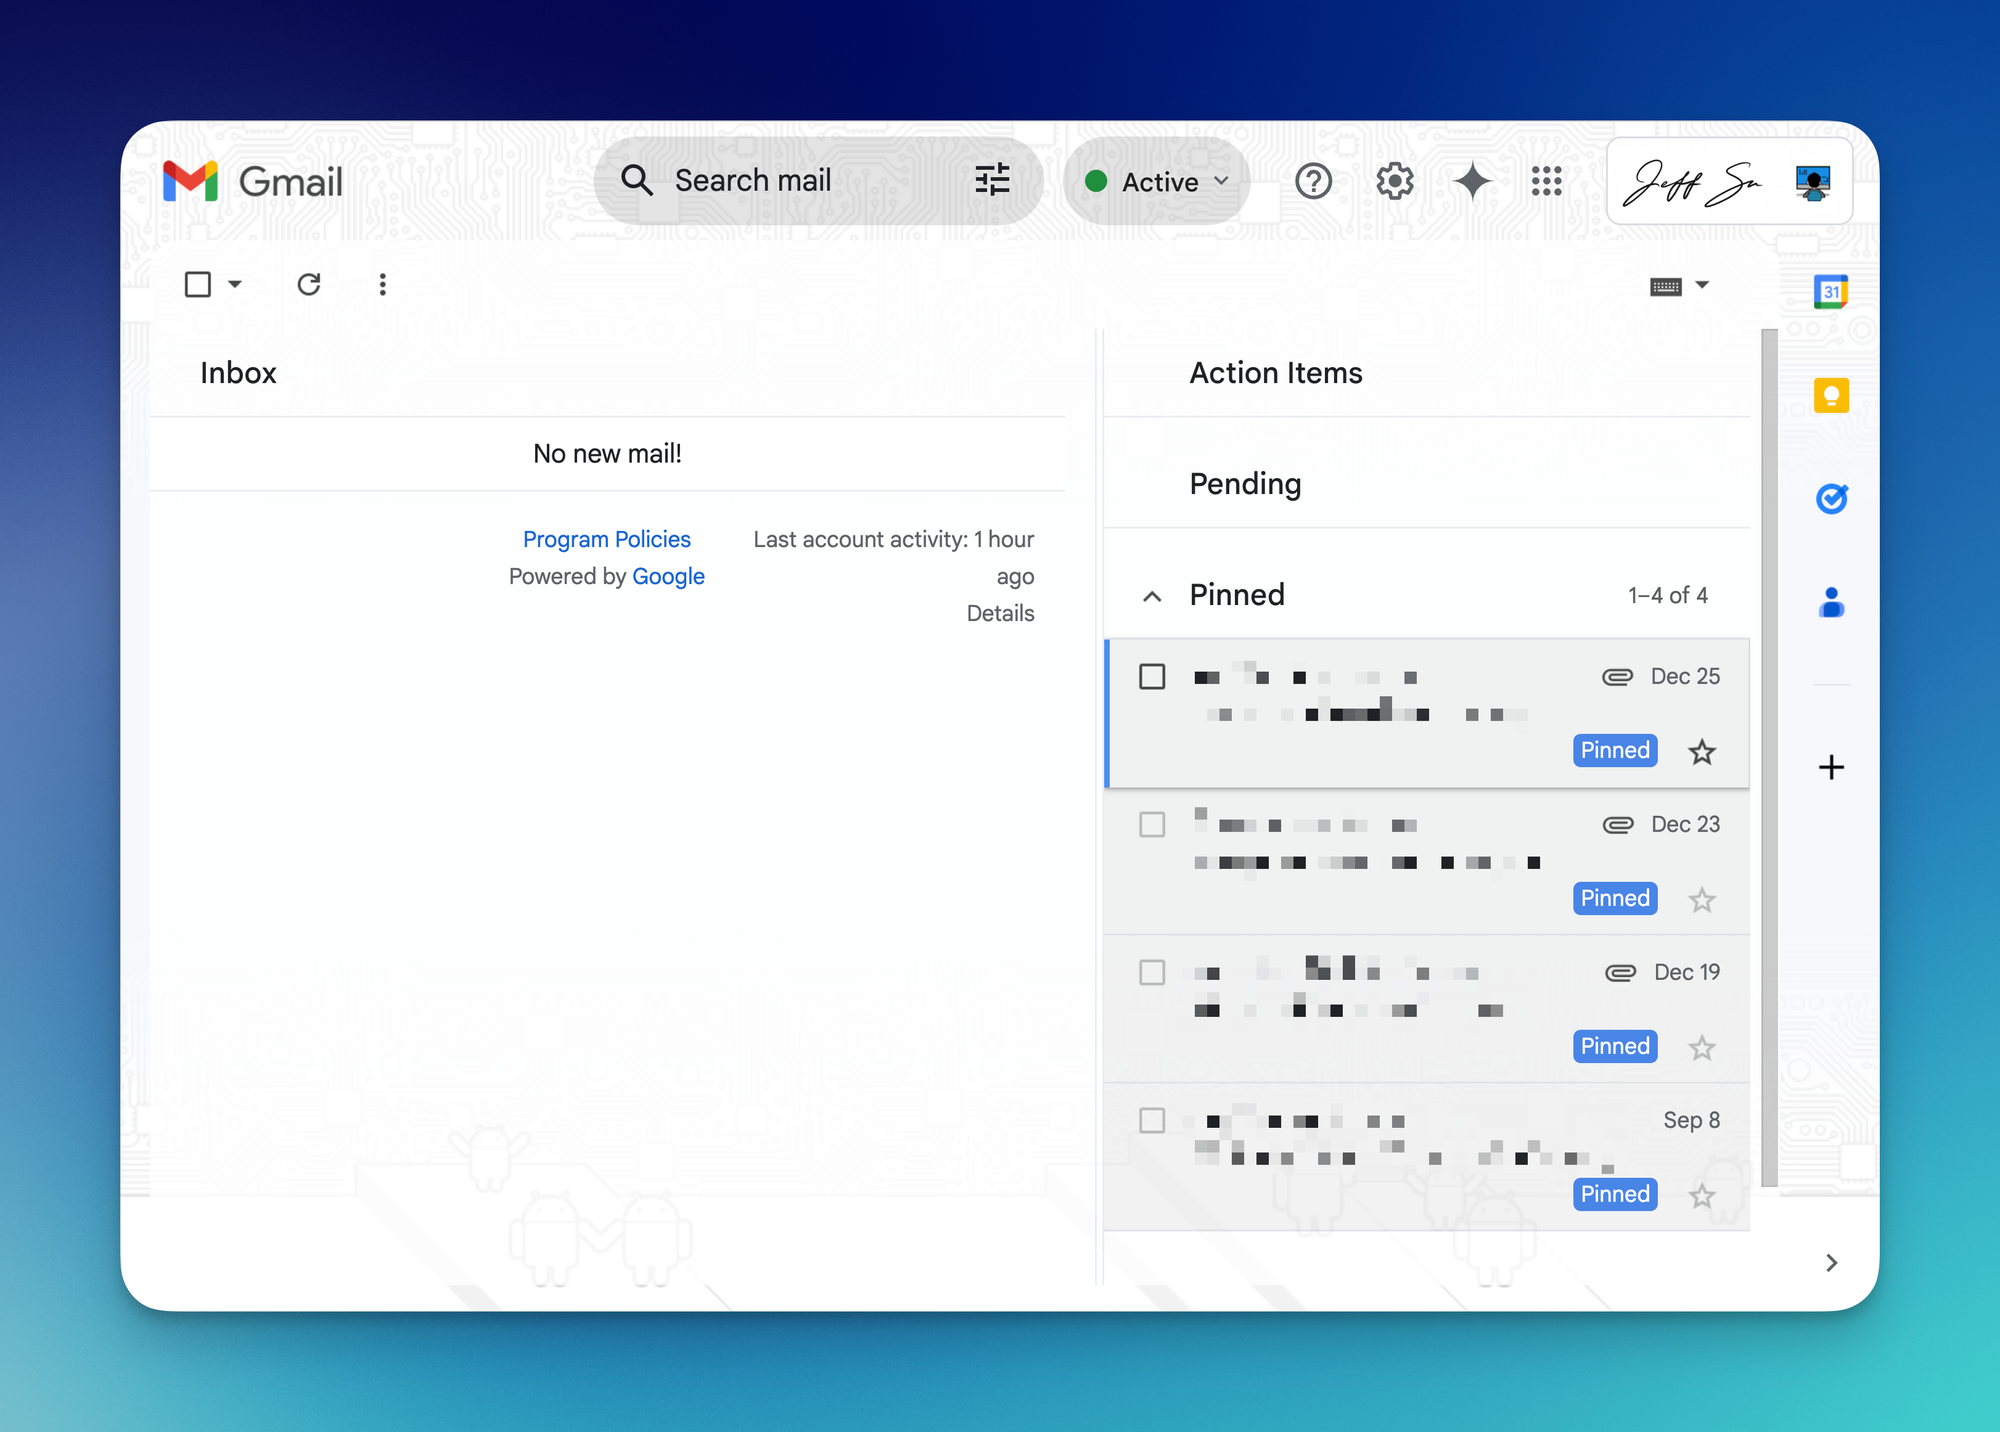
Now we head into the Multiple Inbox Tab
After your 4 labels are created, go to the “Inbox” tab under settings
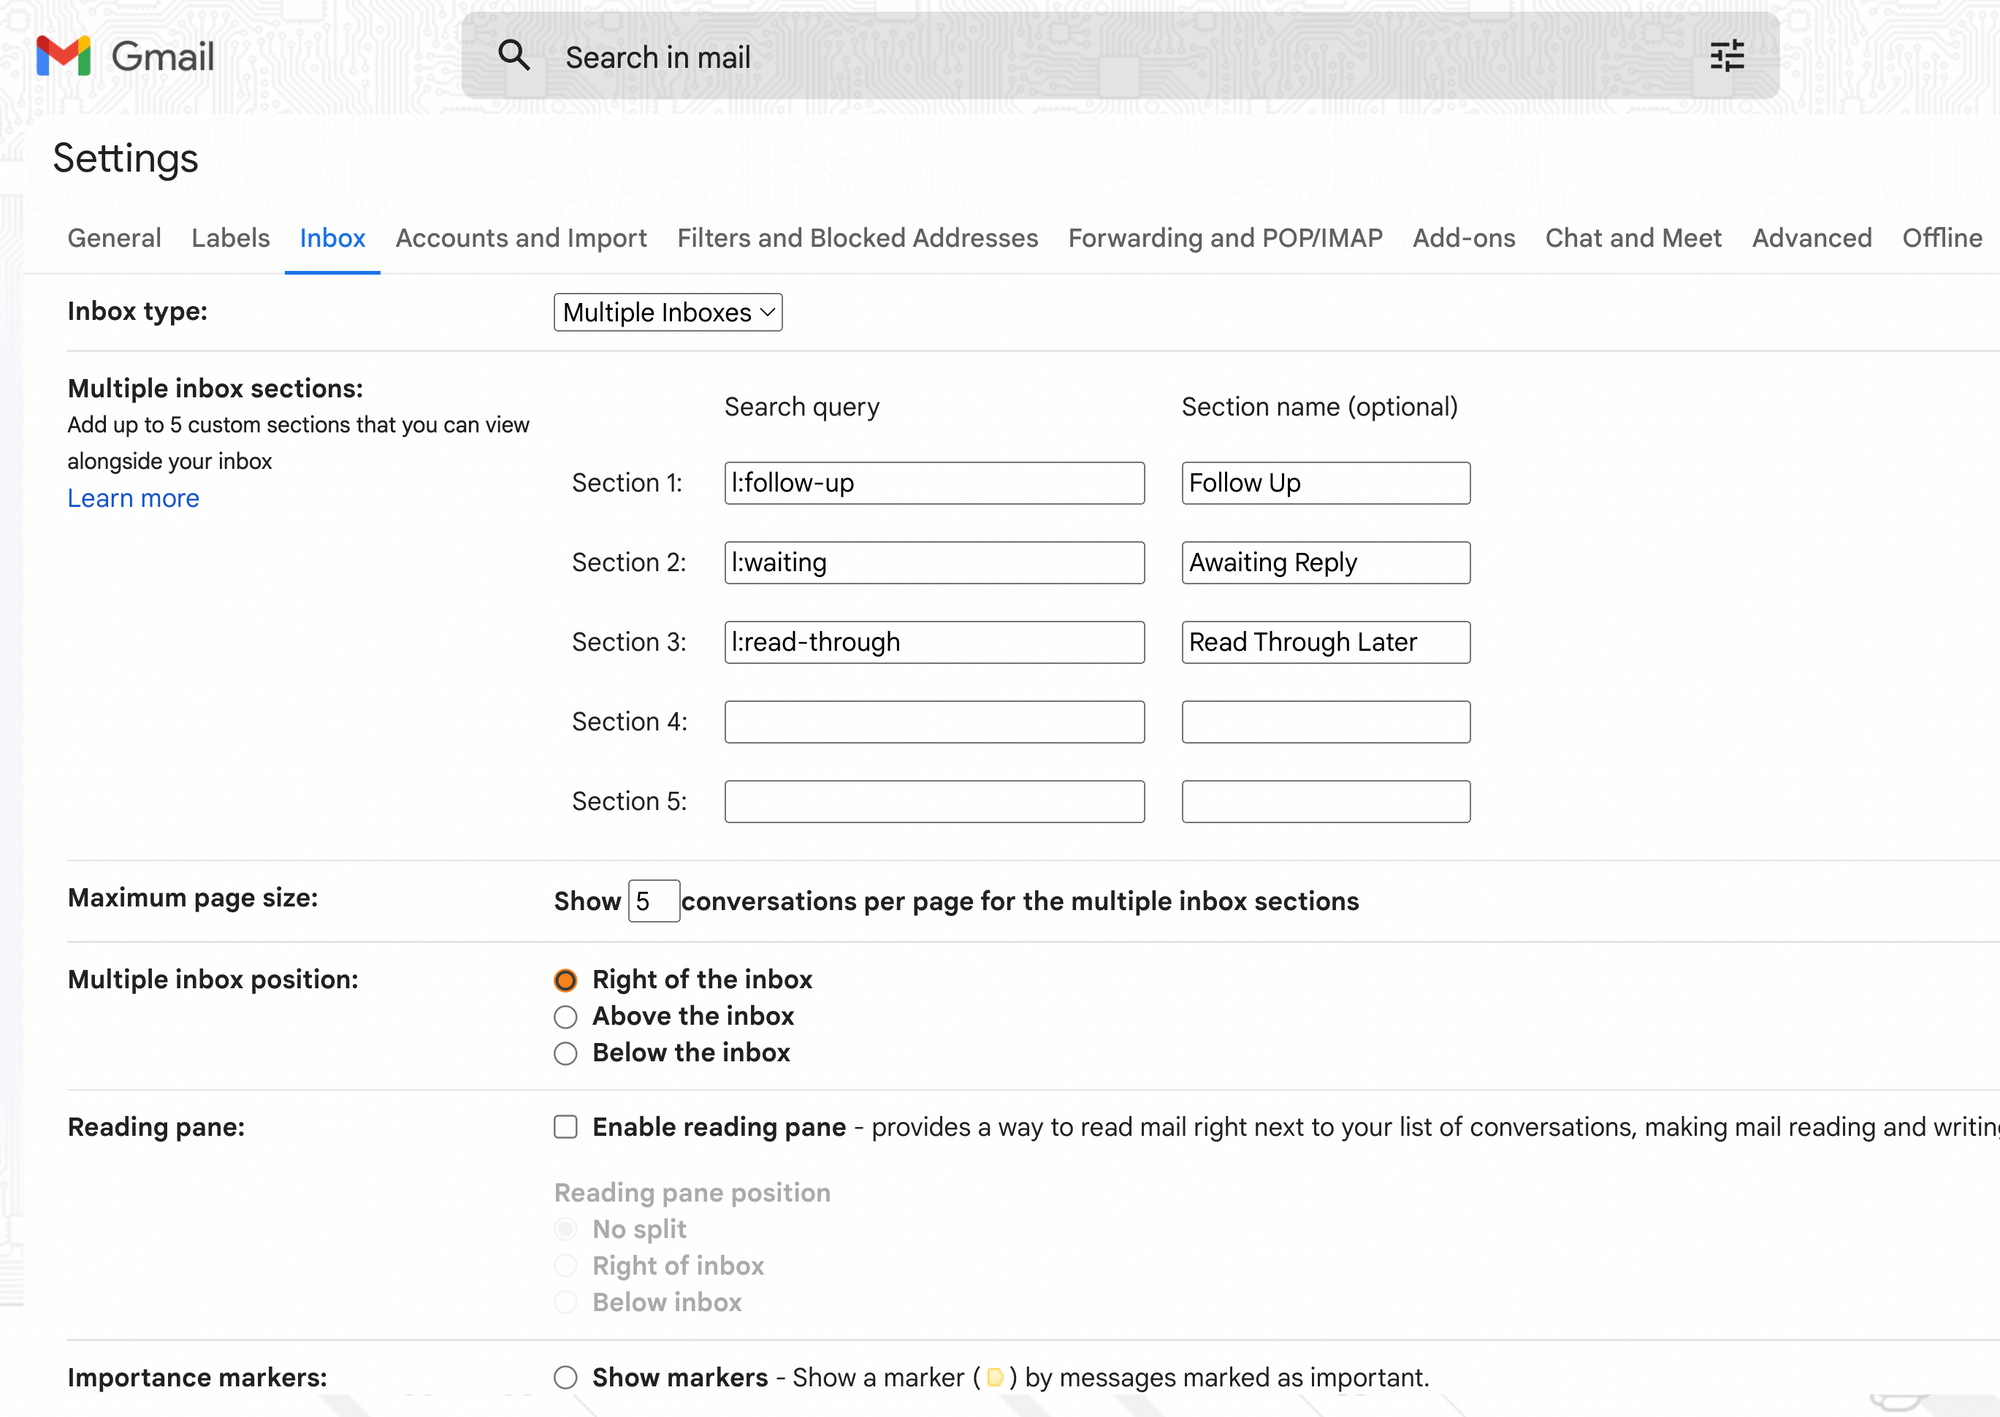
Under the “Inbox type”, click the dropdown menu > click “Multiple Inboxes”
Within the Multiple Inbox sections, for Section 1, type in “l:follow-up” (that’s a lower case L, not an I) under Search query
Under Section name, type in “Action Items”
For Section 2, type in “l:waiting” for Search query and “Awaiting Reply” for Section name
For Section 3, type in “l:read-through” for Search query and “Read Through” for Section name
We will save the Calendar label for something later on.
For the Maximum page size, type in show "10" conversations per page for the multiple inbox sections
For Multiple inbox position, select the “Right of the inbox” option
For Importance markers, select “No markers”
For Filtered mail, select “Don’t override filters”
SAVE CHANGES!
The Inbox Zero Workflow in action
At the beginning of a typical work day, the first thing I do is sort through my emails by their types. For interesting reports I might want to refer to again:
I click “L” on my keyboard for “label” > start typing “Read Through”
Hit Enter to apply the label > press “E” to archive the email
We enabled the “Auto-advance” earlier, so Gmail will automatically take you to the next newer email. For an email I don’t need to take action on (aka useless 🙄), I archive that immediately by pressing “E”.
If you want to mute an email thread you are part of:
Click “M” on your keyboard to mute.
Unless someone emails you directly, you will not receive any more updates from that email thread.
For an email you do need to take action on:
Click “l” and label it as “Follow Up”
Once again, hit “E” to archive the email.
If you’re a visual person like me, you can actually color-code each of your labels. On the left hand side of your screen:
Click on the 3 dots for the intended label > click on “Label color” and select the color.
💡
Pro Tip: If you want to return to your main inbox screen, simply type “G” and then “I”.
How to use the “Waiting” Label
“Waiting” emails mean that someone else needs to take action, but you are still responsible for the outcome. A manual way to apply the “Waiting” label to an email:
Compose your email to the other person > click “Send”
Go to your “Sent” emails > type “l:waiting” > hit Enter to apply the label
This email will now show up under your “Awaiting Reply” inbox. This reminds you to chase the other person for information if they haven’t gotten back to you in a while.
To efficiently automate this process:
Go to “See all settings” > click on the “Filters and Blocked Addressors” tab
Click on “Create a new filter”
In the “To” field, type in “youremailaddress+waiting@gmail.com” > click “Create filter”
On the next page, select “Skip the Inbox”, “Mark as read”, and “Apply the label - Waiting” > click “Create filter”
Now, when you write a follow up email to the other person:
Compose your email
Within the “Bcc” field, type in “youremailaddress+waiting@gmail.com”
Send out your email
When you return to your home page, the email is pop up in your “Waiting Inbox”!
Calendar Filter
If you’re constantly bombarded with online meetings and zoom calls, you probably need this feature. With this filter, you can easily see if someone has declined your calendar invite. To create this filter:
Go to “See all settings” > click the “Filters and Blocked Addresses” tab
Click on “Create a new filter”
In the “Has the words” field, type in “filename:invite.ics AND accepted” > create filter
Select “Skip the inbox” and “Mark as read” options > create filter
Now whenever you send a calendar invite out, only the ones that are declined will stay in your inbox, and the accepted notification will be archived.
Apply to your own inbox
My advice: go back 3-4 weeks in your inbox and manually label your emails like how we just did.
Archive all irrelevant emails (shortcut = “e”)
“Follow Up” for emails you need to take action on
“Waiting” for emails you need to chase someone for
“Read Through” for emails you will reference
THEN, click “Select All” and “Select all conversations in this inbox” > click “Archive”. Don’t worry, you did not just delete all your mail. You can find it again by going to your “All Mail” folder.
Further reading
You’ll become a Gmail connoisseur after checking out these 10 tips you can add to your repertoire.