Master 80% of Notion with this ONE Feature
| Notion
If you only learn one Notion feature today, make it Relations. This single feature unlocks 80% of what makes Notion powerful. Once you understand how Relations work, you can build systems that keep your projects, tasks, and notes perfectly organized without the mess.
In this guide, I'll show you why most people struggle with Notion, how Relations solve that problem, and how to set them up in just two minutes.
Let's get started!
Most people use Notion in one of two ways. Both seem logical at first, but both break down fast.
You create one master Projects page. Under that, you add separate pages for each project. Inside each project page, you list tasks and notes.

This works for about two weeks. Then it falls apart.
You can't see project statuses at a glance. Completed tasks pile up next to ongoing ones. You can't filter notes by type or relevance. The system works fine for one or two simple projects, but it becomes a mess as your workload grows.
You've watched a few Notion tutorials. You know better now. So you create separate databases for Projects, Tasks, and Notes. You add properties like status, end date, and note type. Everything looks organized.
But here's the problem: when you open a specific work project, you see tasks from all your projects mixed together. "Buy tickets for Tomorrowland" sits right next to your quarterly report deadline. Notes from different projects jumble together on the same page.
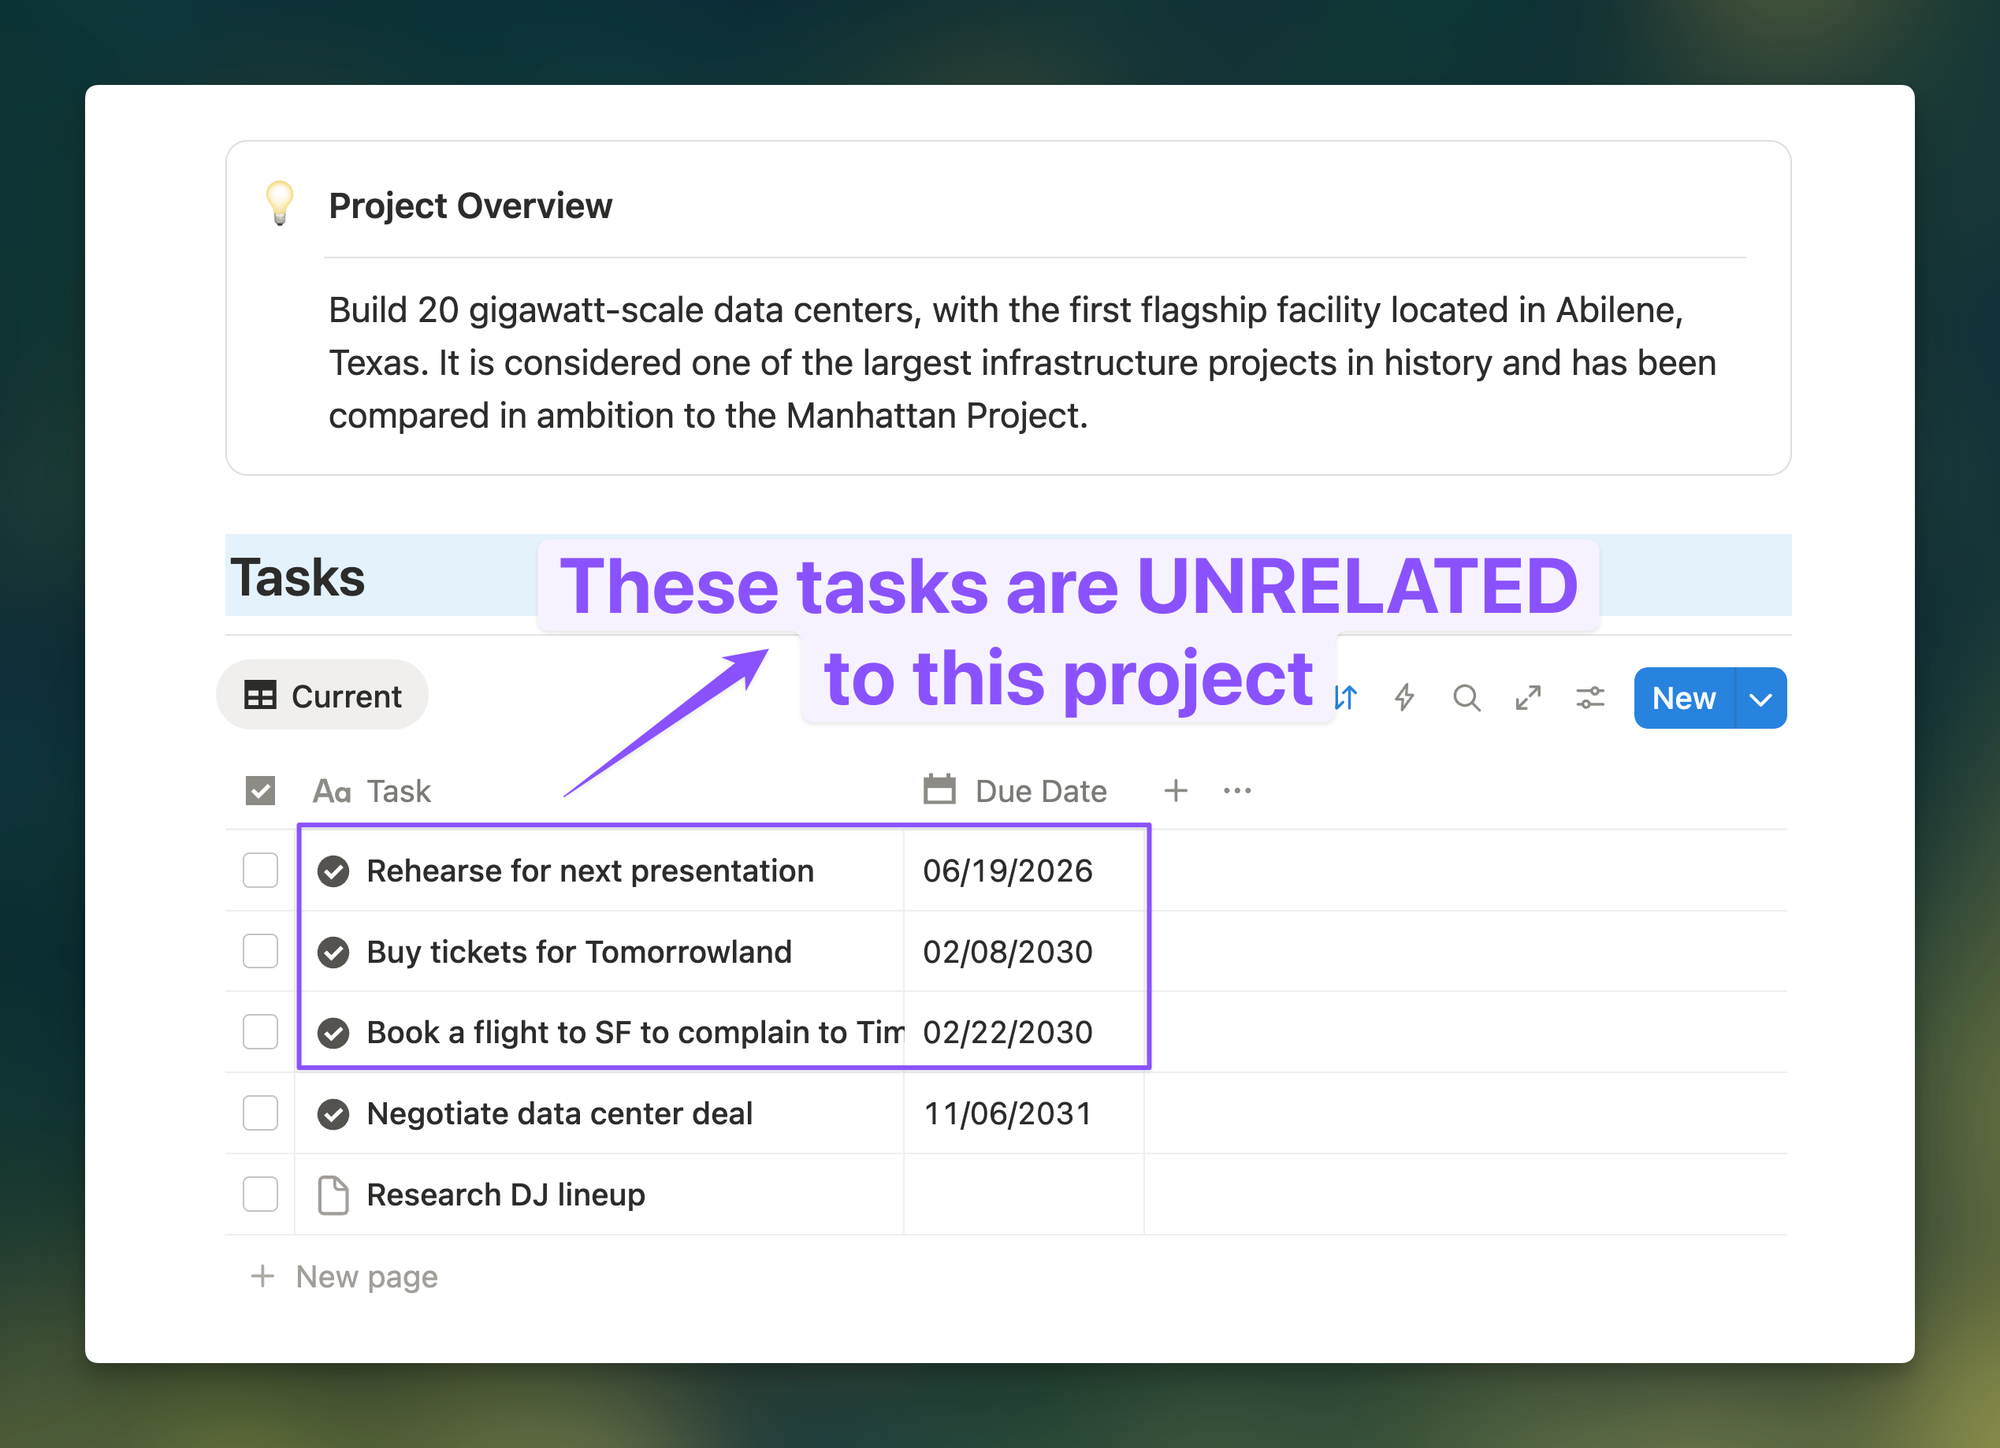
You end up with organized clutter. Better than Level 1, but still confusing.
The solution is connecting your databases using Relations. When you set this up correctly, opening a project shows only the tasks and notes related to that project. Everything else stays hidden.
This mirrors how your brain actually works. You want to see relevant information when you need it, not everything all at once.
By default, Notion databases exist in silos. Your Projects database doesn't know your Tasks database exists. The Relations feature bridges these silos so databases can share information.
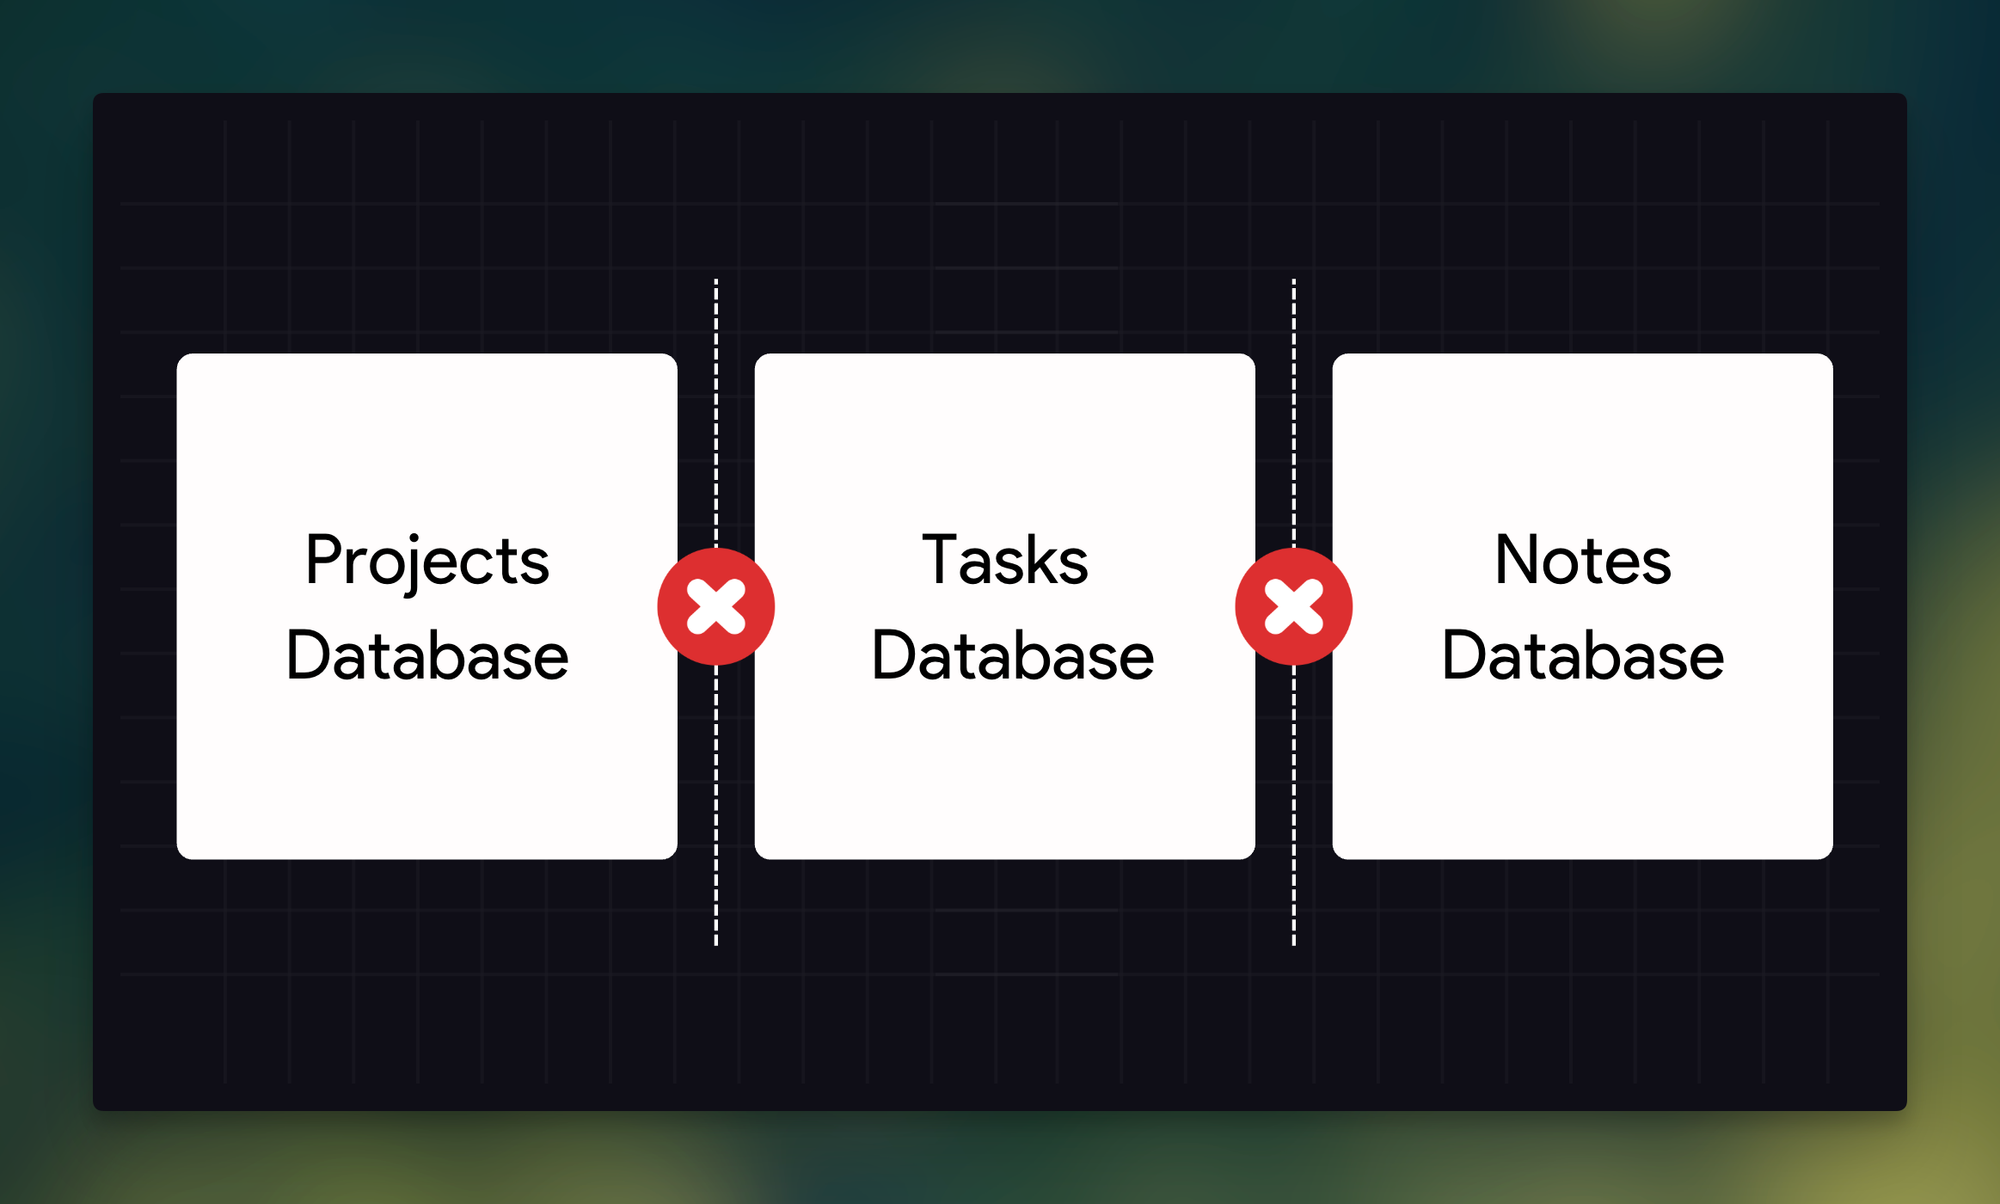
This single capability unlocks every advanced Notion system you've seen online. Second Brain setups, project dashboards, life management systems - they all rely on Relations. You cannot build these systems without understanding this feature first.
The setup takes about two minutes. Follow these steps exactly.
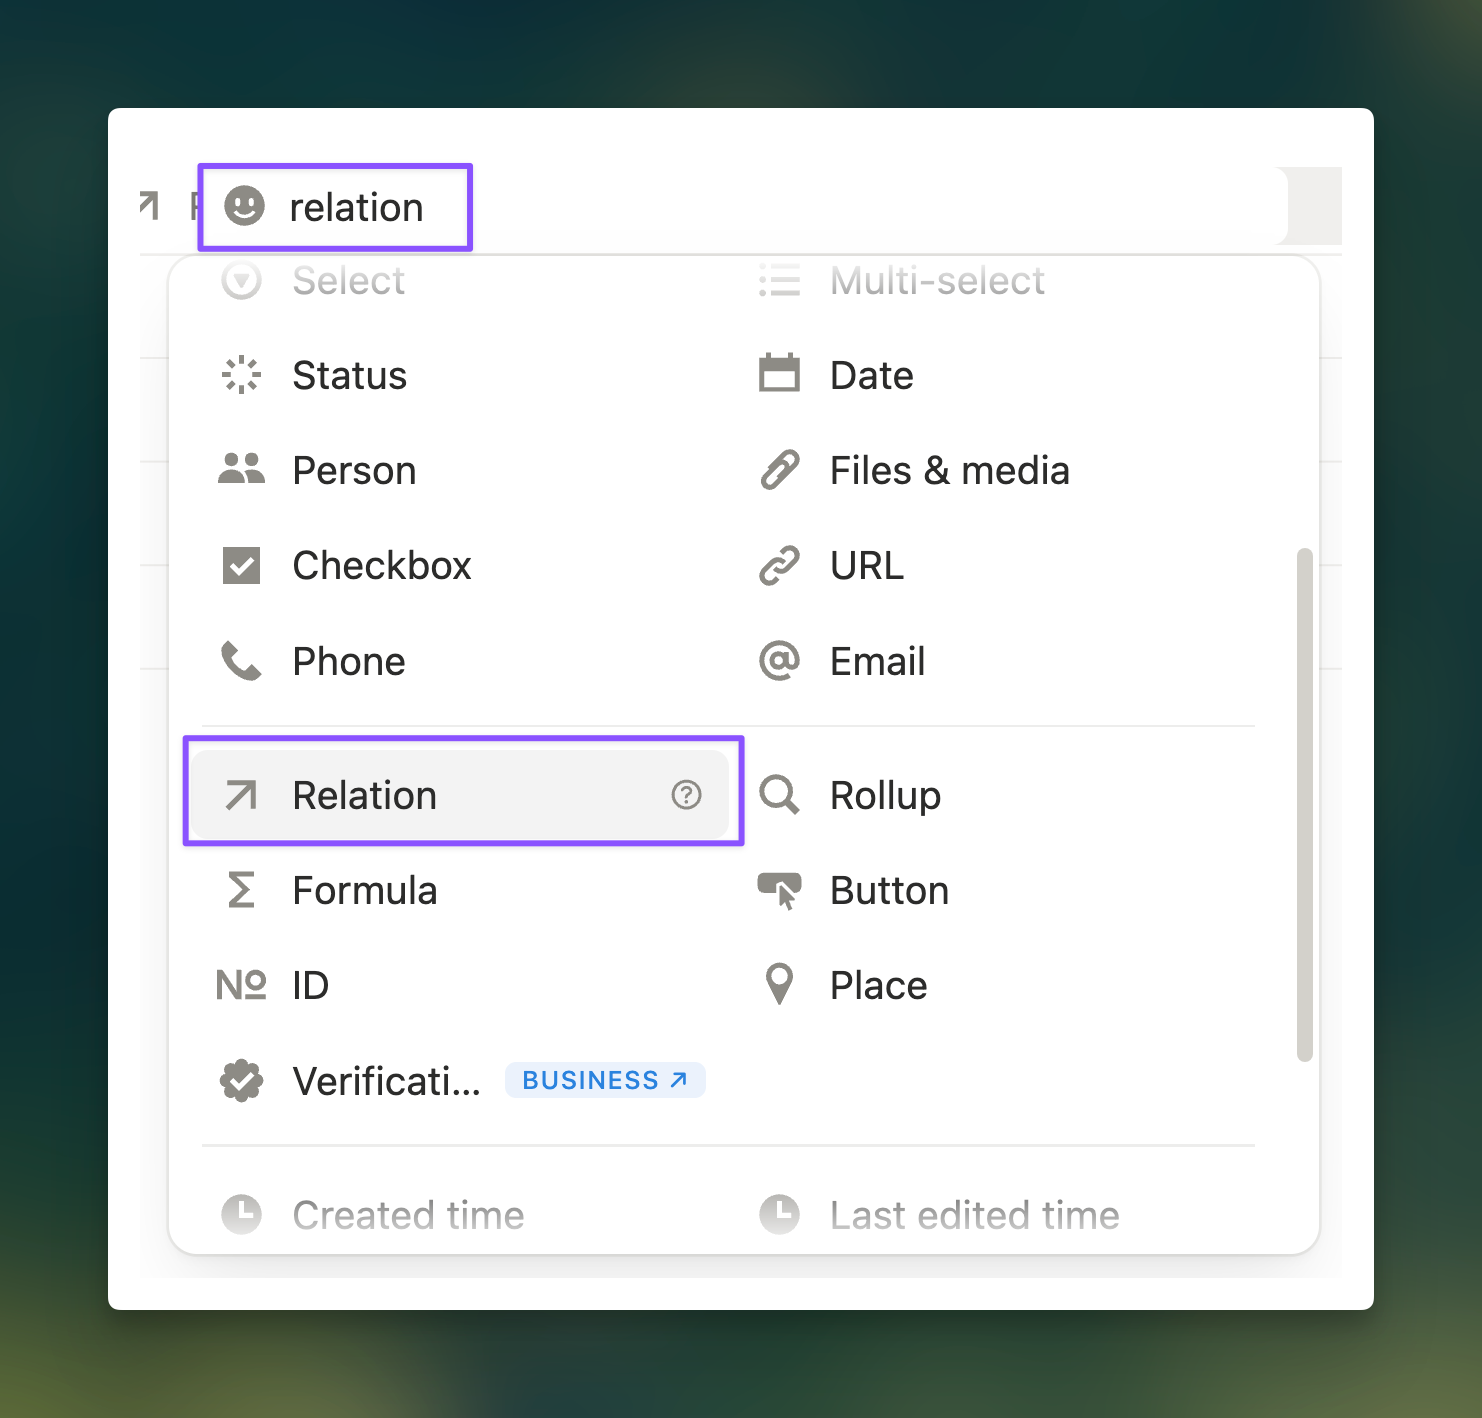
Open your Projects database. Click the plus sign to add a new property. Scroll down and select "Relation." Choose the database you want to connect - in this case, your Tasks database.
Notion will ask if you want to show this relation on the Tasks database too. Almost always say "Yes." This creates a two-way sync between databases.
Give the property a clear name like "Related to Tasks" and save.
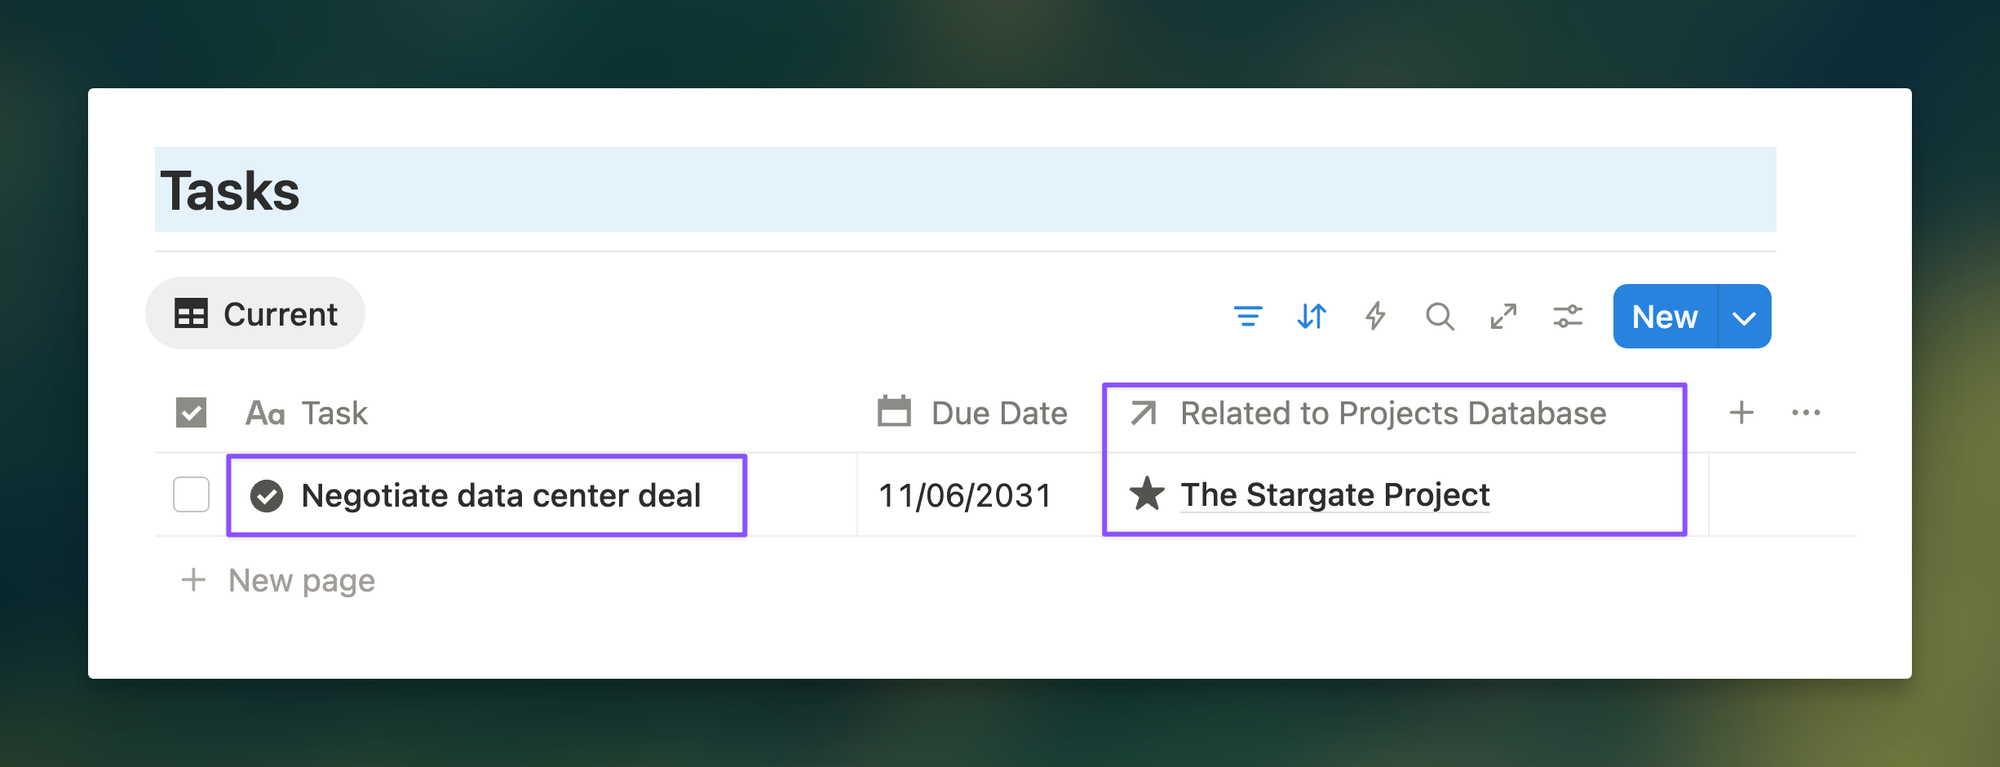
Now open your Tasks database. You'll see a new property called "Related to Projects DB" has appeared automatically. This is your connection in action.
Go back to your Projects database. Click the plus sign again. Choose Relation, select your Notes database, name it clearly, and save.
Done. Your Projects, Tasks, and Notes databases are now connected.
You can use Relations manually or with automation. I'll show you both, but the automated approach saves way more time.
Open a project page. Type /table to create a view of your Tasks database. Look for the "Related to Projects DB" property. If you don't see it, click Property visibility and turn it on.
For each task, click the Relations property and select which project it belongs to. Then add a filter: go to Settings > Filter > Add filter. Set it to show only tasks related to this specific project.
Now only relevant tasks appear. When you unlink a task, it disappears from this view (but stays in your main Tasks database). Link it back, and it reappears instantly.
You can hide the database title by clicking the three dots for a cleaner look.
Here's the thing: setting up views and filters for every new project wastes time. Instead, use self-filtering templates.
In your Projects database, click the arrow next to "New" and edit the New Project template. Inside this template page, type /table to create a Tasks database view. Add a filter showing tasks where "Related to Projects" contains "New Project template" (the name of your current template page).
Now watch the magic happen.
Create a new project from this template. Notion automatically creates a tasks view with the filter already set to that specific project. Any task you create in this view links automatically to that project.
Set this up once. Save countless hours forever.
Apply the same concept to your Notes database to complete your system.
Once your databases are connected, you unlock Rollup properties. This feature pulls data from one database and maps it to another.
Here's a practical example: create a view of your Tasks database and add a Rollup property. Set "Related to Projects" as the relation and "Status" as the target property. Set "Calculate" to "Show original."
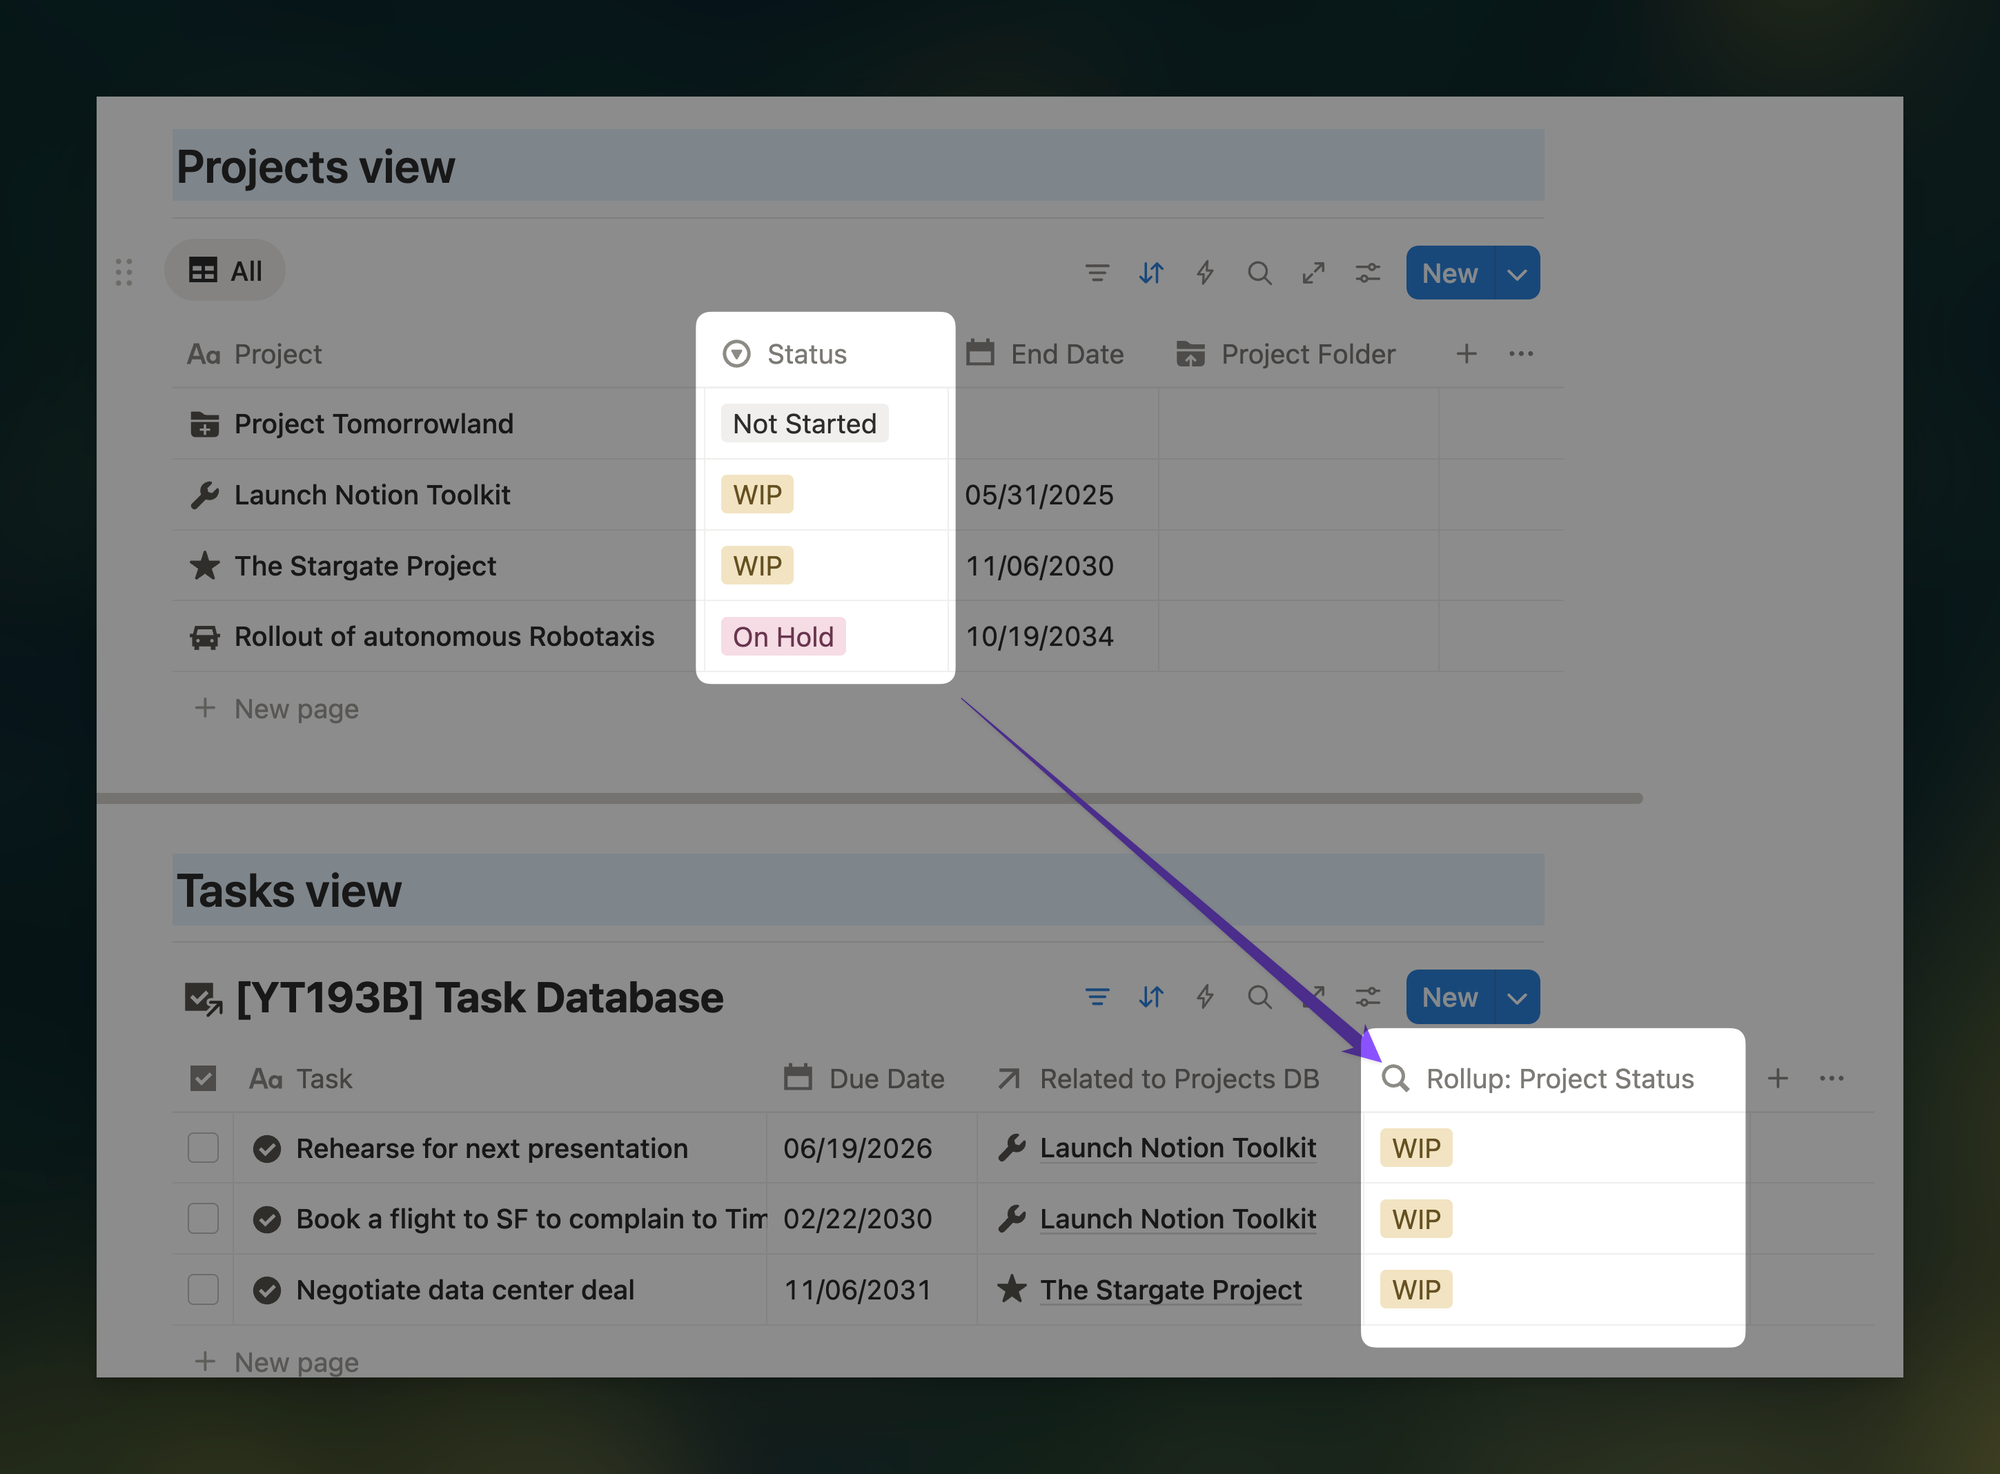
This pulls the status from your Projects database and displays it next to each task. Now you can filter to show only tasks related to projects that are "In Progress" or any other status.
This creates legitimate project management views. You can see at a glance which tasks belong to active projects versus archived ones.
You might also like to learn about my Command Center setup in Notion!