|
Google Slides
| #256
Google Slides: How to Use the Eyedropper and Image Placeholders
Want to see these tips early? Subscribe to the newsletter!
Hey friends, before we get into today's tips, quick heads up: my next YouTube video is on Claude Design, and it's all about turning a rough idea into a genuinely beautiful slide deck in minutes. Here's a peek at what it can do:
0:00
/0:10
It's dropping soon, so keep an eye out.
Now, going from AI-designed decks straight to Google Slides shortcuts is a bit of a downgrade plot twist, I know. But most of us still build and present in Google Slides every single day, so while you wait for the fancy AI stuff, here are 3 tips to make your everyday decks look sharper and present smoother. Let's just get started! 😁
Tip #1: Take control while you present
You're presenting in Google Slides, and a colleague needs to jump in to show something on their own screen. So you exit the slideshow, lose your spot, and the room watches you fumble back to where you were (kinda cringey let's be real here).
Here's how to stay in control without ever leaving present mode:
- Press L to turn your cursor into a laser pointer
- Press B to black out the screen, or W for white
- Press the same key again to jump right back to your slide
Boom. You never have to drop out of your deck.
💡
Pro tip: The black or white screen is perfect when someone else needs to present mid-meeting. Flip to a blank screen so the audience isn't staring at your slides behind their content.

Tip #2: Build beautiful slides faster with image placeholders
Ever wonder how some people put together clean, consistent slides so fast? Part of the secret is they're not dragging and resizing every image by hand. Drop images in manually and you're nudging and resizing on every single slide just to keep things lined up.
The trick is image placeholders:
- Go to Slide > Edit theme
- Pick a layout (or create a new one), then click Insert > Image placeholder and choose a shape
- Exit the theme editor, then copy and paste the placeholder wherever you need it
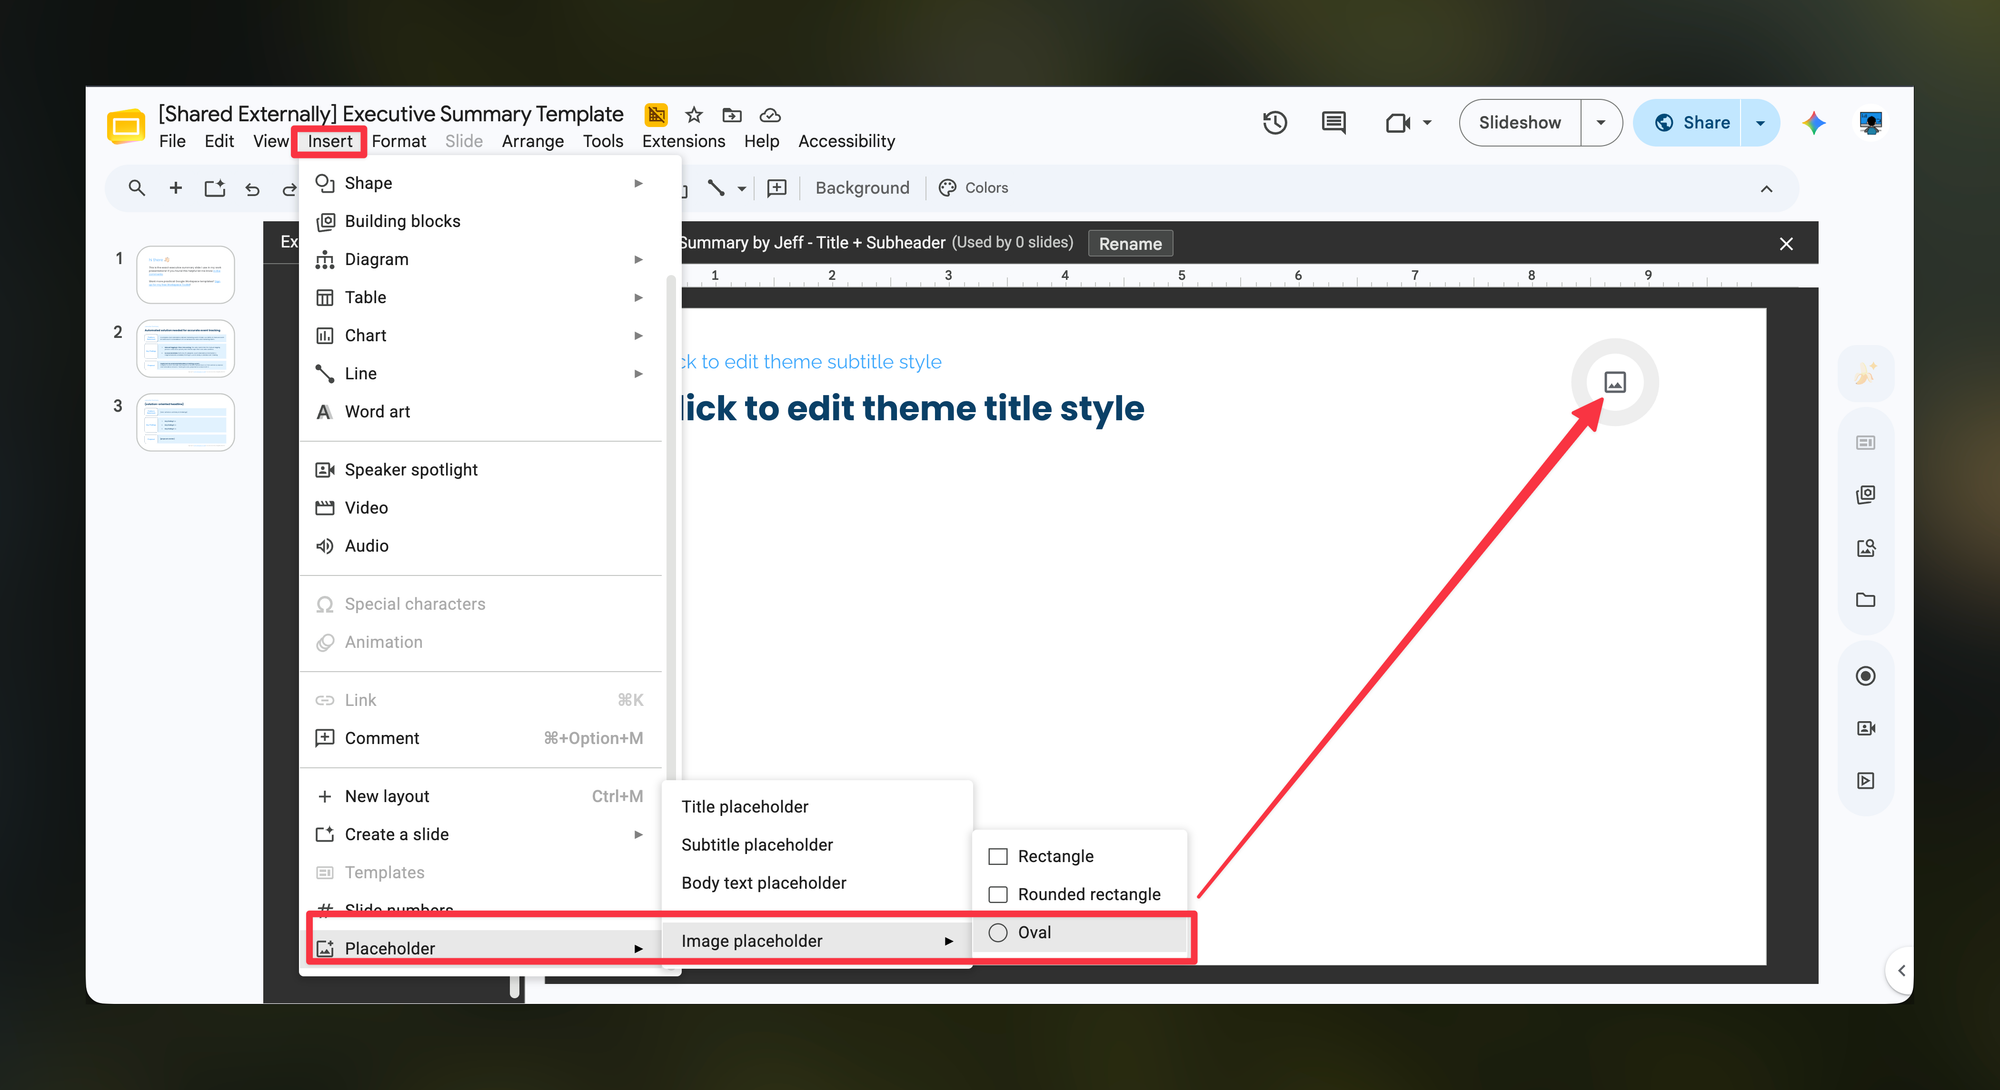
Now anyone editing the deck just clicks the placeholder, hits Replace image, and the image snaps into the exact size and spot you set.
💡
Pro tip: Create a brand-new layout before you add placeholders, so you don't accidentally break slides that already use your original layout.
Tip #3: Match any color in one click with the eyedropper
Matching an exact color used to be pretty annoying since you'd have to hunt down the hex code, copy it, paste it in, then do the whole thing again the next time you want a shape to match your logo or an image.
The eyedropper does it in one click:
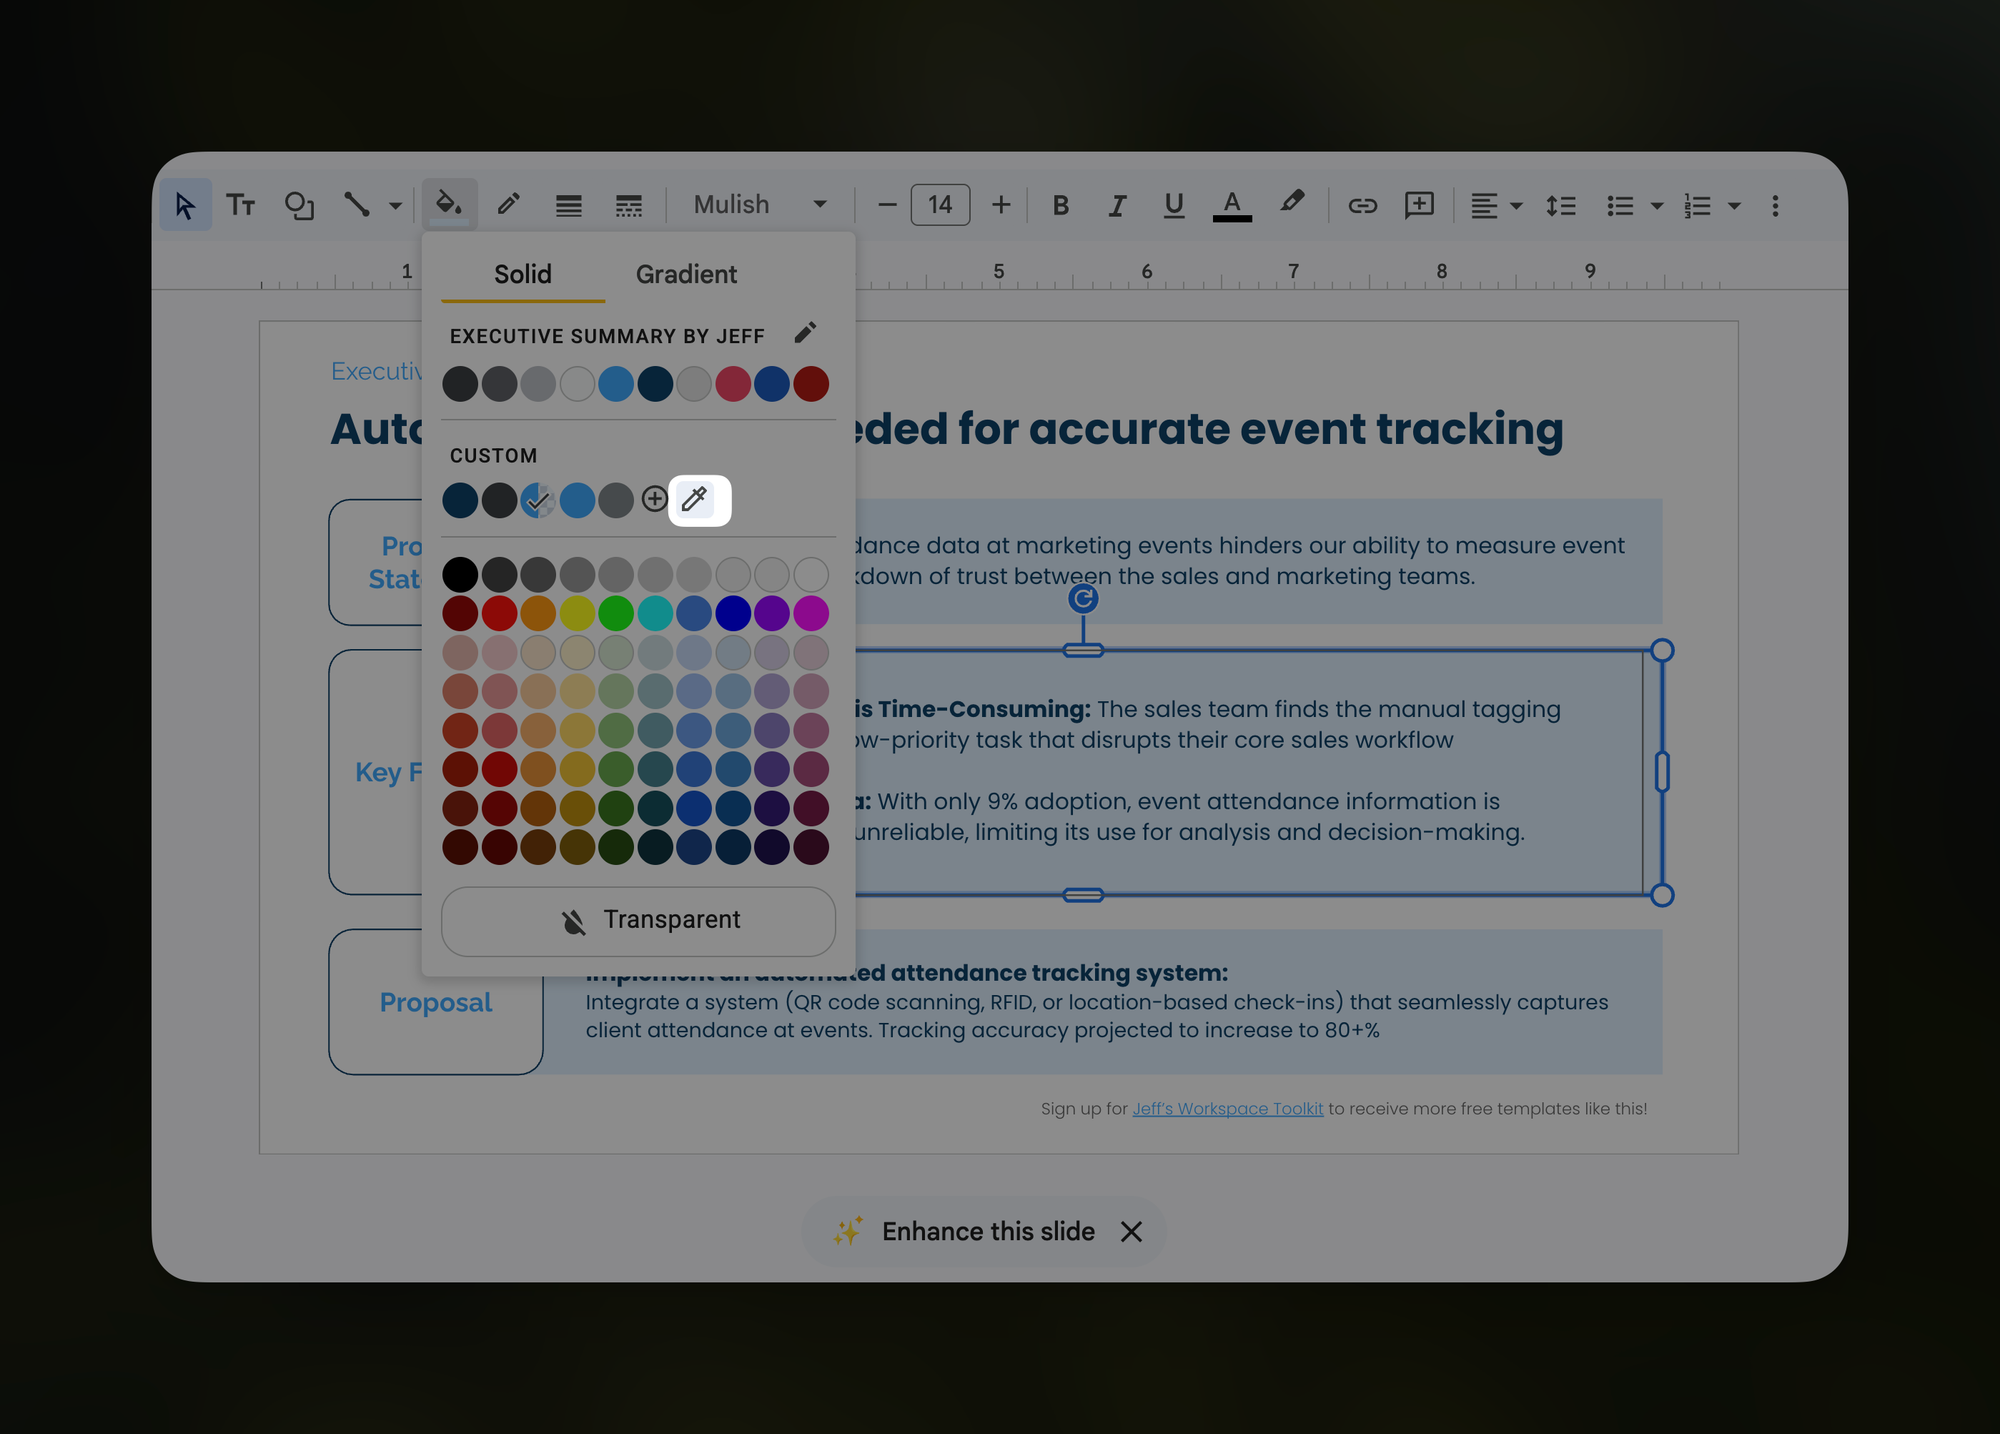
- Select the shape, text, or object you want to recolor
- Open the color menu (the fill bucket for shapes, or the text color icon for text) and click Custom (the + at the bottom)
- Click the eyedropper, then click any color on your screen, including a color inside an image, to apply it instantly
⌨️ Keyboard Shortcuts
- CMD/CTRL + M = create a new slide
- CMD/CTRL + D = duplicate the selected slide or object
- CMD/CTRL + Alt + C then CMD/CTRL + Alt + V = copy formatting, then paste it onto something else
- CMD/CTRL + Shift + V = paste text without the original formatting
Try one of these before my Claude Design video drops, and let me know how it goes! 😁
Whenever you're ready, here are some other ways I can help you:
💻 The Workspace Academy: Never lose a file, task, or note again with my CORE workflow for Google Workspace. Adopted by over 10,000 Googlers.
✅ Build Your Command Center in Notion: Plug-and-play dashboard that surfaces today's priorities automatically and organizes your life in seconds. #1 rated Notion Course globally.