|
AI
Claude Design Tutorial: A Complete Beginner's Guide
Hey friends - most Claude Design tutorials tell you to pick a template, name it, and start prompting, which is exactly why your slides come out generic (and why you burn time and tokens trying to save them).
The fix is 10 to 15 minutes of prep. Get three simple files ready before you prompt, and every deck comes out polished, on-brand, and better every time you give it feedback. Let's get into it! 😁
Watch it in action
Resources
- awesome-design-md on GitHub (free DESIGN.md files from major brands, I use Stripe's in the video)
- Beginner Resources for Claude Design (every prompt from this tutorial, ready to copy)
- My free Claude Toolkit (the same carry-forward idea applied to Claude, in a 7-email series)
The 3 inputs that fix Claude Design
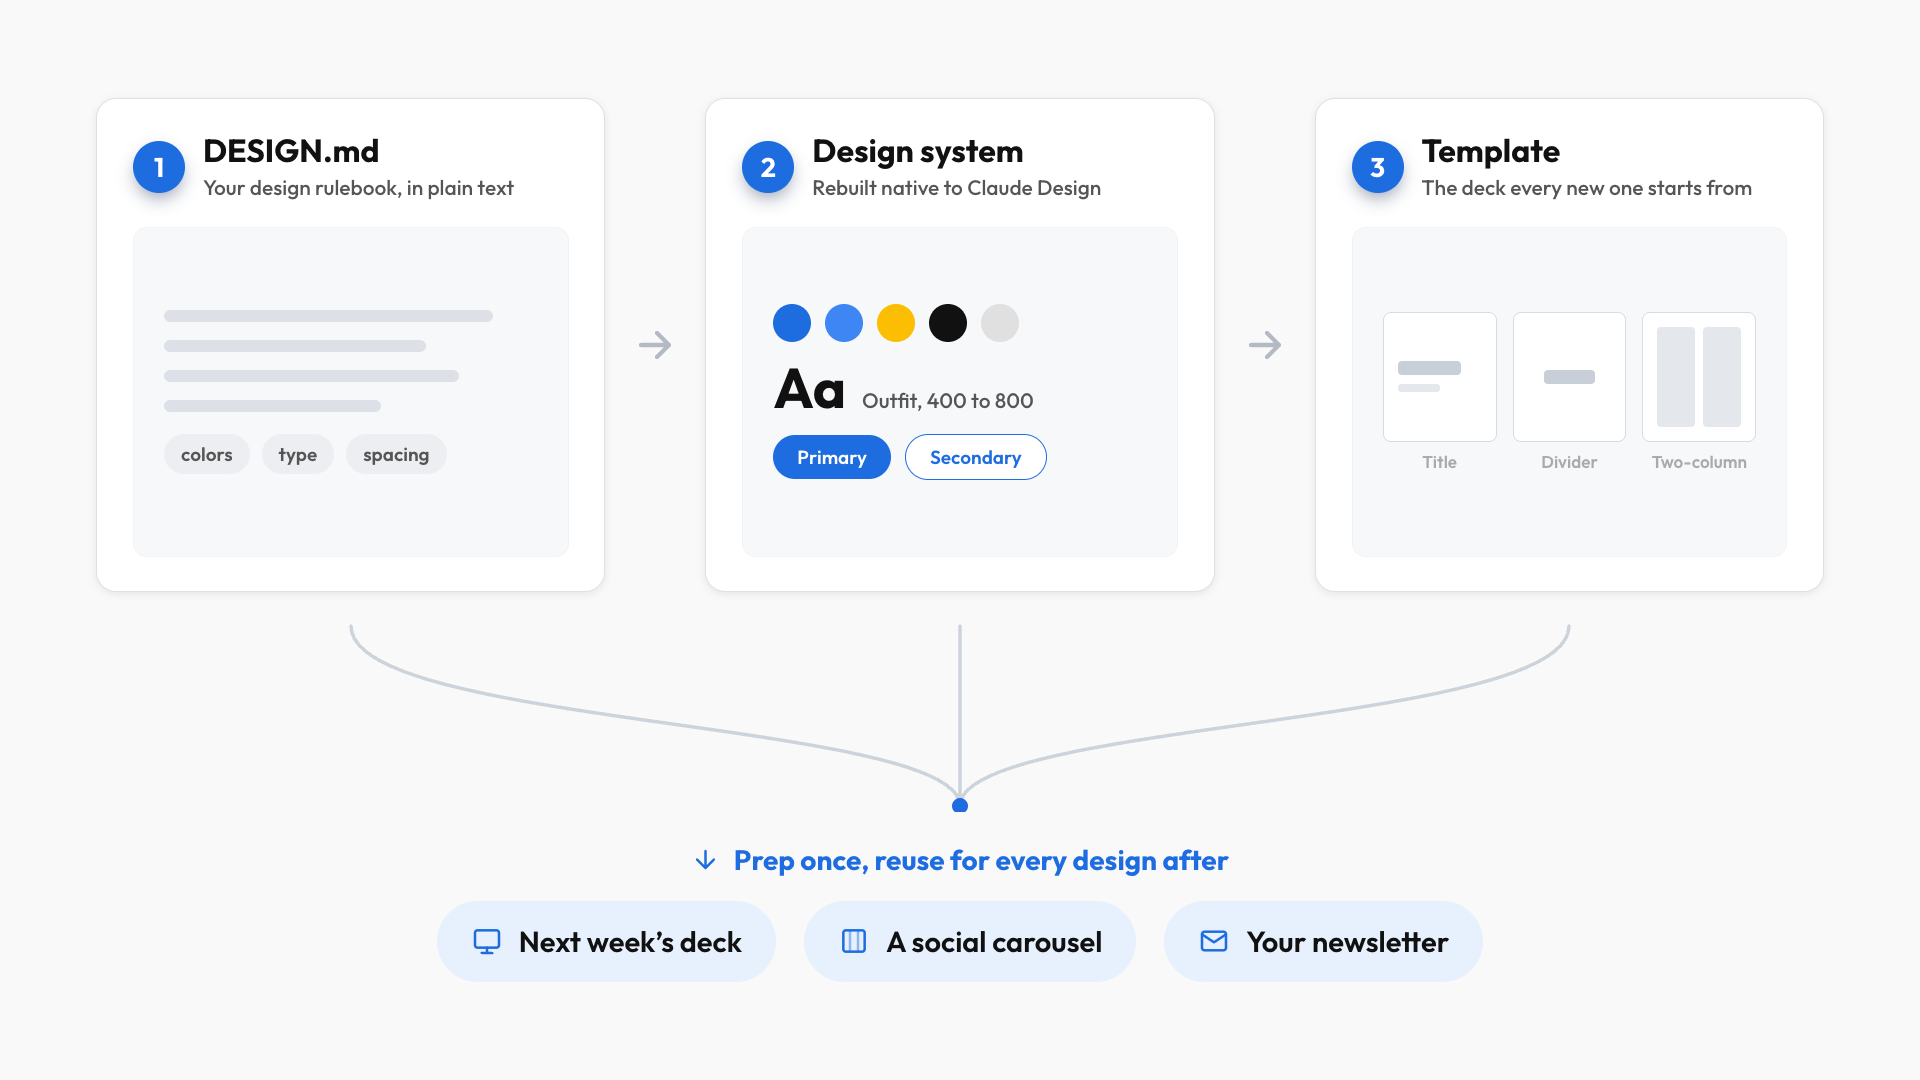
Instead of prompting blind, you prepare three files first, and each one feeds the next:
- A
DESIGN.mdfile: a plain-text rulebook for how your design looks and feels. - A design system: that
DESIGN.mdfile rebuilt into something native to Claude Design. - A reusable template: a pre-built deck, in your style, that every new presentation starts from.
All three are reusable across every future deck. And even though we're focused on slides, the same workflow applies to social carousels, newsletters, and any other design.
Input #1: Your DESIGN.md file
A DESIGN.md file is just a text file that spells out the rules for a design: the exact colors, fonts, spacing, and how things like buttons and cards get styled. It works in any AI tool, so Claude Design can take it and turn it into its own native format.
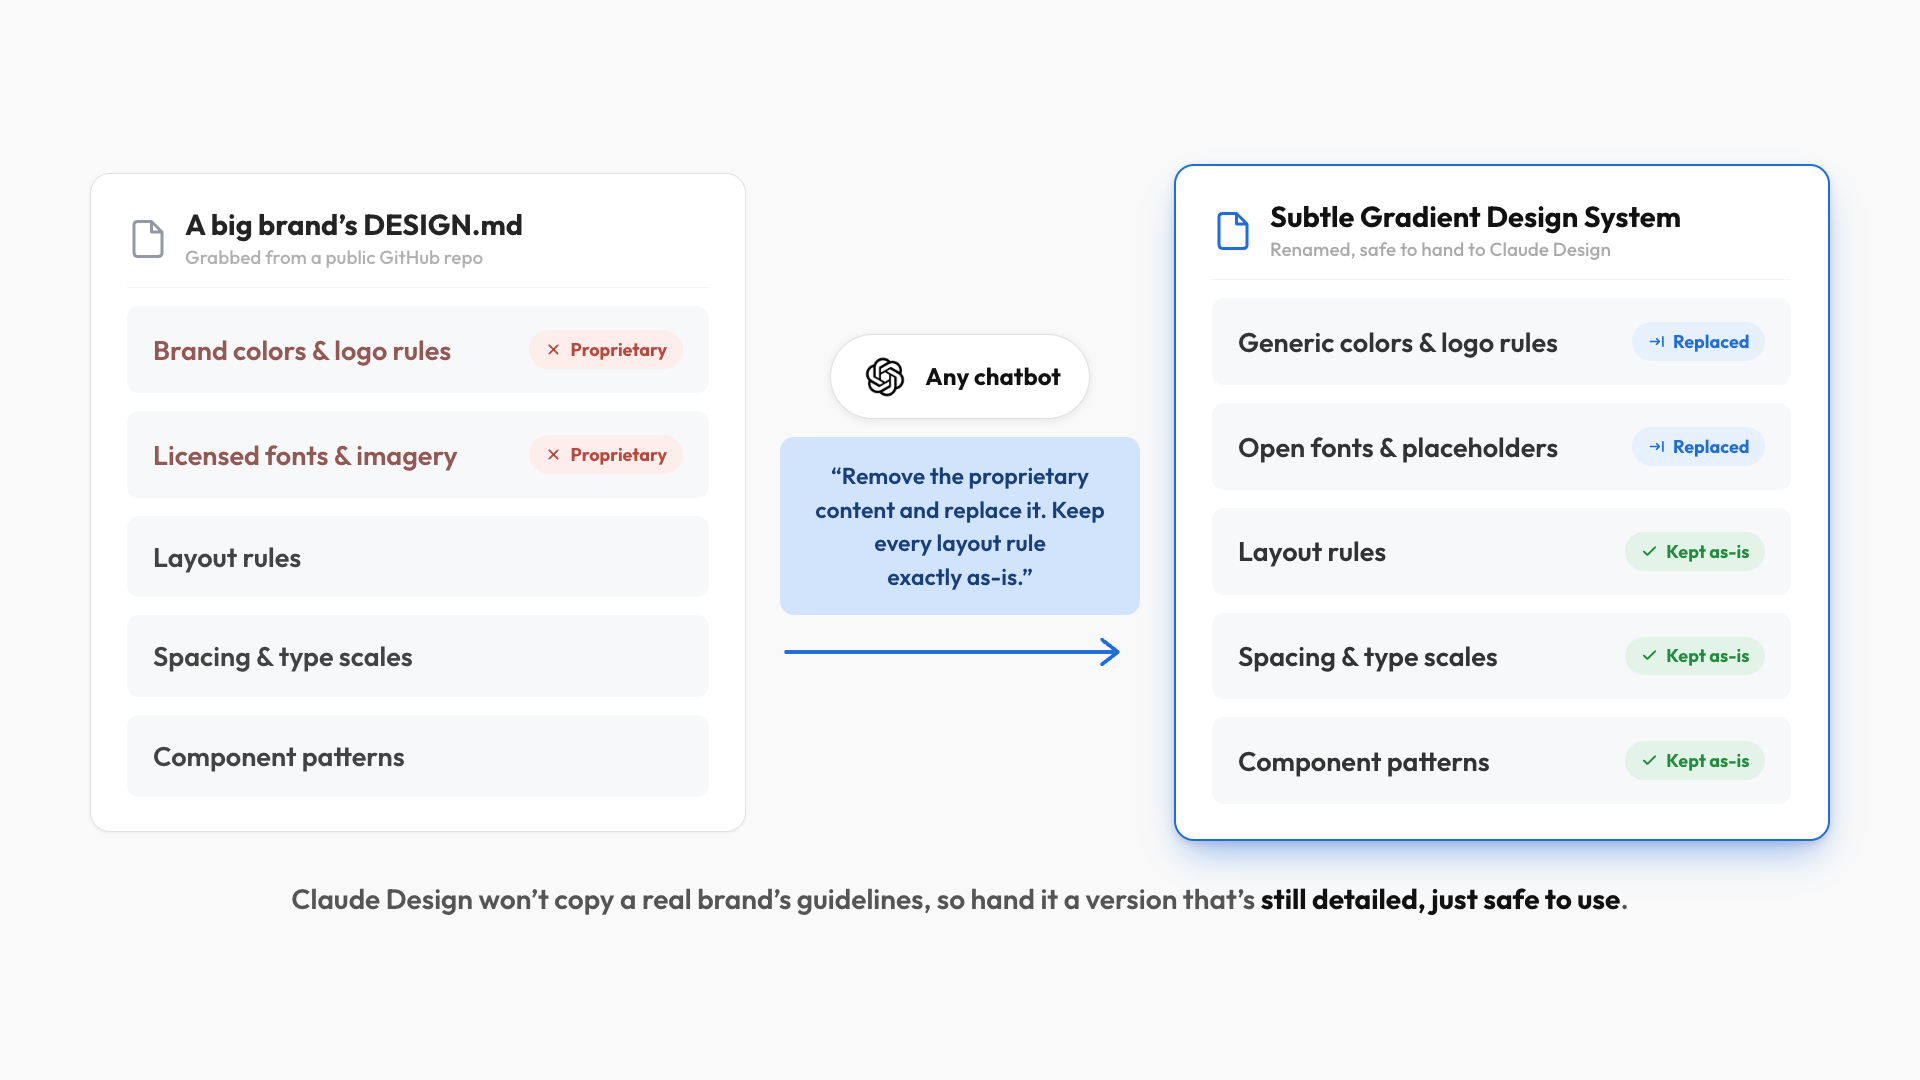
You don't need to write one from scratch. Grab a public one from the awesome-design-md GitHub repo (linked above), then clean it up so it's safe to use. Paste it into ChatGPT (or any chatbot) with this prompt:
- "Remove the proprietary and licensed content from this design file and replace them using your own judgment. Keep everything else exactly as-is, including all layout rules, spacing, type scales, component patterns, and design principles, since those aren't proprietary and are the whole reason we're using this file. Then rename it to the Subtle Gradient Design System."
The reason you clean it: Claude Design won't copy a real brand's guidelines directly, so you need a version that's still detailed but safe to use.
Input #2: Your design system
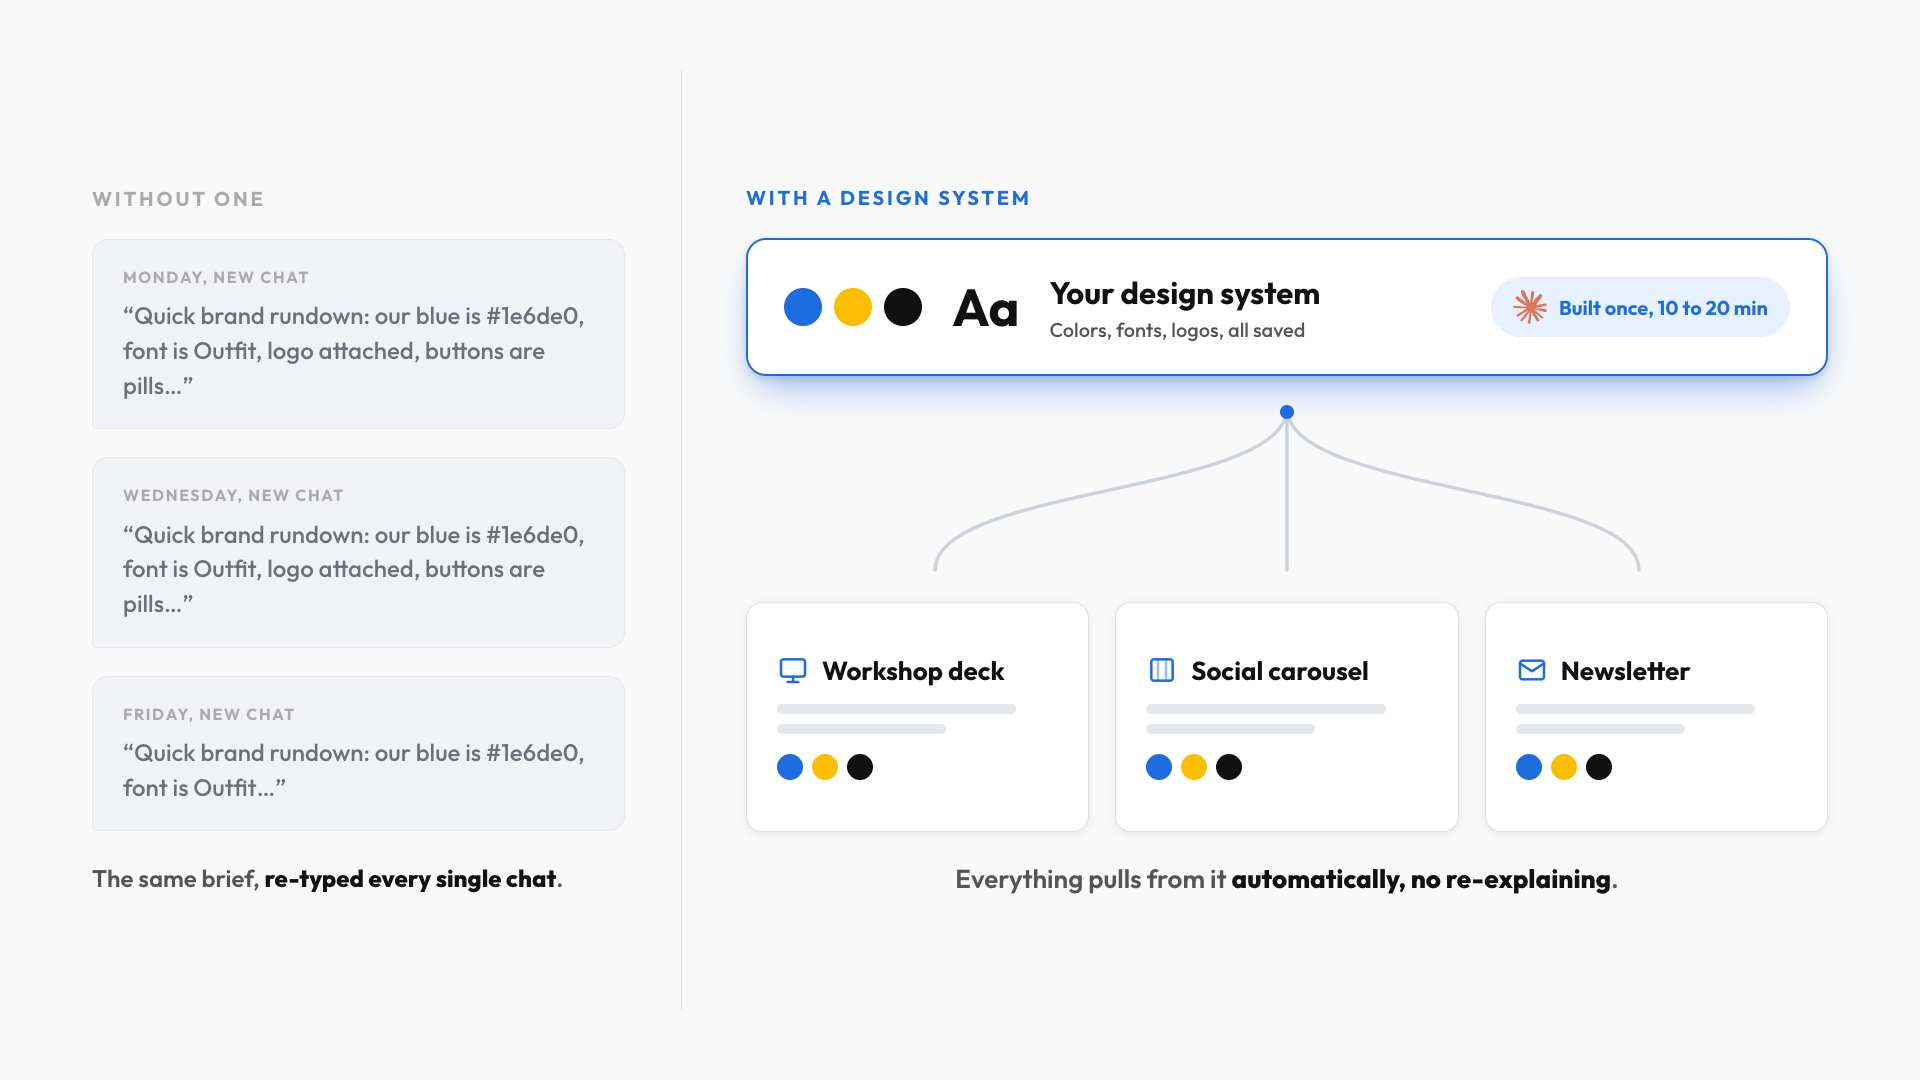
A design system is that DESIGN.md file rebuilt into a format Claude Design can actually use. Same colors, fonts, and logos, just optimized for the tool. Once it's built, everything you ask Claude Design to make comes out consistent and on-brand without you re-explaining your look every time.
To build it:
- Start a new chat, pick the latest Opus model (great output without Fable's token cost), set effort to Max, and click "Create Design System."
- Give it a short name and description, then scroll to the bottom and upload your cleaned
DESIGN.mdfile.
This takes 10 to 20 minutes while Claude Design reads your file and generates real mockups to review. When it's done, you can change anything with the "Feedback" button in plain English.
💡
Optional but worth it: upload a few extras to customize the system further, like a voice principles file so the copy sounds like you, plus your logo and the icons you reuse. After that, every future design pulls them in automatically.
Input #3: Your reusable template
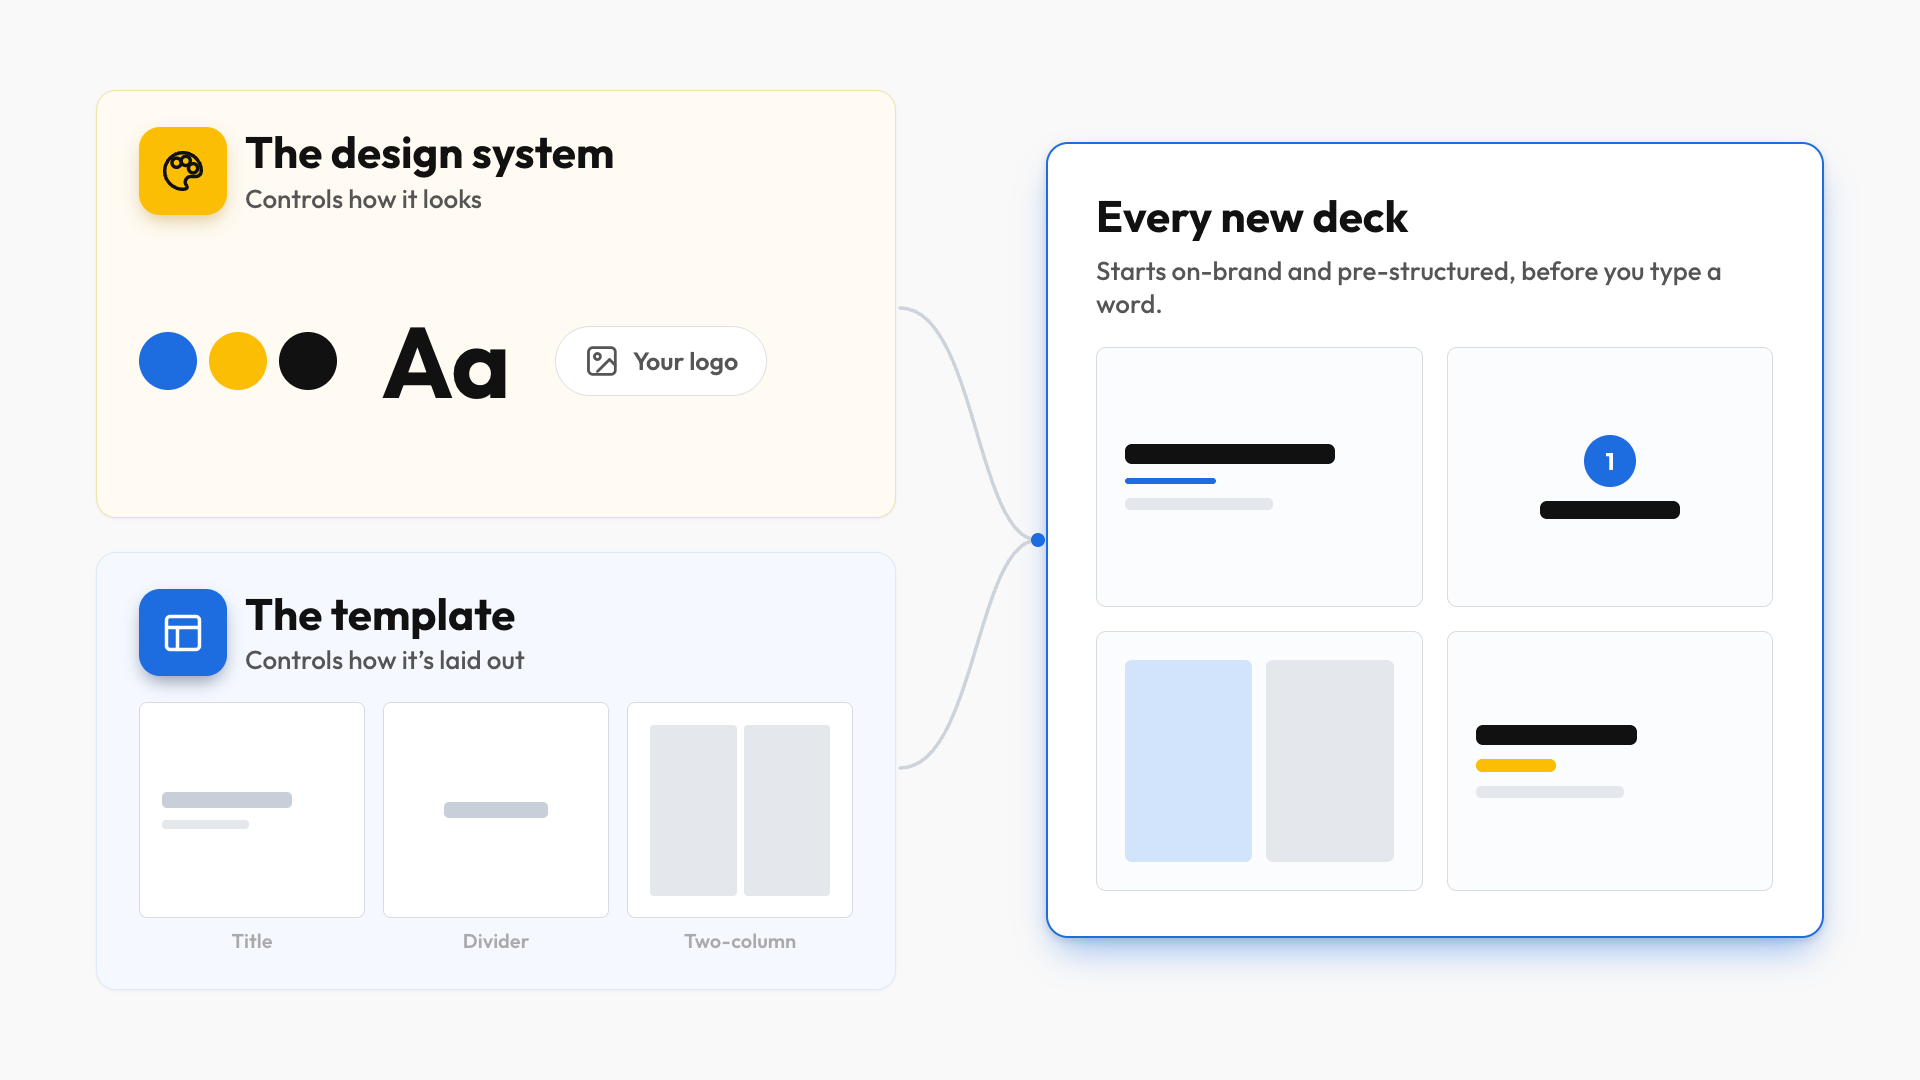
A template is a pre-built deck in your style that every new presentation starts from: title slide, section dividers, a two-column layout, and so on.
The difference between them is simple: the design system controls how everything looks (colors, fonts, logos), and the template controls how a deck is laid out (which slides and in what order). Use them together and every new deck starts on-brand and pre-structured instead of from a blank canvas.
Once your design system looks right, ask Claude Design to build the template:
- "Go ahead and build a slide deck template for workshops and trainings. You pick the number of slides."
Then refine it with feedback, since every future deck references this template.
Generate your first slide deck
Back on the homepage, select your design system, select the matching template, attach your talking points, and send it off:
- "Turn the attached talking points into a workshop deck, and ask me anything you need before you build."
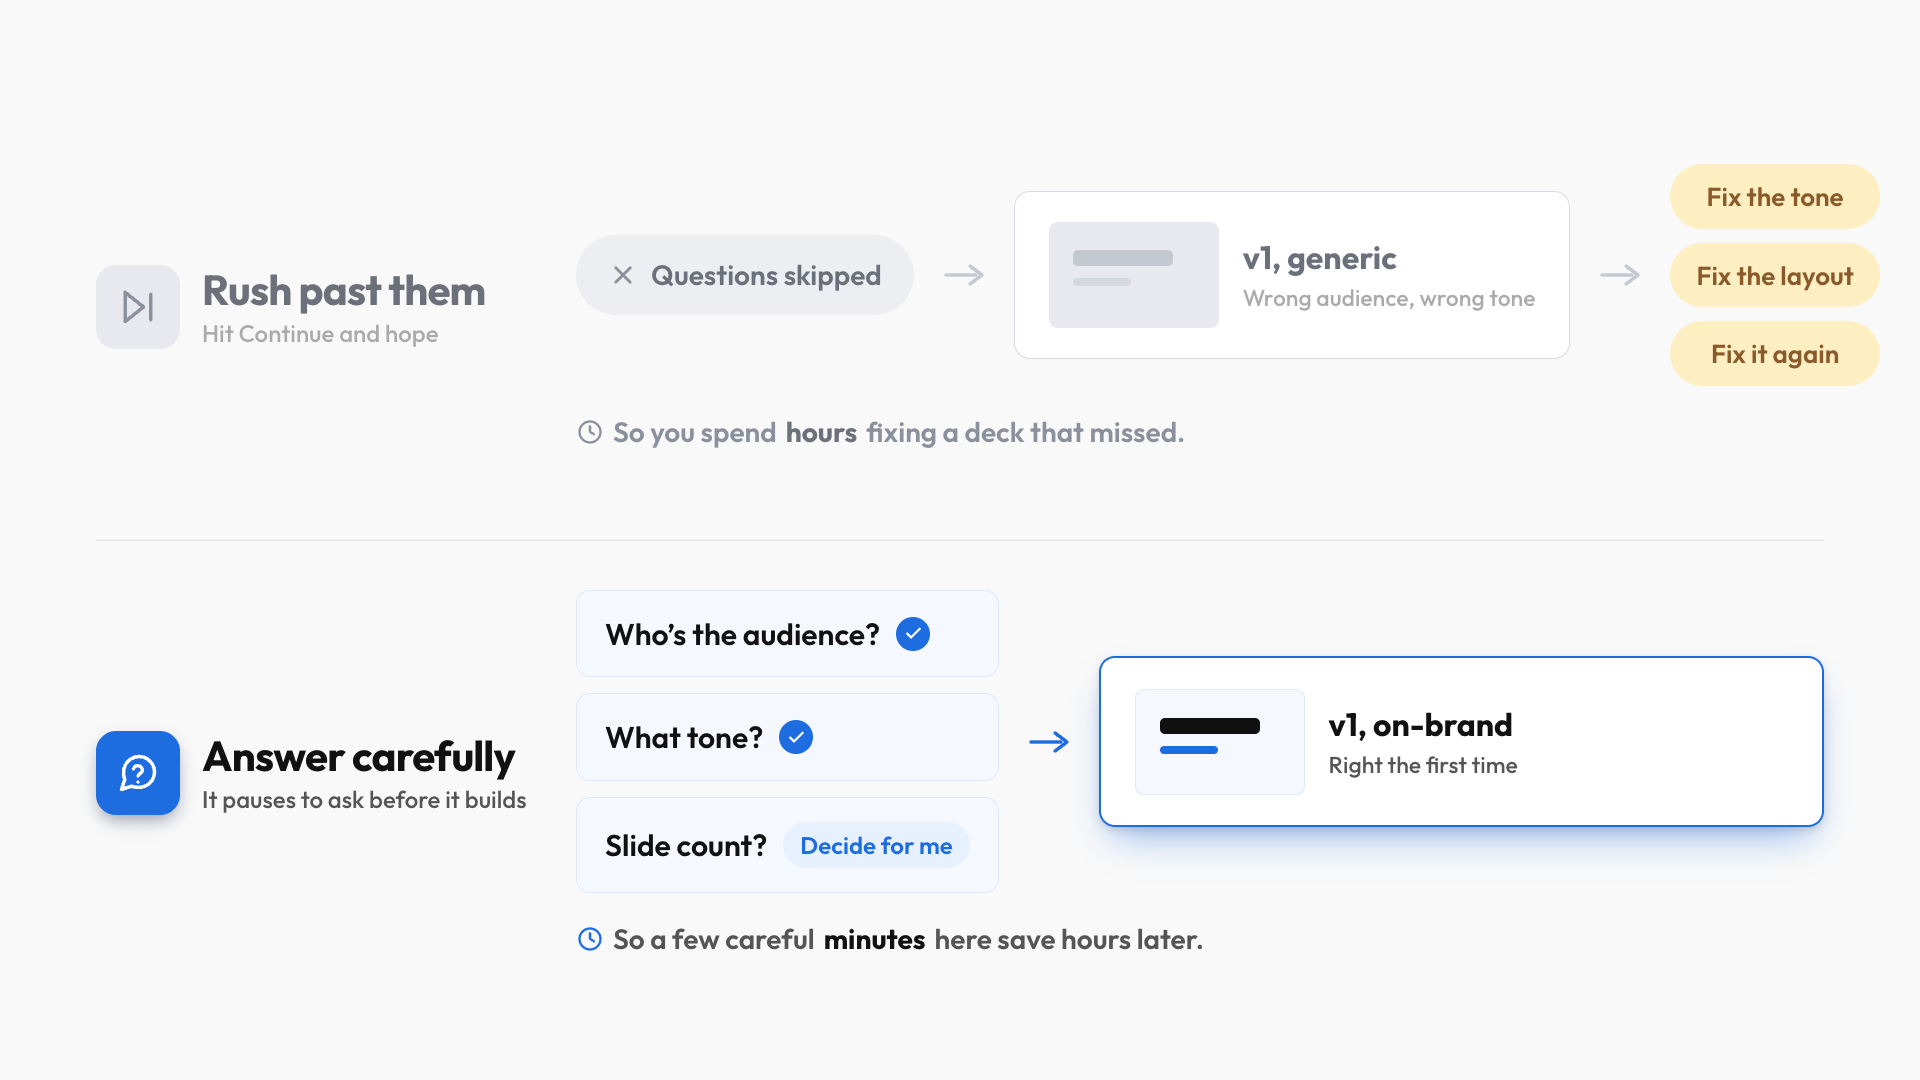
Claude Design pauses to ask a few questions before it builds. Take your time here, because a few minutes answering carefully saves you hours later. If you're not sure how to answer, pick "Decide for me." Then hit Continue and it generates your first version.
Feedback that carries forward
Your v1 already looks good because of the prep. To push it further, there are two kinds of feedback.
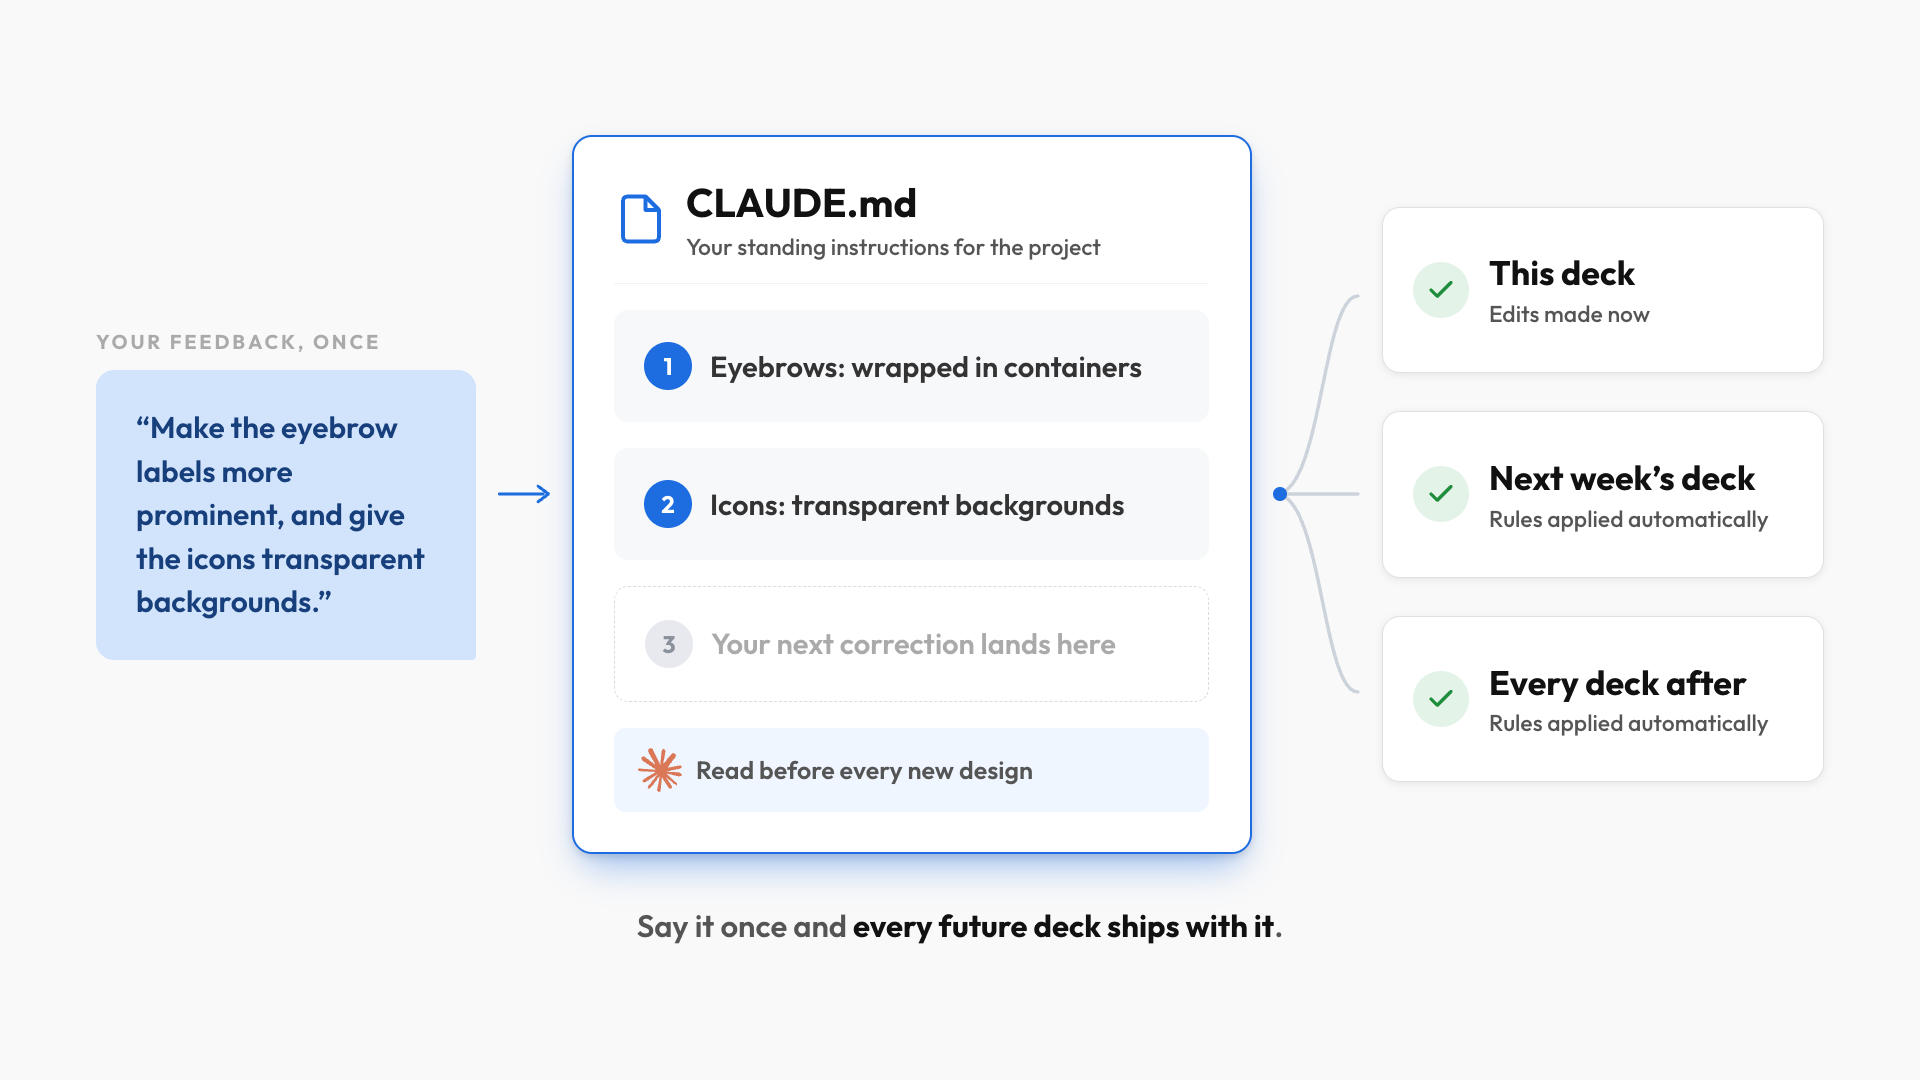
The first kind applies to this deck AND every future deck in the project. Give the feedback and have Claude Design save it:
- "Review my feedback below and in addition to making the edits, create a CLAUDE.md file you'll read for all future slide decks. As for the feedback: Make the eyebrow labels more prominent, wrap them in a rectangular container and the icons should all have a transparent background."
A CLAUDE.md file is where Claude Design stores your standing instructions for a project, and it reads that file before every new design. So every time you give feedback, it saves that feedback and applies it to all future decks, and your corrections compound over time. The trick: for your next presentation, stay in the same project and start a new chat so it still loads the project's CLAUDE.md.
The second kind is surgical, slide-level changes:
- Edit lets you select an element and change it yourself, like font size, color, or bold.
- Annotate lets you draw on a slide and describe a change, like adding contrast to separate two elements.
- Tweaks create a switch for a decision that shows up across the whole deck, like "toggle my logo" or "show slide numbers."
Use Edit and Annotate to fix one thing in one place, and use Tweaks when a single decision touches every slide and you want to flip between options before committing.
Export your finished deck
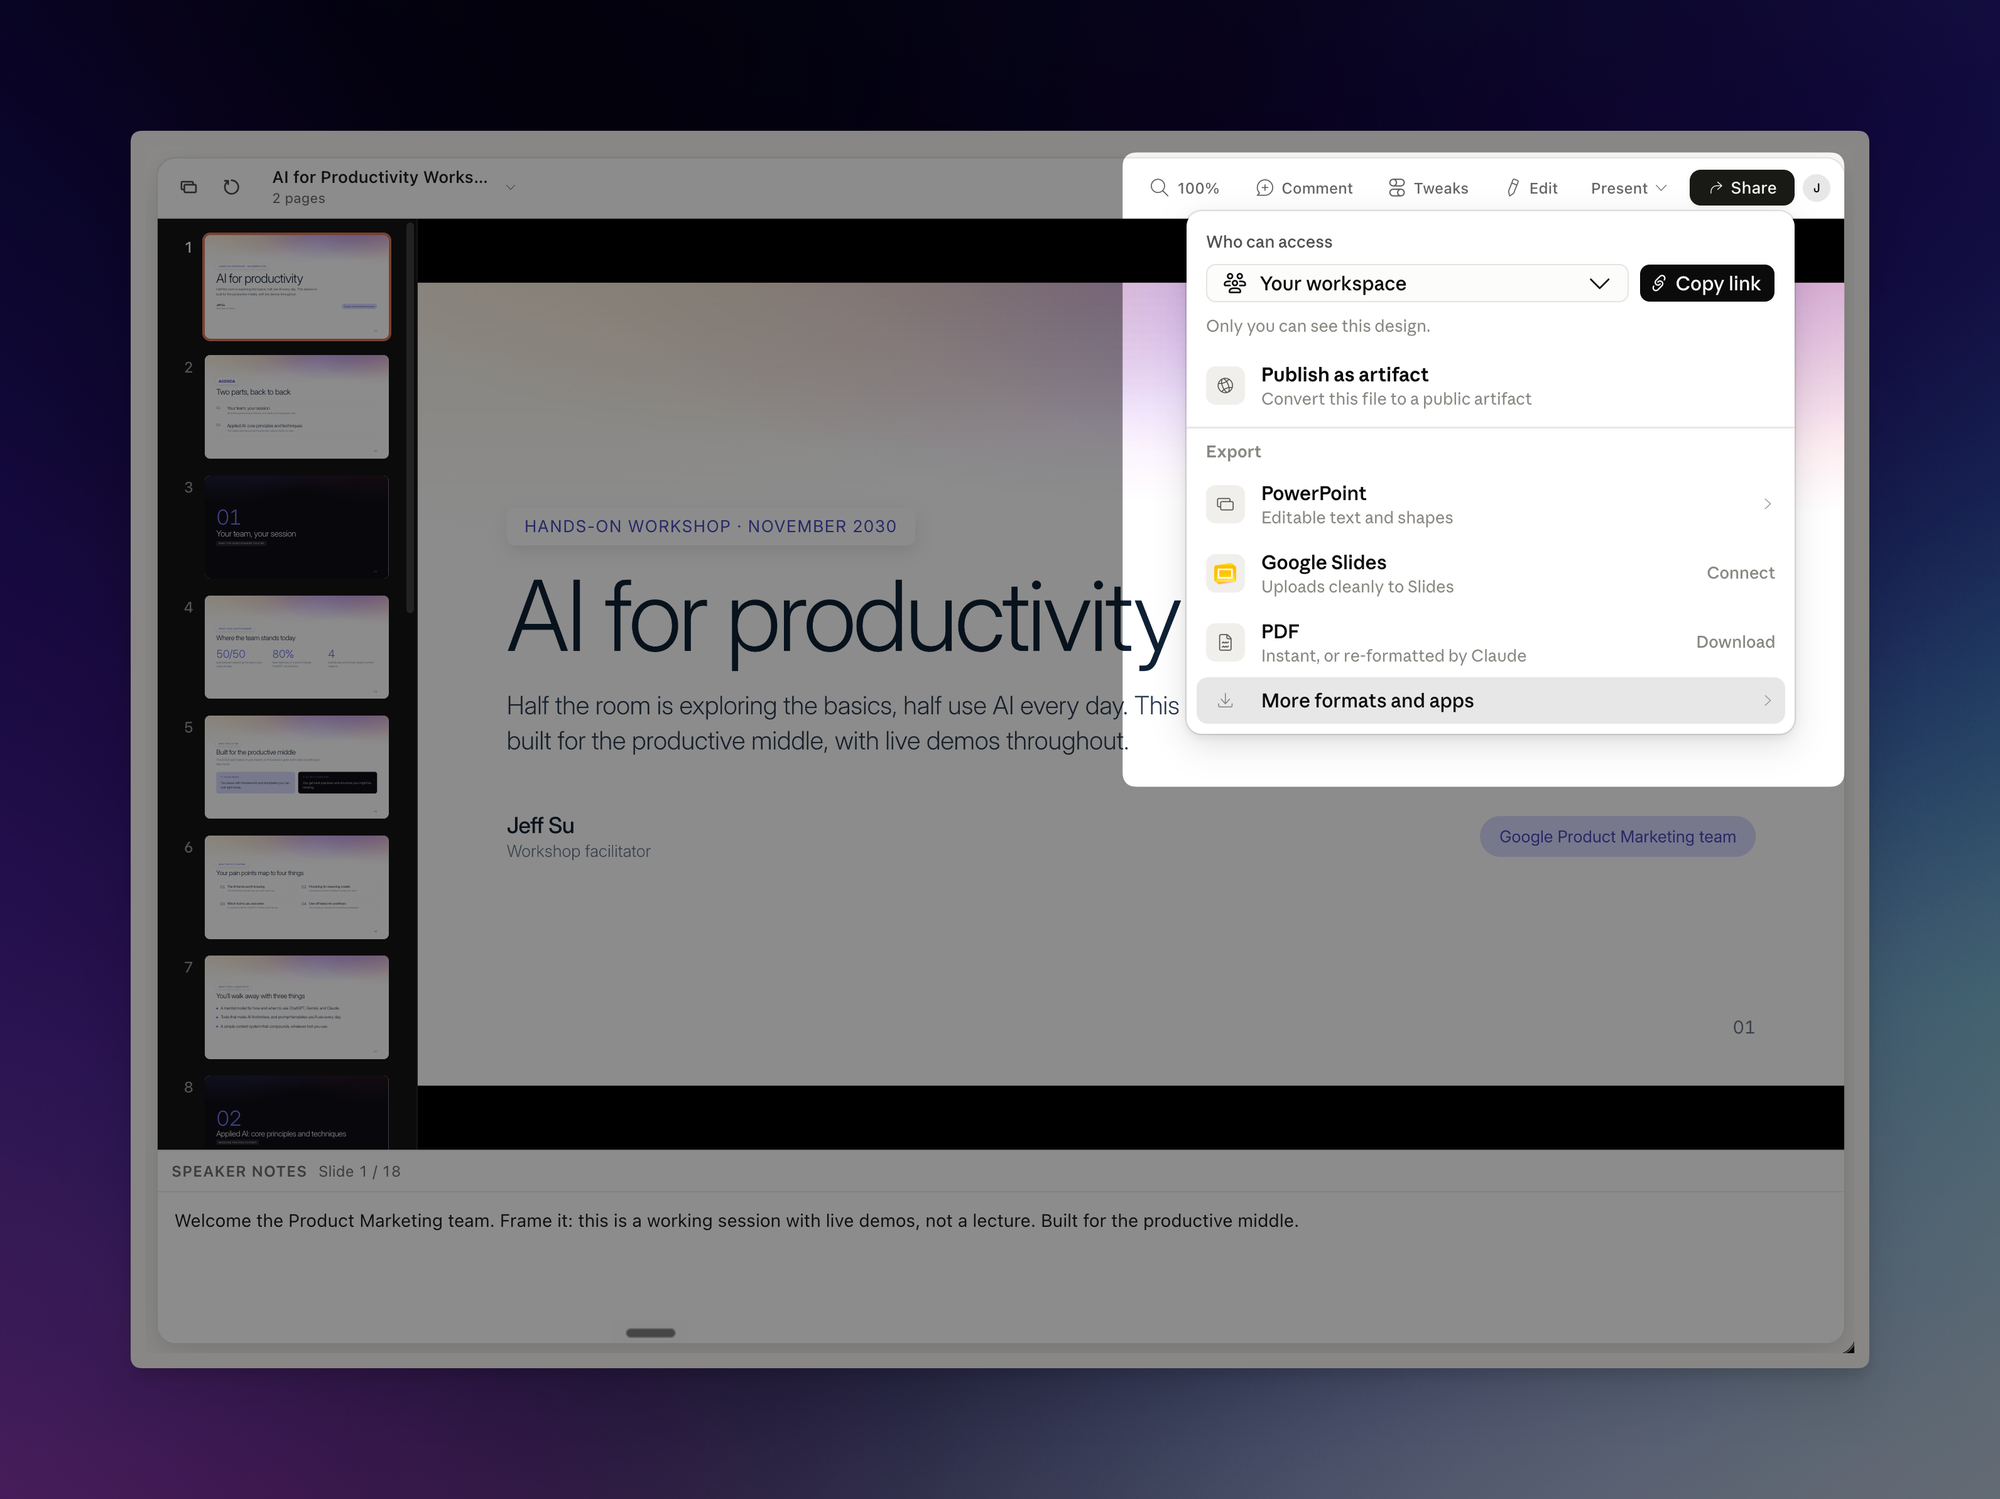
When the deck's done, click "Share," and under the Export tab you've got a bunch of options. I like the standalone HTML file because of how versatile it is: double-click to open it in any browser, and anyone you send it to can open it in theirs.
The HTML export also unlocks more advanced options. For example, you can have Claude Design add a presenter-view button that opens your speaker notes in a separate window, which is pretty great for live talks.
If you enjoyed this...
You might also like: Top 5 Claude Cowork Tips I Wish I Knew from Day One